Drupal SDK [Archived]
Install, configure, and use Edge Integrations with Drupal.
This page has been archived. The content is no longer maintained and may be outdated.
The Pantheon Edge Integrations SDK for Drupal is no longer maintained and those repositories have been archived.
While the integrations are still available with Pantheon Advanced Global CDN, and the code remains available, the SDKs are no longer actively developed or supported.
The Edge Integrations personalization system for Drupal consists of two main parts:
-
Pantheon Edge Integrations library - a CMS-agnostic PHP library that allows reading, process, and set vary headers to be recognized by Pantheon Advanced Global CDN.
-
A collection of Drupal modules in the Edge Integrations Drupal SDK ecosystem that provide Smart Personalization blocks and preview functionality. If you decide to forgo using the SDK, installing the Smart Content CDN module will give you everything you need to get up and running with personalization.
Before You Begin
Before you can use Pantheon Edge Integrations, you must be connected to Pantheon’s Advanced Global CDN, and your site's vary headers and custom VCL rules must have been provisioned by Professional Services. Contact your Account Manager if you have questions about how to add and configure this for your site.
-
Ensure you have a working Drupal 8+ installation ready.
-
Install the necessary modules and dependencies, which can be pulled with Composer. As noted above, this can be achieved either by using the Edge Integrations Drupal SDK, or the Smart Content CDN module.
Edge Integrations Drupal SDK
Installing the Edge Integrations Drupal SDK will give you all the documentation in the Drupal SDK package as well as the Edge Integrations Global Library, which is required for Edge Integrations to work optimally in Drupal. You should choose this option if you do not plan on using Smart Content in your Drupal site. If you plan on using Smart Content to manage personalized content, you need to install both the Drupal SDK package as well as
smart_content_cdn.Smart Content CDN Module
Installing the Smart Content CDN module will install the Smart Content module and the Edge Integrations Global Library. This option does not include documentation in the Drupal SDK package. You should choose this option if you plan on using the Smart Content ecosystem to manage personalized content in your Drupal site. If you installed
smart_content_cdnwith Composer, you do not need to install the Edge Integrations Drupal SDK. -
The Smart Content Preview module is an optional package you can use to preview your personalized content. It allows you to preview content personalized with Smart Content and Smart Content CDN. It can also be installed with Composer:
Configure Smart Content CDN
-
Enable the Smart Content module.
-
Enable the Smart Content CDN and Smart Content Block modules.
-
Enable the Smart Content Preview module.
-
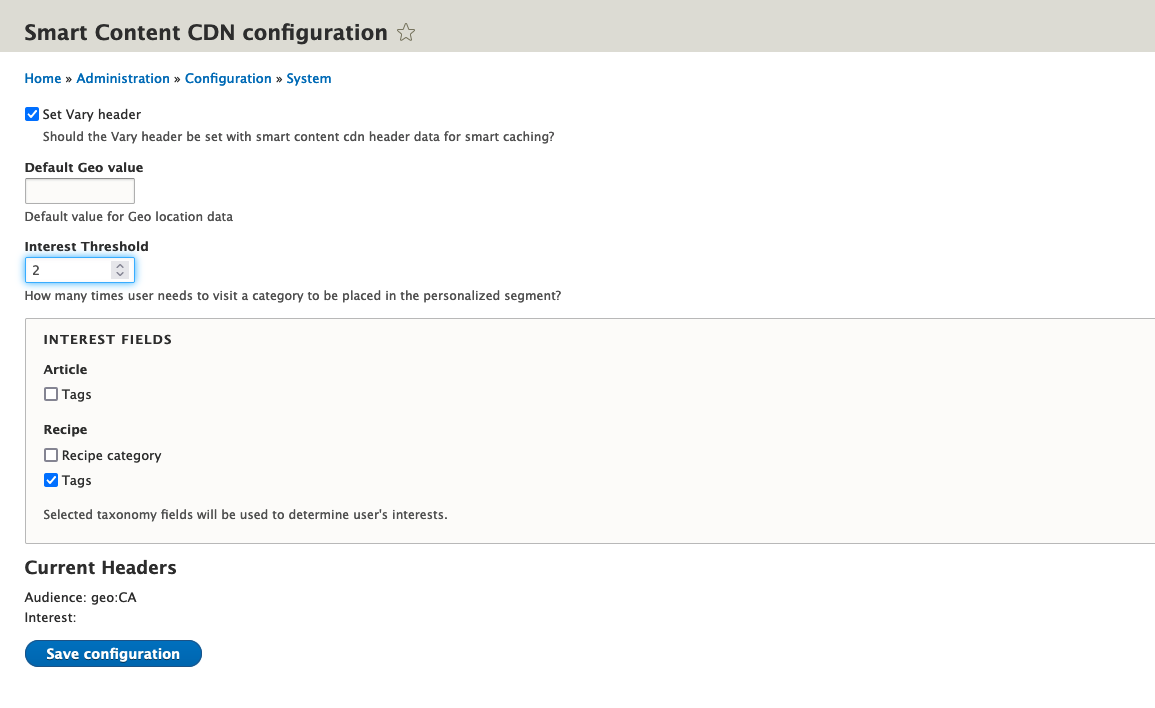
Navigate to the Configuration > System > Smart Content CDN Configuration page at
/admin/config/system/smart-content-cdn. -
Enable the Vary Header toggle.
-
Set default Geo value to a 2-letter country code in all uppercase (e.g. US). This should match the default segment in Step 8 of the Geolocation section.
-
Save the configuration.
Smart Content CDN Usage
There are a few different ways to use Smart Content CDN. In this doc, we will cover targeting via Geolocation, and Interest via Taxonomy.
Configure Geolocation Segments
-
Navigate to
/admin/structure/smart_content_segment_set. -
Click +Add Global Segment Set.
-
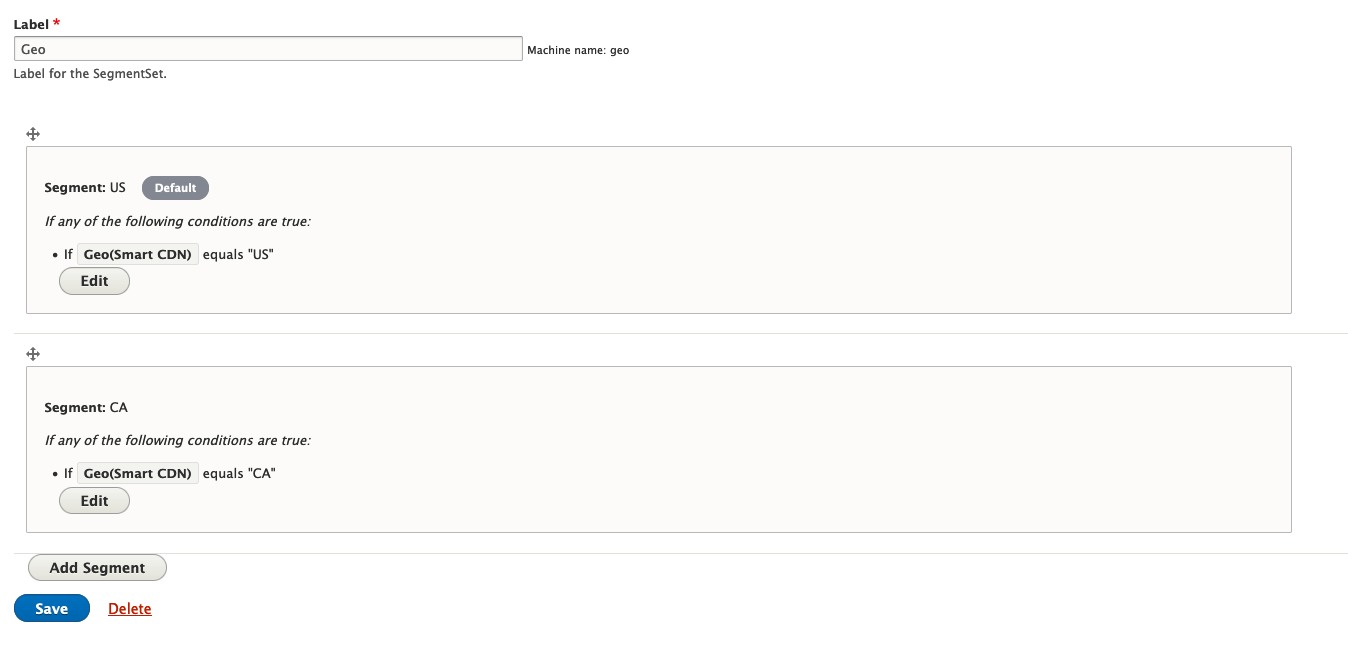
Provide a label (e.g. Geo).
-
Click Add Segment.
-
Change the segment name to something meaningful (e.g. Canada, US, etc).
-
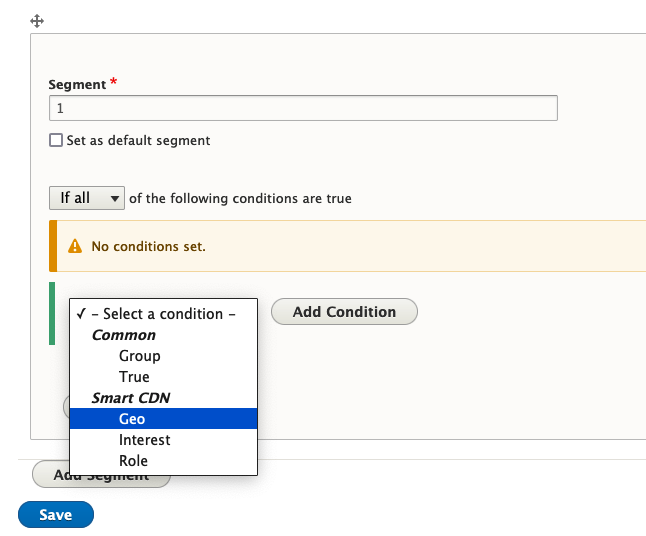
Select Geo condition under the Smart CDN category.
-
Click Add Condition.
-
Fill in value for Equals. Fastly is currently set up to return 2-letter country codes for geolocation. If your country is USA, type in “US” in all uppercase letters.
-
Add all of the required segments and select one that will act as the default.
-
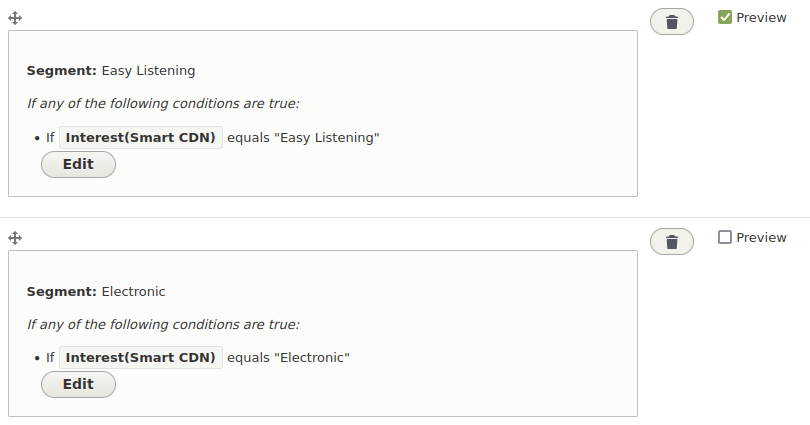
Make sure that Preview checkboxes are unchecked.
-
Click Save.
-
Navigate to Structure > Block layout > Add custom block at
/block/add. -
Add content blocks for each segment. For instance "Hello Canada!", "Hello US!", etc.
-
Navigate to the Block Layout section of the site at
/admin/structure/block. -
Click Place block in the region you want the geo-block to appear, and search for SSR Decision Block.
-
Configure the Decision Block: select your new Geolocation Segment set; click Select Segment Set.
-
In the Configure Reactions section, click Edit, and add the “Hello…” blocks you created to the corresponding segment.
-
Add placement configuration to the block and save the block.
-
Navigate to the page with the block and you will see the personalization you configured.
-
If you don’t have a VPN client, navigate to the Segments Sets Admin page at
/admin/structure/smart_content_segment_set, edit the set, select one preview checkbox, and save.
The content corresponding to this segment will display. Please note that only users who are logged in can access the content in preview; anonymous users will not have access.
Configure Interest via Taxonomy
In this section, we identify the content type where you want to use personalization by Interest, add a taxonomy field, and connect it to the pertinent vocabulary. For this example, we will assume it is Tags field_tags.
-
Navigate to Admin > Config > System > Smart Content CDN at
/admin/config/system/smart-content-cdn. In the configuration form for Smart CDN, select the checkbox for Tags. The form automatically reads all available taxonomy reference terms for all content types and allows you to select them. -
Create tags for your Tags vocabulary.
-
Review your content and tag it using the Tags vocabulary (e.g. "Biking").
-
Navigate to
/admin/structure/smart_content_segment_setto configure interest/taxonomy segments. -
Click +Add Global Segment Set.
-
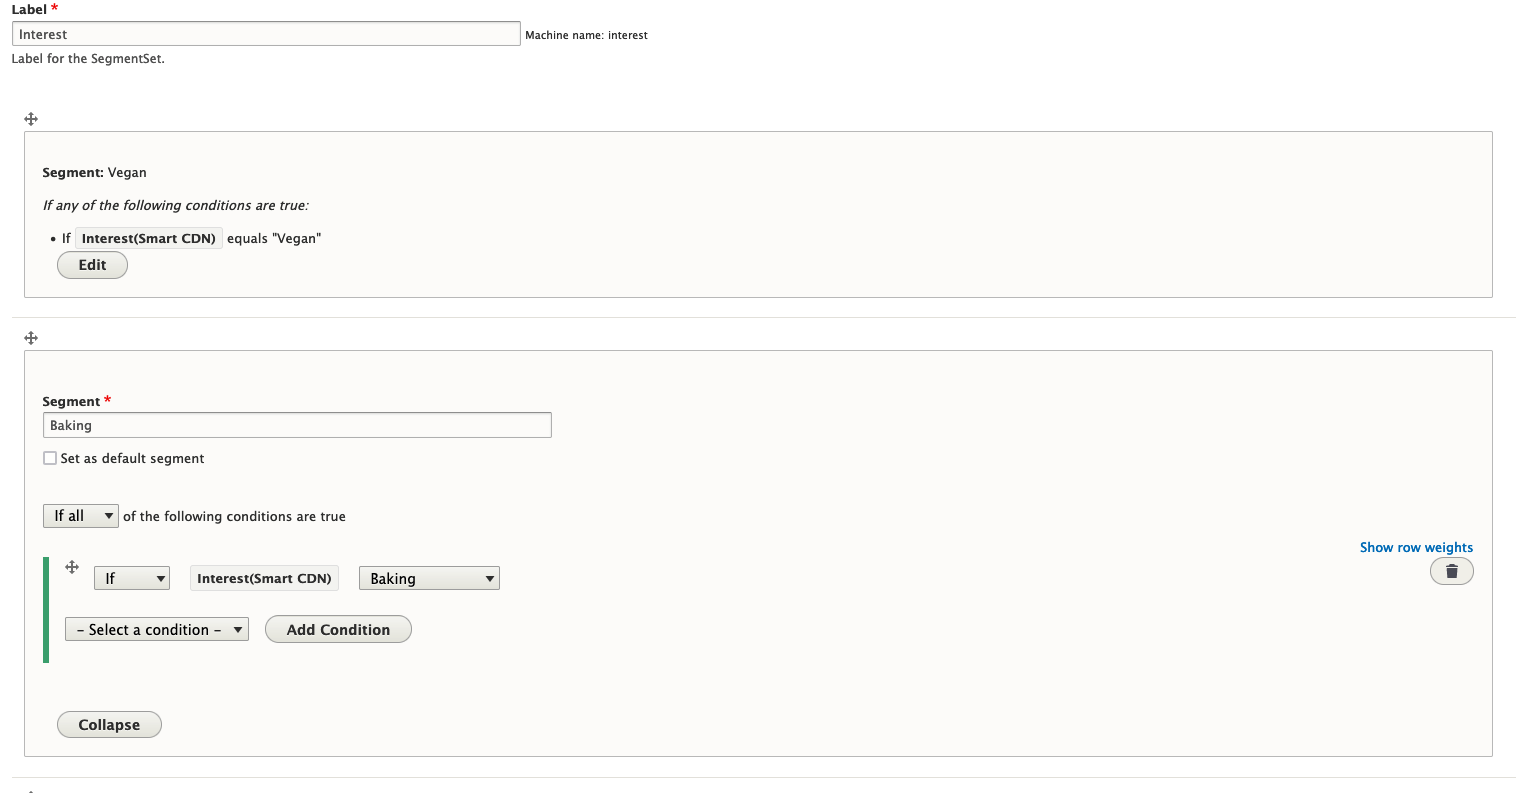
Provide a label (e.g. Interest) - the name isn't critical.
-
Click Add Segment.
-
Change segment name to something meaningful. We recommend matching the term name (e.g. "Biking").
-
Select Interest condition under the Smart CDN category.
-
Click Add Condition.
-
Fill in value for Equals with the taxonomy term name.
-
Set default segment and save.
-
Create content blocks per segment; they can also be views or block types.
-
Add another SSR Decision Block, select Interest segment, and configure reactions. Place block and save.
-
Navigate to the page with the block and you will see the personalization you configured.
-
If you don’t have a VPN client, navigate to the Segments Sets Admin page at
/admin/structure/smart_content_segment_set, edit the set, select one preview checkbox, and save.
The content corresponding to this segment will display. Please note that only users who are logged in can access the content in preview; anonymous users will not have access.
Additional Configuration
There is some additional configuration that you can apply to Smart Content. The Interest is of particular importance. It is calculated by the frequency with which the page tagged with a certain term is visited.
To set up the threshold after which the user will be placed in the particular Interest segment:
-
Navigate to the Configuration > System > Smart Content CDN Configuration page at
/admin/config/system/smart-content-cdn. -
Update the Interest threshold value.
-
Clear the cache.
Recap
The Smart Content CDN module extends Smart Content's functionality, and leverages the Pantheon Edge Integrations, a CMS-agnostic PHP library. The setup steps above provide two use cases: Geolocation and Interest, but there is much more you can accomplish with Smart Content and content personalization. For more information about the module, and other possible use cases, refer to the Smart Content CDN module.
More Information
Pantheon Edge Integrations uses header data to provide a personalization object that is utilized for personalizing content for each user. To make use of the PHP library, ensure PHP can use the class:
use Pantheon\EI\HeaderData;
Class Methods
In order to use the class methods, you need to create a HeaderData object:
$headerData = new HeaderData();
Global Methods
There are global methods that mirror the class methods in order to ease the API usage. These include:
-
HeaderData::personalizationObject() -
HeaderData::parse() -
HeaderData::header() -
HeaderData::returnVaryHeader()
For more information on what these methods expect and return, refer to Pantheon's API documentation.
Obtain Header Within a Custom Module
The follow can be used in any class context, or procedural context in any hook.
To include the library, run:
use Pantheon\EI\HeaderData;
Use the following snippet to obtain the header data object:
Known Issues
There is a known conflict with the Internal Page Cache module. This module does not provide any benefit when used in a Pantheon environment, but may be recommended (or enabled) for some modules. Our recommendation is to disable the Internal Page Cache module to ensure compatibility with Edge Integrations. Dynamic Page Cache is compatible with Edge Integrations and does not have the same restrictions.


