Analytics [Archived]
Integrate Edge Integrations with Google Tag Manager and Google Analytics.
This page has been archived. The content is no longer maintained and may be outdated.
The Pantheon Edge Integrations SDKs for Drupal and WordPress are no longer maintained and those repositories have been archived. Additionally, this guide is written for a version of Google Analytics that may no longer be supported.
While the integrations are still available with Pantheon Advanced Global CDN, and the code remains available, the SDKs are no longer actively developed or supported.
Pantheon’s Edge Integrations offers advanced and powerful features for content personalization. At this time, two key primary features are supported: Geo and Interest. These features allow us to serve different content to each user at given URLs. Google Analytics won’t differentiate between the personalized versions of a page unless you instruct it otherwise. This section aims to help you enhance your configuration to track personalization experiences via Google Tag Manager.
Requirements
- Access to your site’s Google Analytics and Tag Manager accounts, and basic knowledge of these products.
- You have the Smart CDN module enabled and a personalization use case active and working on your Pantheon-hosted, Advanced Global CDN-enabled website.
Personalization strategy and implementation are outside the scope of this page. For more information on that, refer to the Introduction part of the guide.
Before You Begin
Consider the desired goals and objectives for your users. Define success for your organization and how you want to measure it. Do your personalization tactics aim to convert your users to sign up for your newsletter, download a whitepaper, or achieve some other goal? You may already have tracking in place to measure against these key performance indicators; you will be extending them here.
Configure Your Website
Add Google Tag Manager(GTM) Code
Track Implementation
This section will cover the configuration of Google Tag Manager and Google Analytics.
Configure Google Analytics(GA)
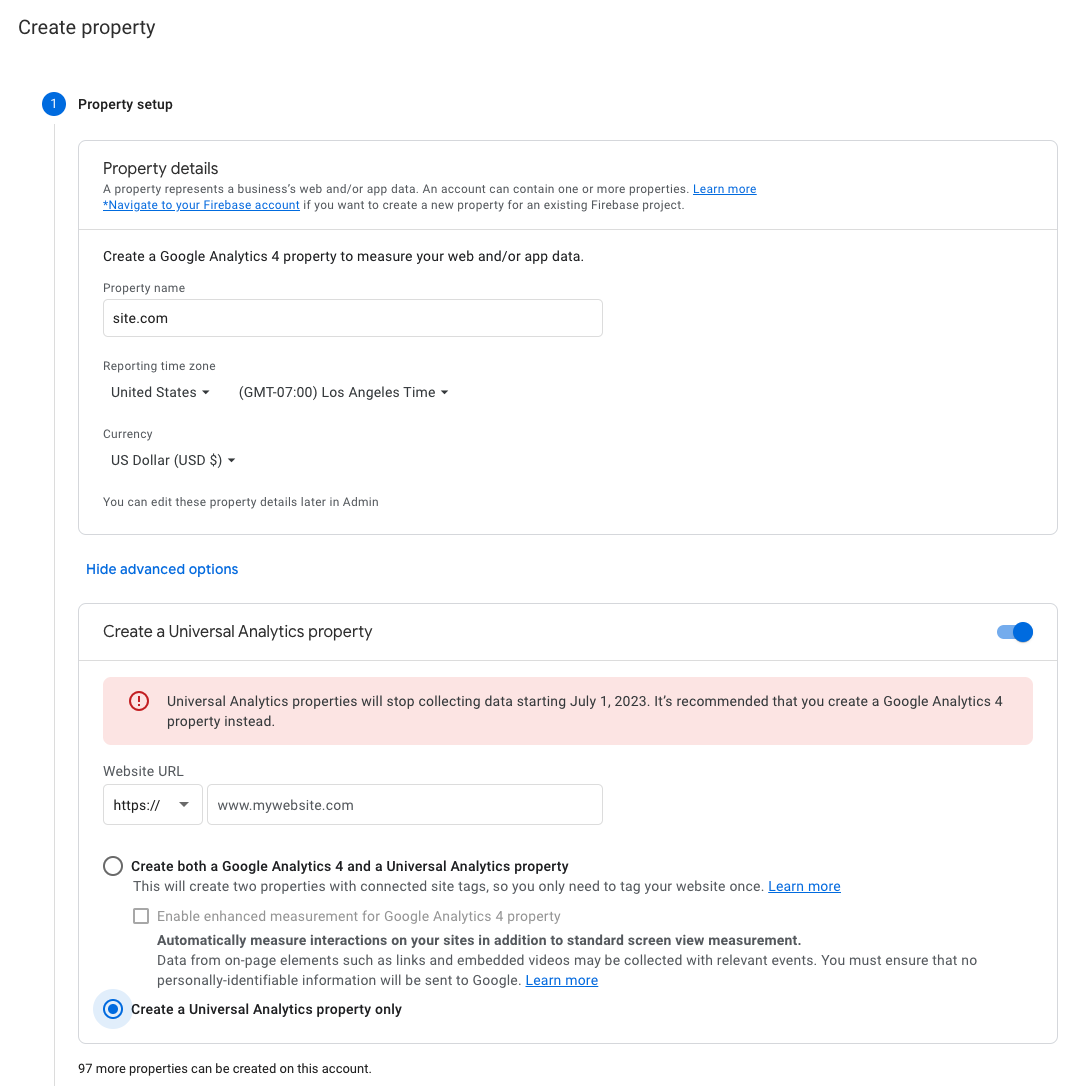
Before you start, if you are setting up a brand new site/property, you must select "Create a Universal Analytics property" under Advanced Options. While you can choose either the "Create both a Google Analytics 4 and a Universal Analytics property" or the "Create a Universal Analytics property only" options, all of the additional settings described here refer to the Universal Analytics property, specifically. Google Analytics 4 is not currently supported.
Track Personalization Properties as Custom Dimensions in GA
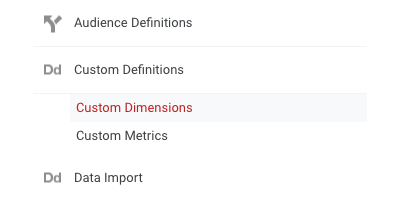
- Navigate to the Admin > Property area of Google Analytics. Expand Custom Definitions and select Custom Dimensions:
- Add New Custom Dimensions that correspond to the identifiers. Most dimensions will be set to “Hit,” as they change based on user behavior. For geotargeting, you have to set the scope to "Session" to allow the setting to persist.
Take note of the Index for each of your new Custom Dimensions, as you will need them to configure your Variables in Google Tag Manager. Your indexes will differ from this example if you have pre-existing configurations.
You now have the option to verify that the identifiers are accurately pushing data into the dataLayer. Refer to the Test and Debug section for more info.
Configure Google Tag Manager(GTM)
Create Variables in GTM
- Navigate to User -Defined Variables and click New in the upper right-hand corner.
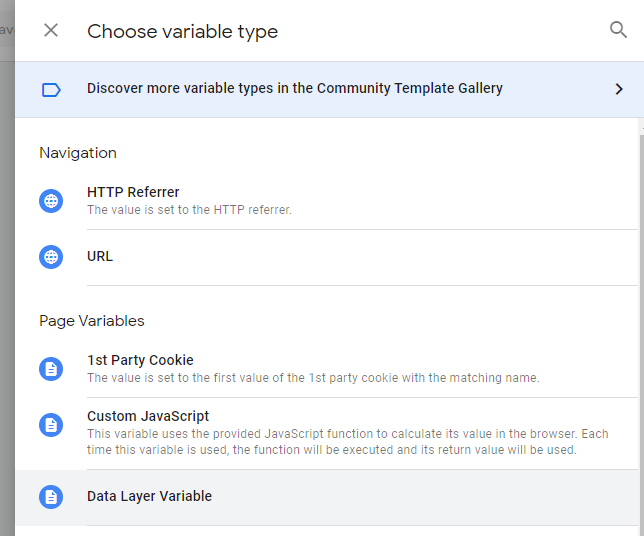
- From the list, select Data Layer Variable.
-
Create Variables following these best practices:
- Use a common prefix for each of your variable names to help group and identify them. In the example below, we use
dlvto signify “data layer variable.” Please make sure to note the actual name of the variable. - Include the Custom Dimension Index ID in your variable name, so that it's easy to reference.
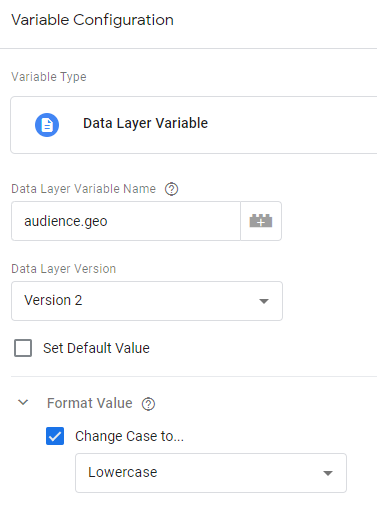
- When you create new variables that include text, we highly recommend that the Format Value is lowercase.
- Keep the Data Layer Version at Version 2.
- Leave the Set a Default Value box unchecked.
- The Data Layer Variable Name is the most important, so ensure you spell everything identically to what the DataLayer is pushing. In our case, these names are:
- audience.geo
- interest
- Use a common prefix for each of your variable names to help group and identify them. In the example below, we use
Append Variables to Your Google Analytics Settings in Tag Manager
After your variables are created, you can attach them to your Google Analytics Settings Variable.
In your list of Custom Variables, be sure that the Type is the same. If you are using a “Constant” or have hardcoded the UA ID into each tag, change that in favor of GTM tags in order to ensure future usability.
To append the variables:
-
Edit the Google Analytics Variable settings.
-
Expand the More Settings fieldset.
-
Expand Custom Dimensions.
-
Click Add More Dimensions.
-
Create an entry for each of your custom dimensions, and ensure that your Index and Dimension Values are correct:
Test and Debug
- In Google Tag Manager, click Preview in your Workspace to debug. If you are new to using Preview, please refer to the Preview and debug containers support documentation on Google Tag Manager Support.
- Use the DataSlayer Chrome extension to verify data is accurately being sent to Analytics. The Data Layer properties displayed should correspond directly to what is pushed to Google Analytics. Additionally, your personalization values with the Custom Dimension Index numbers you previously set up should also display.
Click Tracking and Goal Setup
This section will cover how to capture clicks on a particular link and set up a goal with Google Analytics. For this example, we will use Google Tag Manager to capture a “View recipe” button click as an event, and set it up as a goal in Google Analytics.
With dataSlayer, there is a dataLayer push that happens when you click on the “View recipe” button because it is a link click and has a unique Click Text – namely, “View recipe.” The values you will use in Google Tag Manager are:
eventgtm.event- Click Text
gtm.elementClassesgtm.elementIdgtm.elementTargetgtm.linkClick- element
- View recipe
Create New Tag in GTM
- In the workspace for your GTM account, visit the Tags menu and click the New button to create a Tag that will capture the information you are looking for. In this example, we want to know how often people click on the “View recipe” button. There are no best practices at this time, so feel free to make modifications as needed.
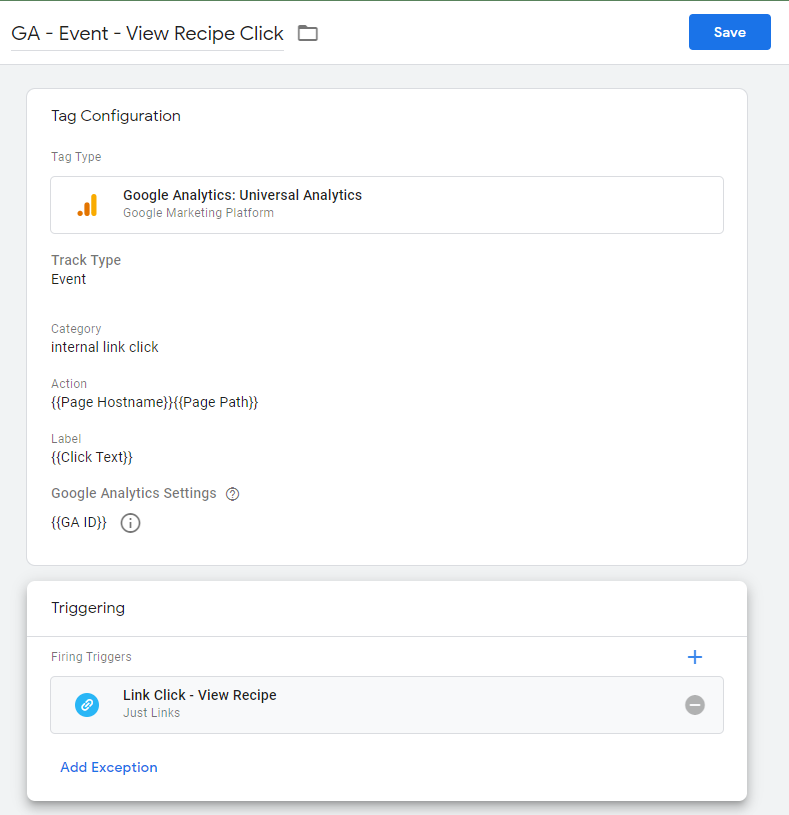
Our recommended Tag Configuration is as follows:
-
Scroll beyond the Tag Configuration section. In the Triggering section, click the gray circle to choose a trigger that will make the tag fire.
-
Click on the + in the upper right-hand corner to create a new trigger.
-
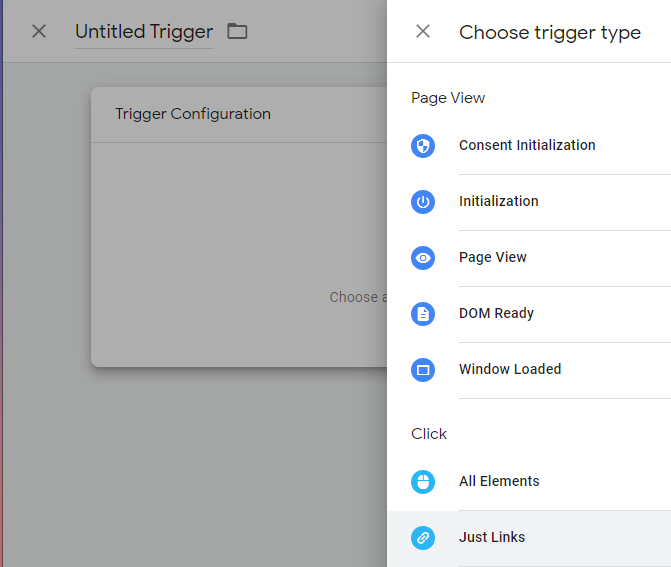
Click on the gray circle again and select the Just Links trigger type from the fly-out menu.
-
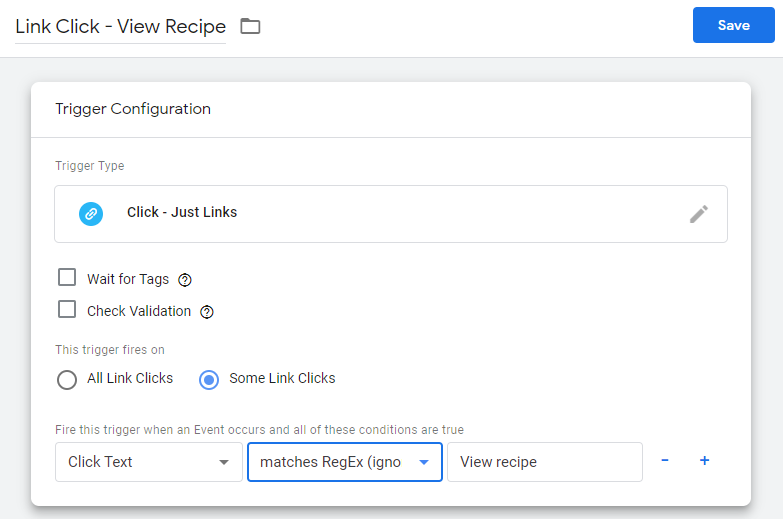
Fill out the form details for the trigger. Ensure you give it a name that is easy to understand for anyone who refers to it in the future. In the example below, we've called it “Link Click - View Recipe.” To make the trigger specific to the “View recipe” button, select Some Link Clicks, instead of All Link Clicks. Be sure to specify that Click Text should be set to matches RegEx for “View recipe," which is the value we got from the dataSlayer extension. Save the trigger.
You now have a fully working Tag and corresponding Trigger.
To test that the Tag and Trigger function as expected, use Preview mode. In GTM, your tag will fire when you click on the link.
In dataSlayer your event will fire with the values that you previously set up in your tag.
In this example case:
- category: internal link click
- action: (site URL)
- label: View recipe
After you test your new event, make sure to publish your changes by pressing the Submit button in your Workspace.
Goal Setup in Google Analytics
-
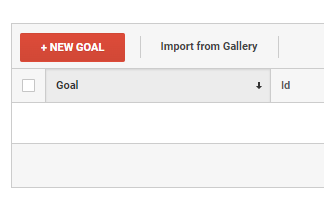
Navigate to the Goal section and click + New Goal.
-
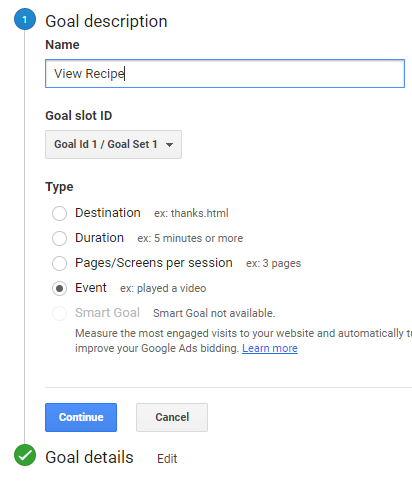
Name your goal and select Event as the type. Click Continue.
-
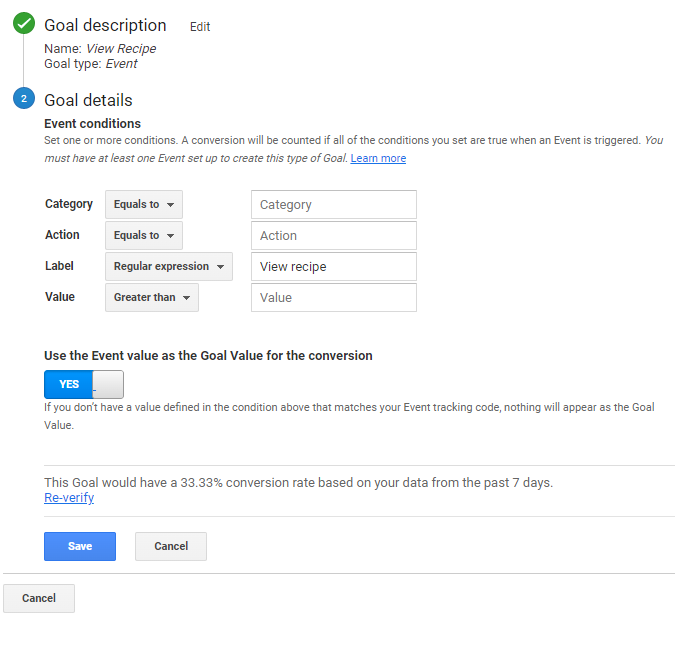
Input the condition of the goal. In this case, you need the label value that was generated in the previous section:
- label: View recipe
Based on this information, enter the value of “label” into the Label field. Ensure that you change the default “Equals to” condition to “Regular expression,” which makes the matching more flexible.
-
Save the goal.
Reporting
-
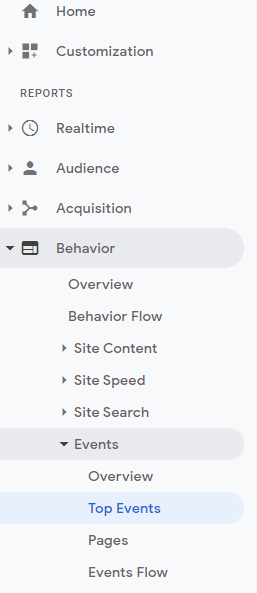
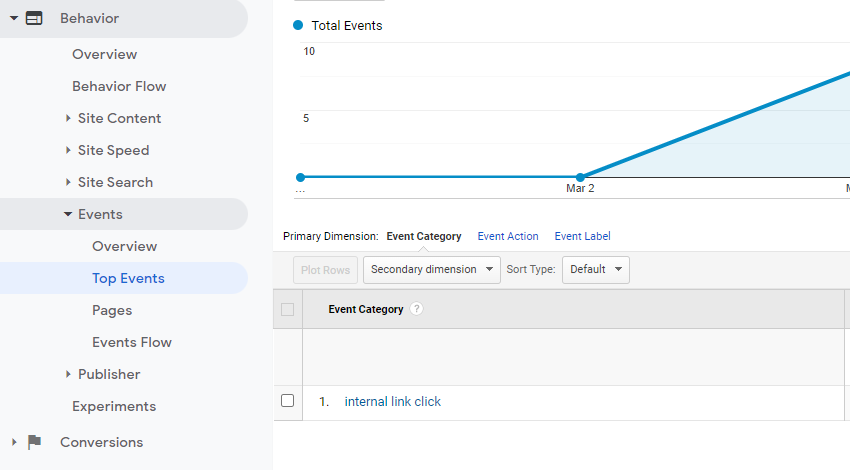
To find your new data, log into Google Analytics. In the main navigation, go to Behavior > Events > Top Events.
-
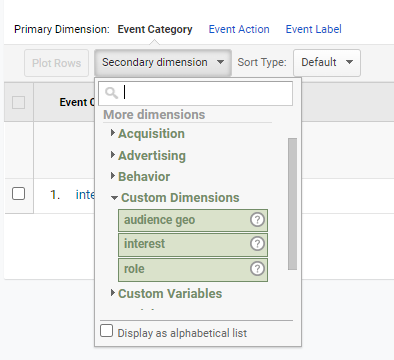
Click on the Secondary dimension button, right below the Event Category label. This will display the custom dimensions you created earlier.
-
Click on any label in the list to display the associated data.
You can also toggle between the different custom dimensions by clicking in the list of events to switch views:
Segmentation
Create segments based on your custom dimensions in order to slice and dice your data.
- Most reports in Google Analytics allow you to segment your data by clicking on the + Add Segment button in the Pages section.
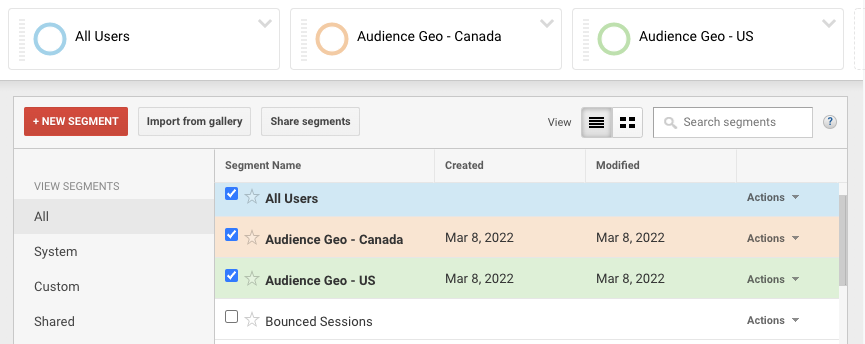
- Create a new segment by clicking on the + New Segment button. If you have any existing segments, they will be listed.
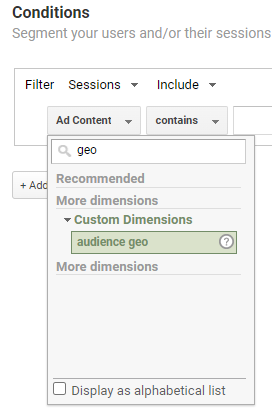
- Under Advanced choose Conditions and select the kind of segment you want to create. For example, if you want to see how Canadian session behavior differs from all other visitors, go to the dimension field, find the appropriate dimension and click on it. In this case, it is audience geo.
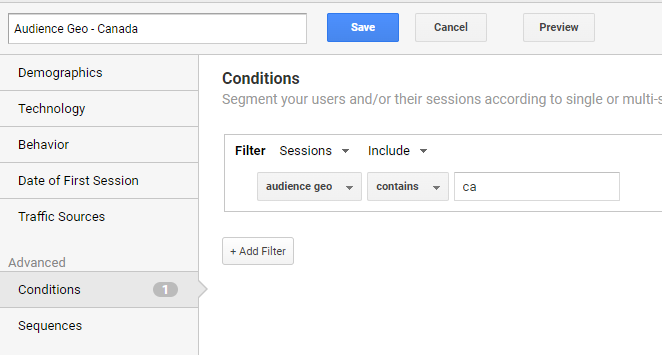
- In this example, we want data for Canadian visitors, so the custom dimension should contain a value of
ca. Name and save your segment, for example:Audience Geo - Canada.
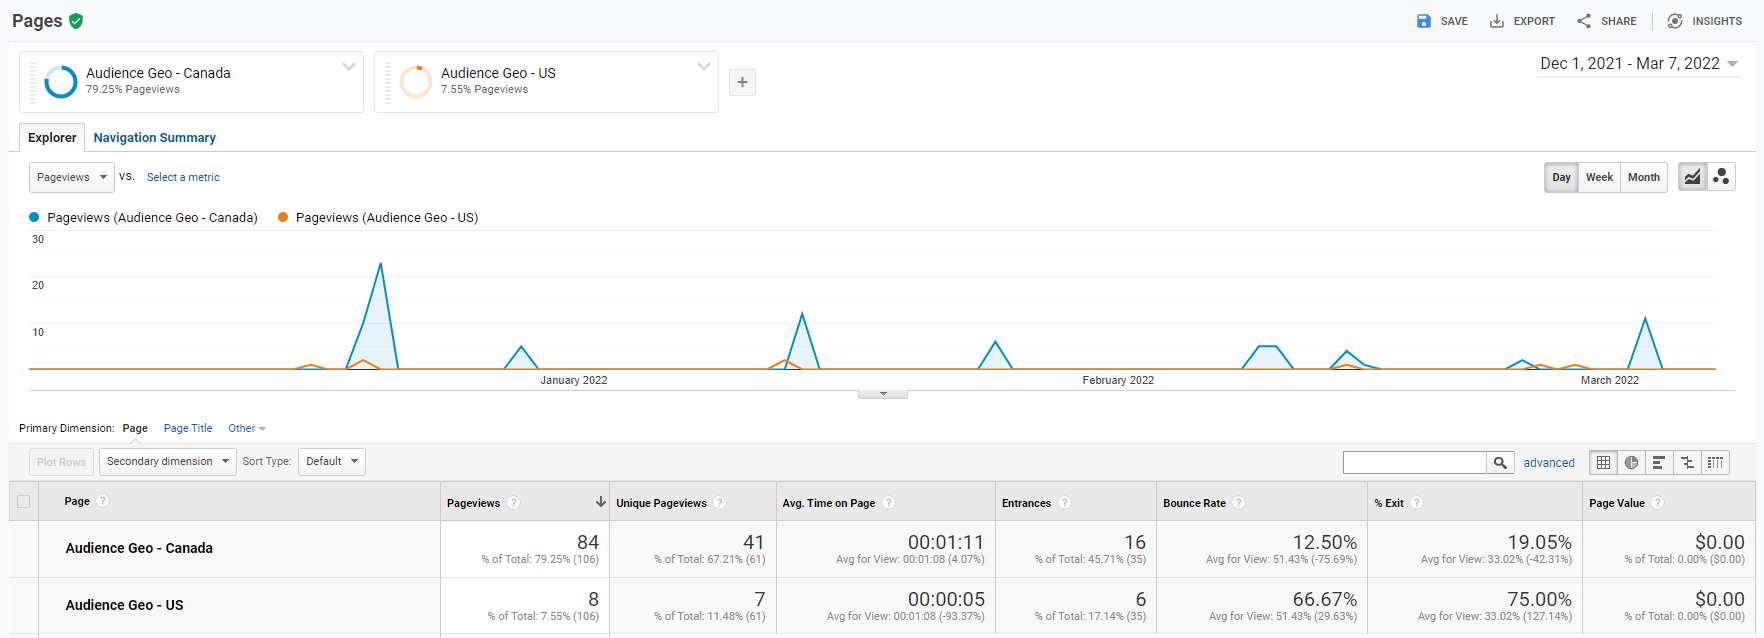
- Follow the same steps to create additional segments in your reports, like a US geo audience, to compare outcomes.
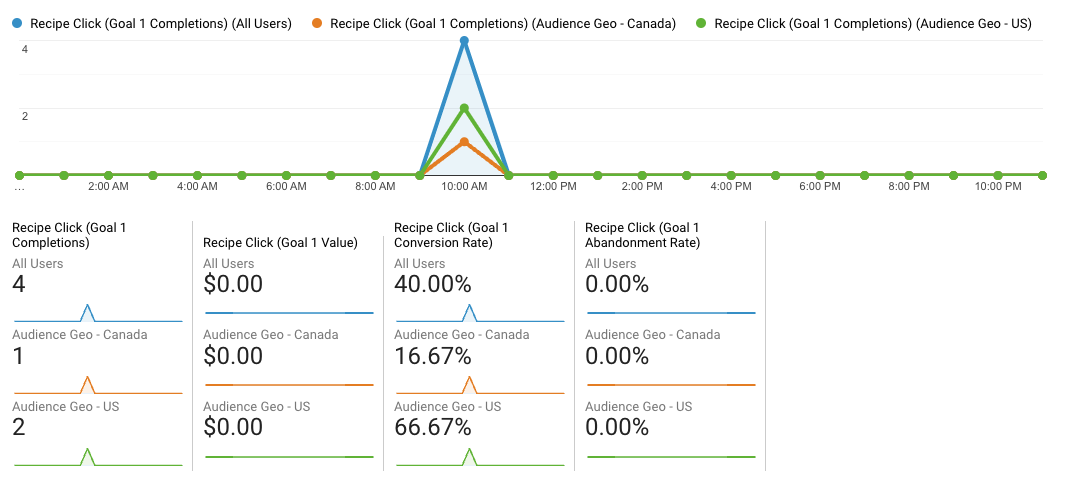
It is useful to add audiences to your Goals. Tying this back to our previous Recipe Click goal, if we add US and Canadian audiences, we can compare outcomes. If we're more interested to see click-through rates based on audience interest, we can do that, too!
You can also observe how different audiences convert towards the same Goal.
