Next-generation Global CDN
Pantheon Advanced Edge Features
Learn how to configure Pantheon's Advanced Edge, like how to block certain IPs or regions, turn on the Enterprise WAF, or optimize images.
What is Advanced Edge?
The Advanced Edge (formerly Advanced Global CDN) is a set of workspace-level and YAML/site level edge configuration tools, under the Edge tab in the dashboard, that let customers self-serve CDN-layer changes that previously required a support ticket.
It currently includes:
The following features are planned to be added in the future, amongst other features:
- AI Bot Allowlist
- Custom Error Pages
- Edge Logging
How blocking rules work
- What a blocked visitor sees: A blocked request receives an HTTP 403 response. By default the body is the plain text “Forbidden.” If the workspace has a Custom Error Pages configuration for status 403, that custom page is served instead, but only to browser-type requests; API and non-browser clients always receive the plain “Forbidden” response.
- How long it takes to go live: A newly published version can take up to 5 minutes to reach all edge locations.
- Who can publish: Any workspace member can view these pages. Publishing a new version requires the workspace Admin role.
- Changelog: Every publish is recorded on the Changelog tab, next to Configurations, with who published it and when. It is an audit log, not a diff; it does not show which entries were added or removed.
IP Blocking
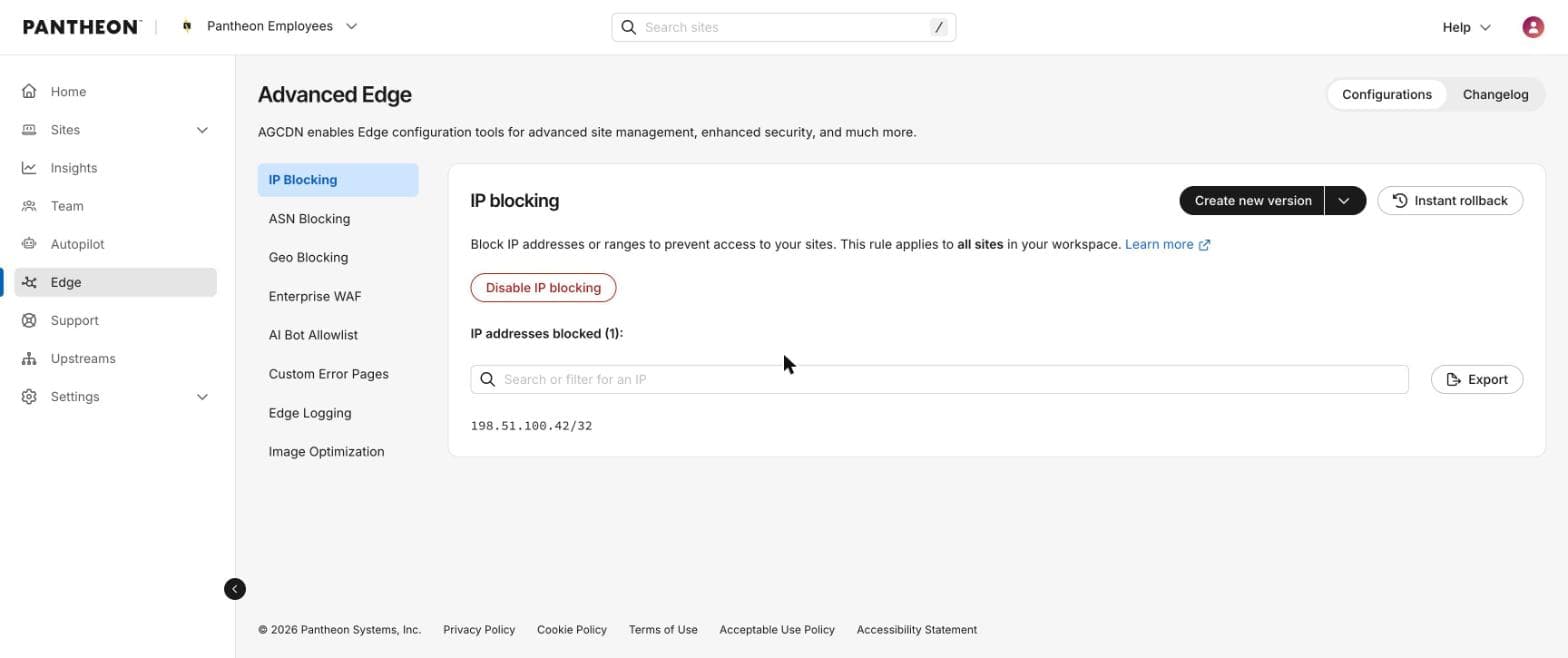
Block specific IP addresses or CIDR ranges from accessing any site in your workspace. This is a workspace-level rule — once published, it applies to every site in the workspace, not a single site.
Where to find it
Dashboard nav: Edge > IP Blocking.
URL pattern: /workspace/{workspaceId}/edge-agcdn/configurations/ip-blocking
How to add IP addresses
-
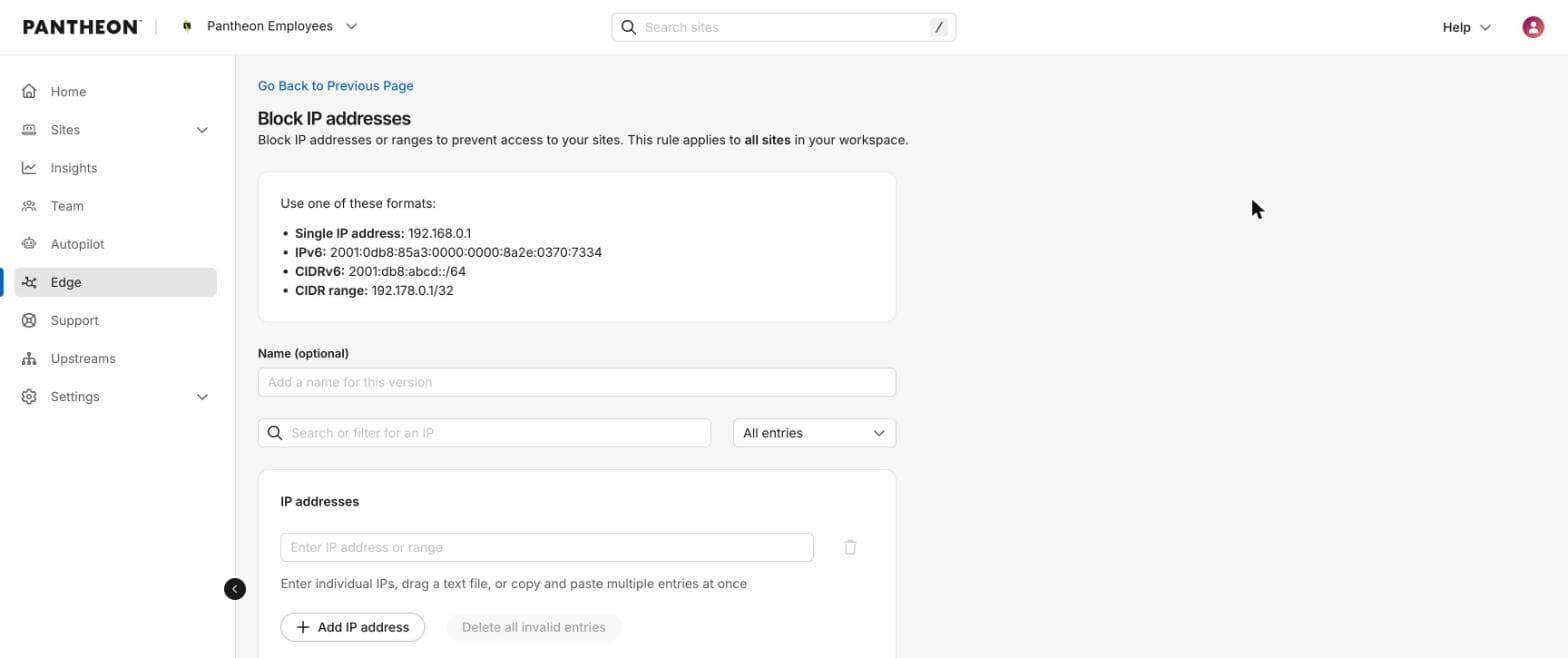
Click Create new version.
-
Optionally name the version (max 255 characters).
-
Enter IPs three ways: type individually via “Add IP address”, paste multiple at once (auto-splits into rows), or drag/upload a .txt file (one entry per line).
-
Accepted formats:
- Single IP address: 192.168.0.1
- IPv6: 2001:0db8:85a3:0000:0000:8a2e:0370:7334
- CIDRv6: 2001:db8:abcd::/64
- CIDR range: 192.178.0.1/32
-
Duplicate entries are flagged inline as row errors before publishing — they are not silently merged.
-
Click Publish configuration — this creates a new immutable version, it does not edit the active version in place.
Limits
Maximum 10,000 entries per version.
Rolling back
Instant rollback restores the previous published version automatically (a true rollback endpoint, not a manual re-entry). Confirmation copy: “You’re about to restore your IP blocking to the last saved configuration. Changes may take a few minutes to become active.” Disable IP blocking turns the rule off without discarding its configured entries; re-enabling restores the last published version.
Scope
Applies to all sites in the workspace — cannot be scoped to a single site from this page.
ASN Blocking
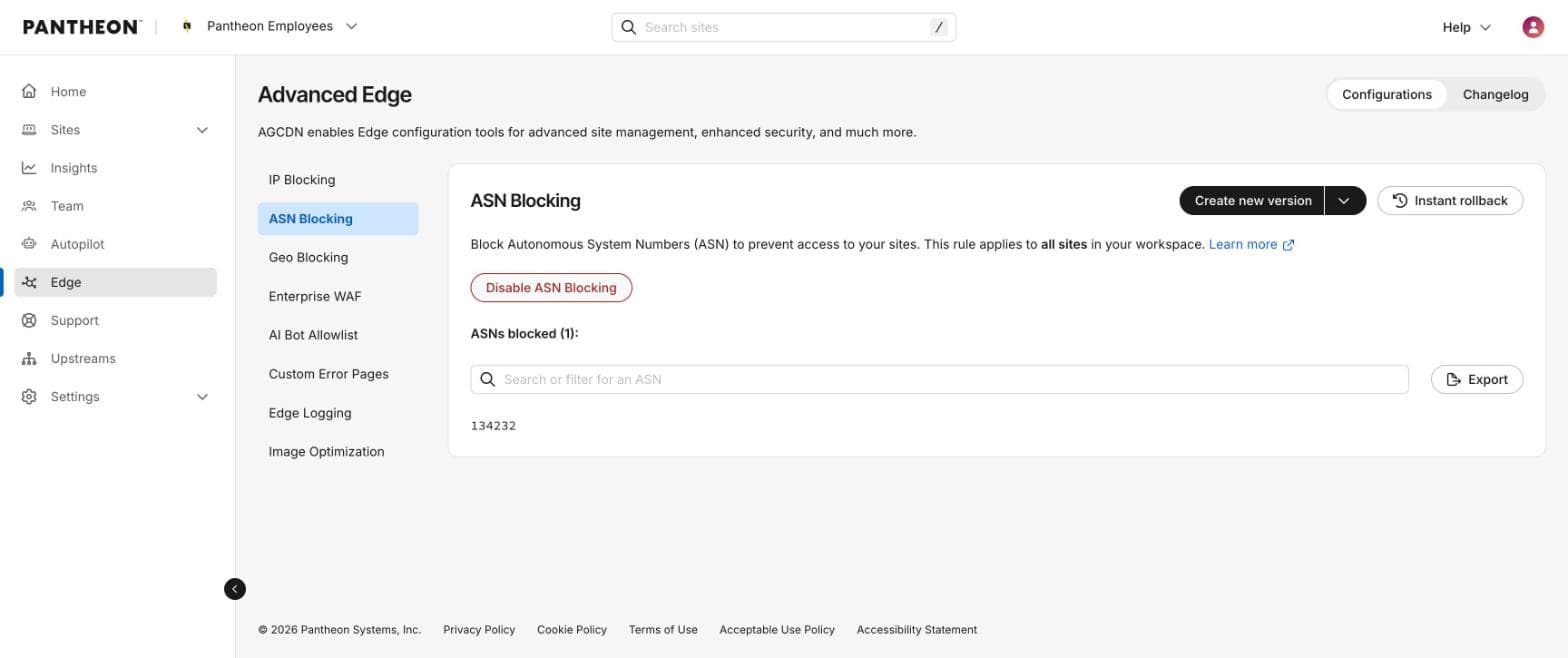
Block traffic from entire Autonomous Systems (e.g. a hosting provider or ISP associated with abusive traffic) across every site in the workspace.
Where to find it
Dashboard nav: Edge > ASN Blocking.
URL pattern: /workspace/{workspaceId}/edge-agcdn/configurations/asn-blocking
How to add ASNs
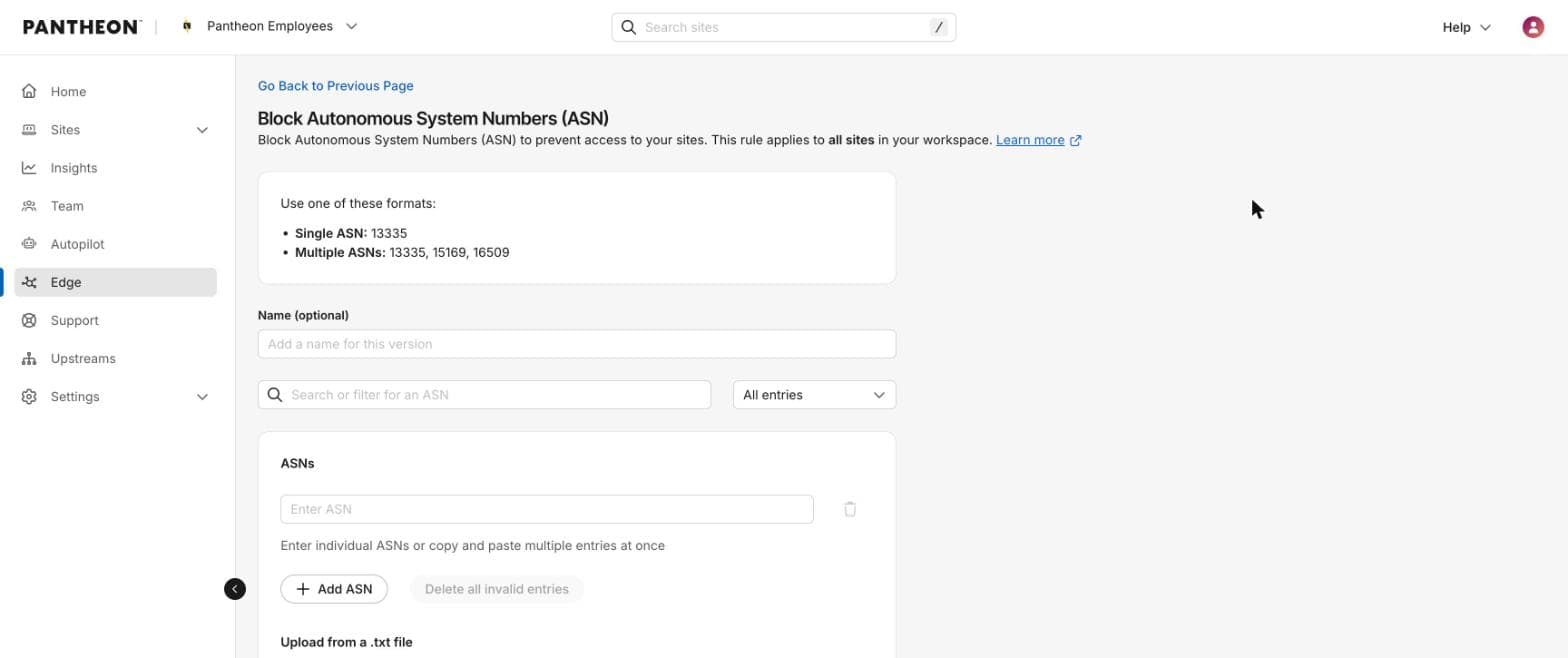
- Click Create new version.
- Optional name (max 255 characters).
- Enter ASNs: single (13335), multiple comma-separated (13335, 15169, 16509), or AS-prefixed form (AS15169, case-insensitive); paste or .txt upload supported same as IP blocking.
- Valid range: 1–4,294,967,295 (32-bit).
- Publish creates a new immutable version.
Limits
10,000 entries per version.
Rolling back
Same instant-rollback mechanism as IP Blocking. For details, see this section above.
Scope
Applies to all sites in the workspace.
Geo Blocking
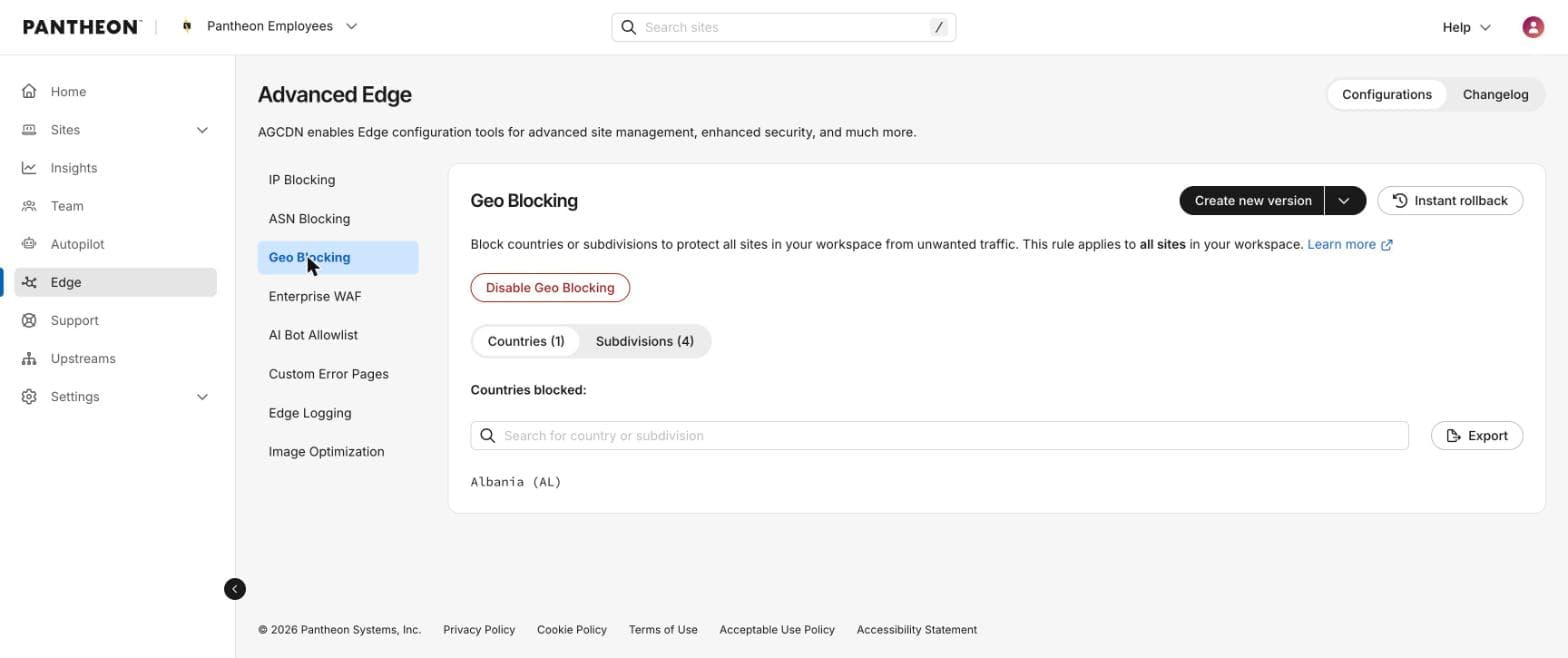
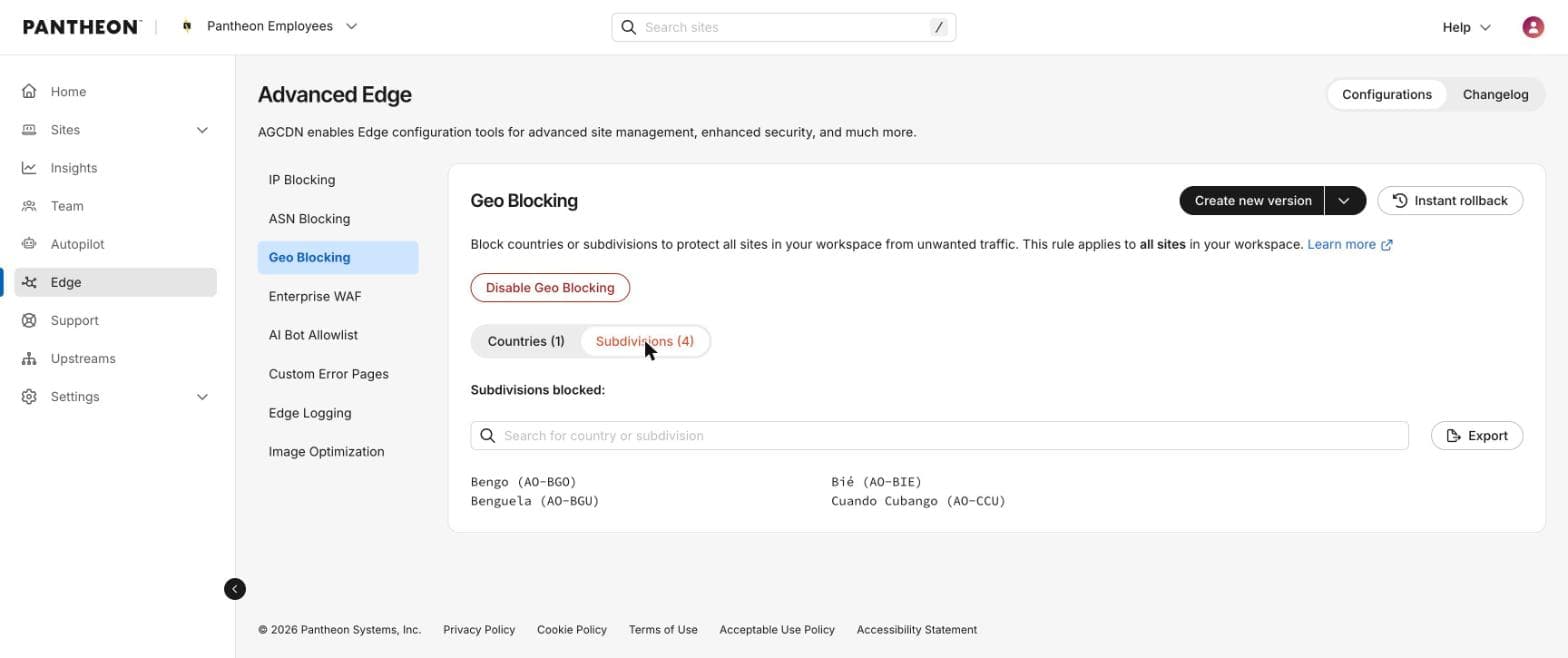
Block traffic by country or by sub-country region (state/province), across every site in the workspace.
Where to find it
Dashboard nav: Edge > Geo Blocking.
URL: /workspace/{workspaceId}/edge-agcdn/configurations/geo-blocking.
Two independent lists live on this page, switchable by tab: Countries and Subdivisions.
How to add locations
- Click Create new version.
- Optional name (max 255 characters).
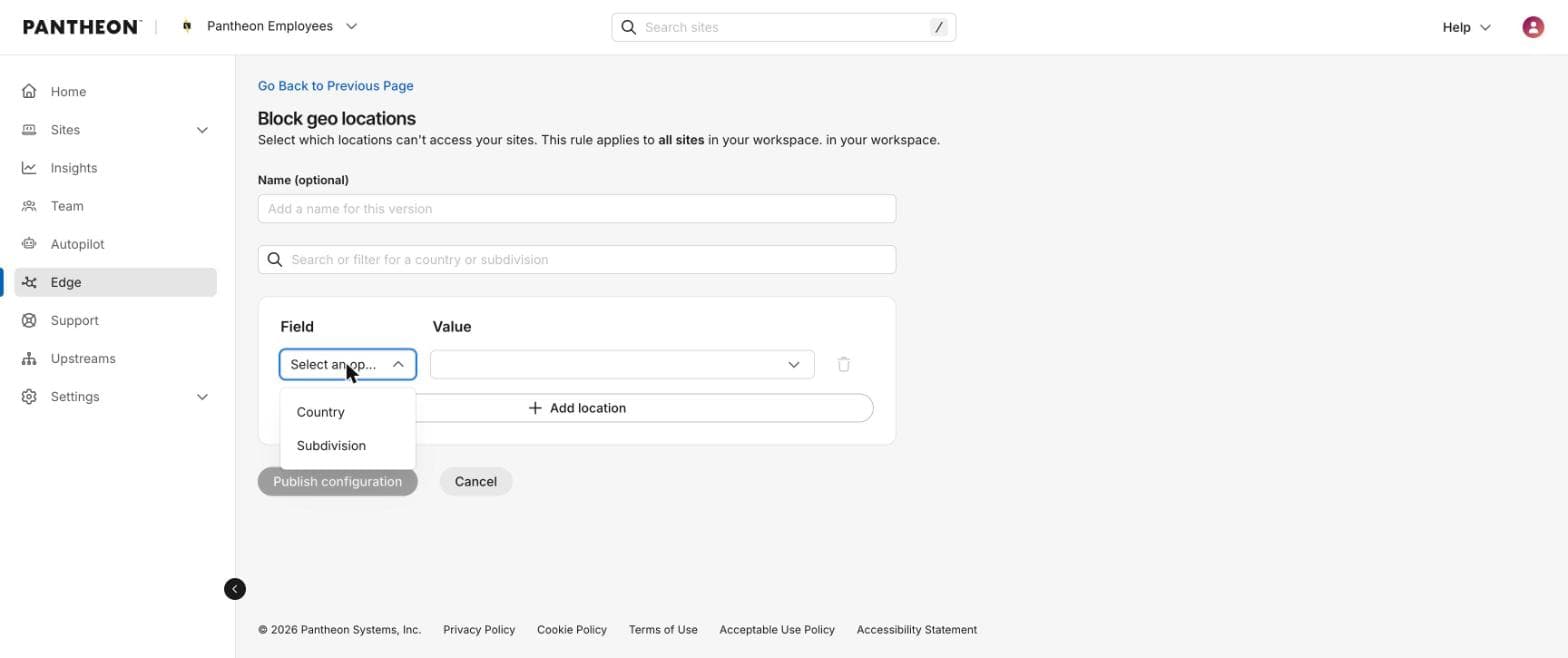
- Unlike IP/ASN blocking, there’s no free-text or bulk-paste entry — use the combobox: set “Field” to Country or Subdivision, then choose the value from the dropdown (the subdivision picker requires choosing a country first).
- Format under the hood: ISO 3166-1 alpha-2 country codes (e.g. RU) and/or ISO 3166-2 subdivision codes (e.g. UA-43).
- Click Add location to add more rows before publishing.
- The publish confirmation groups changes into collapsible “Countries (n)” / “Subdivisions (n)” panels for review.
Limits
Maximum 8,192 entries per version — lower than IP/ASN blocking’s 10,000 ceiling.
Rolling back
Same instant-rollback pattern as the other two features. For details, see this section above.
Scope
Applies to all sites in the workspace.
Enterprise WAF
A CMS-tuned web application firewall that protects your sites from common attacks. Enterprise WAF is a single on/off setting for your entire workspace.
Where to find it
Dashboard nav: Edge > Enterprise WAF.
URL pattern: /workspace/{workspaceId}/edge-agcdn/configurations/enterprise-waf
How to turn it on or off
Click Enable Enterprise WAF to turn it on, or Disable Enterprise WAF to turn it off. Only workspace Admins can change this setting, and each change is recorded on the Changelog tab.
Scope
Applies to all sites in the workspace.
Image Optimization
Automatically optimizes images at the edge, including converting them to smaller, modern formats like WebP for browsers that support them. Image Optimization is a single on/off setting for your entire workspace.
Where to find it
Dashboard nav: Edge > Image Optimization.
URL pattern: /workspace/{workspaceId}/edge-agcdn/configurations/image-optimization
How to turn it on or off
Click Enable Image Optimization to turn it on, or Disable Image Optimization to turn it off. Only workspace Admins can change this setting, and each change is recorded on the Changelog tab.
Scope
Applies to all sites in the workspace.