Content Publisher Tutorial for Next.js
Integrate Content Publisher with a Next.js site on Pantheon
Pantheon's Content Publisher shines as a way to send content straight from Google Docs to a Next.js site hosted on Pantheon. This tutorial will walk you through the steps needed to make a simple site combining the two.
Learning Objectives
This tutorial will walk you through:
- Making a new Next.js codebase using the Next.js Content Publisher Starter.
- Creating a new GitHub repository to hold that codebase.
- Creating a new Pantheon site that will build and run the code from that repository.
- Creating a Content Publisher collection that will send content to the Next.js site.
- Configuring environment variables on Pantheon to connect the Next.js site to the Content Publisher collection.
Requirements
- A GitHub account with SSH configured
- A Content Publisher account with Administrator access
- Install the following applications:
* Requires logging in after installation.
Create a Content Publisher collection
Before you can make a Next.js site to display content from Content Publisher, we will need a Content Publisher collection. You can reuse an existing Content Publisher collection if you have one, but for this tutorial we will make a new one.
-
Go to the Content Publisher dashboard and log in.
-
Next create a new collection by clicking the "New collection" button.
-
Enter something simple for Collection name like "Next.js tutorial content".
-
For the URL field, enter the URL of the Next.js site you intend to make a Pantheon. You can change this field later. For instance, use
https://dev-my-site-name.pantheonsite.ioif you intend to make a site with a machine name ofmy-site-name.
When using this combination of Content Publisher and Next.js in production, you would likely use the URL of your live environment here. For more information on deploying to Test and Live environments, see Deploying to Test and Live.
-
Set Collection access. Since this collection is meant to be a tutorial, you may want to select Only managers and authorized users.
-
Click Create collection.
Get Content Publisher ID and Token
Now that we have a Content Publisher collection, we can grab variables for the collection ID and a token that we will soon give to Next.js.
-
From the Tokens tab of the Content Publisher dashboard click Create access token and fill in the prompt. The token will only be shown once, copy it to a local text file and delete it later.
-
From the Home tab of the Content Publisher dashboard find and select your new collection. Copy the collection ID to the same text file. For example:

Create a local Next.js codebase
With all the requirements above in place, we will now make a local codebase for our Next.js site.
Run this command (replacing my-site-name with a unique name for your site):
You can answer the interactive prompts that follow with "no" since we have not yet made a Content Publisher collection or token to go with this site.
When the command completes, you will have a simple Next.js codebase on your local machine in a directory named my-site-name.
Create a GitHub repository
Next, we will create a new repository on GitHub to hold the codebase we just made.
You can do this via GitHub's web interface or via the command line.
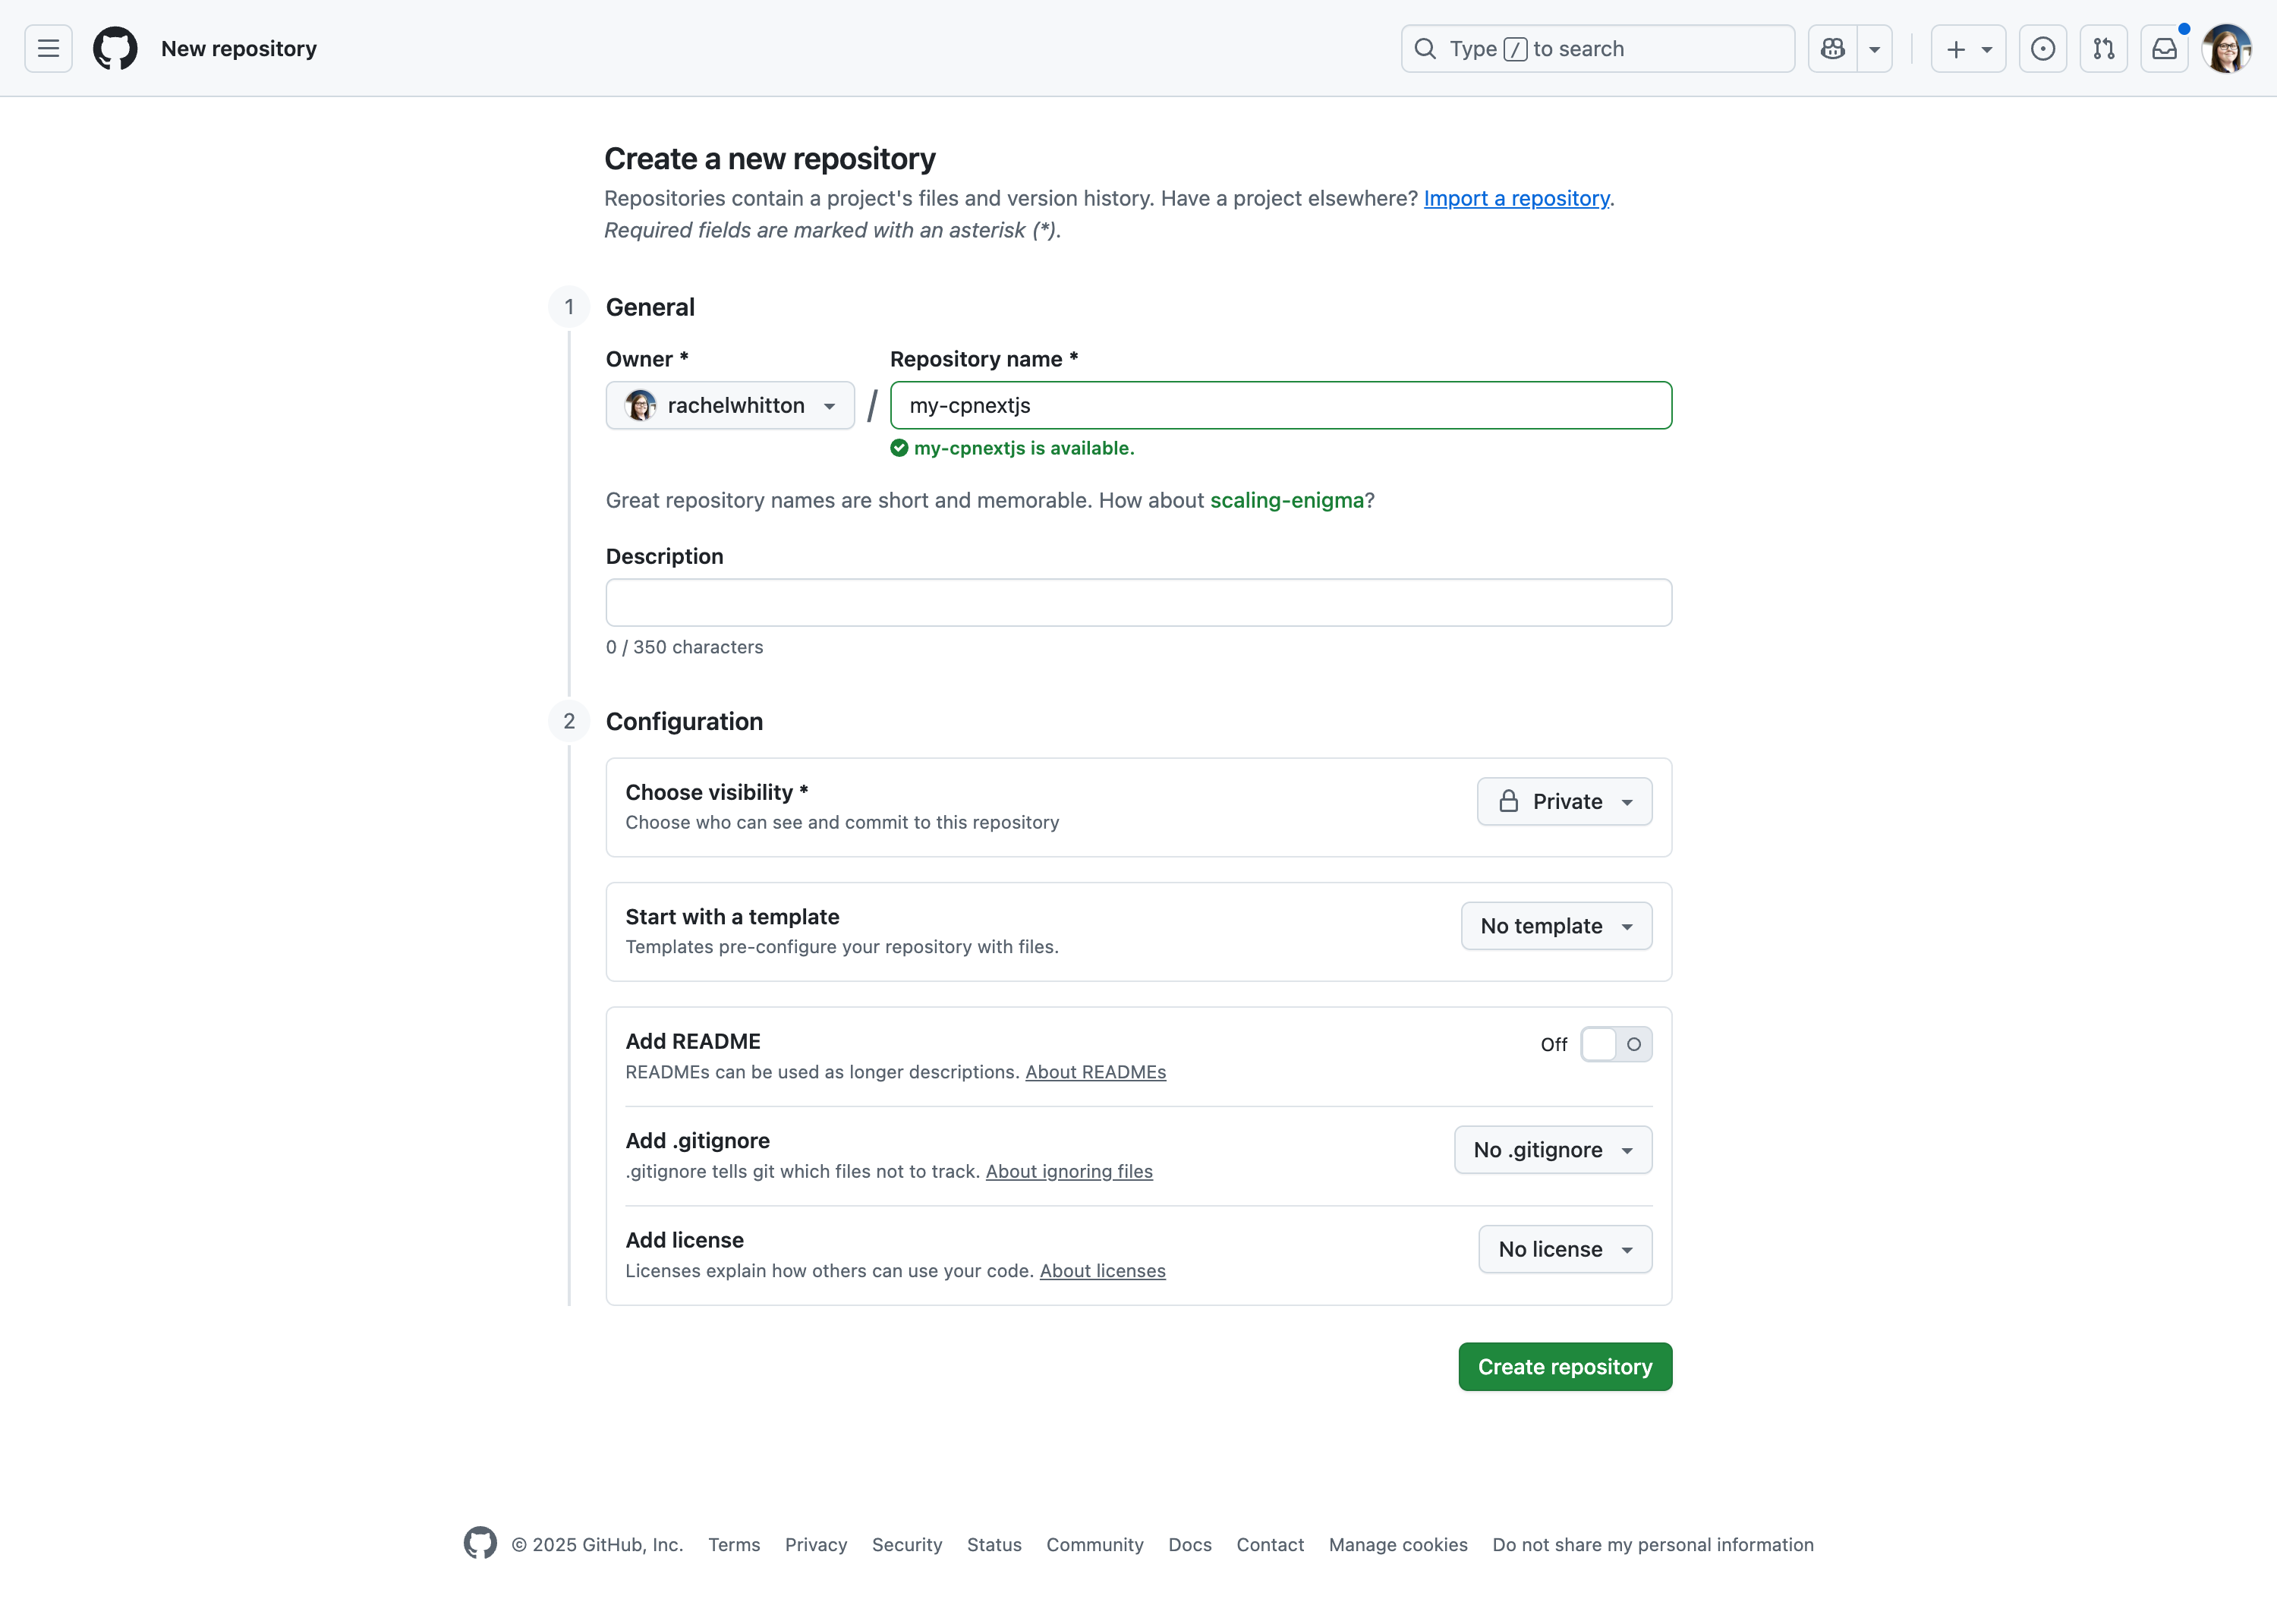
Leave the repository empty for now and do not add a README, .gitignore, or license.
Since this repository is meant to be a tutorial, you may want to make it private.
Push the codebase to GitHub
Now, we will push the codebase we made with cpub init to the new repository on GitHub.
- First, change into the directory holding the codebase:
- Next, initialize a new Git repository:
- Next, add the files in the directory to the new Git repository:
- Next, commit the files to the new Git repository:
- Finally, add the GitHub repository as a remote and push the code to it (replacing
mynameandmy-site-namewith your GitHub username or organization and the name of the repository you created):
Create a new Pantheon site
With a GitHub repository holding our Next.js codebase, we can now create a new Pantheon site and use Pantheon's external repository integration to trigger builds in response to code changes.
- Go to the workspace and click the Create New Site button. Then click Next.js.
- Click Connect next to GitHub. You will be prompted to install and authorize the Pantheon Site Integration GitHub application.
- Select the newly authorized account, then click Continue.
- In the Configure Site step, switch tabs to Use existing repository, then enter a Site name and select your existing repository from the dropdown menu.
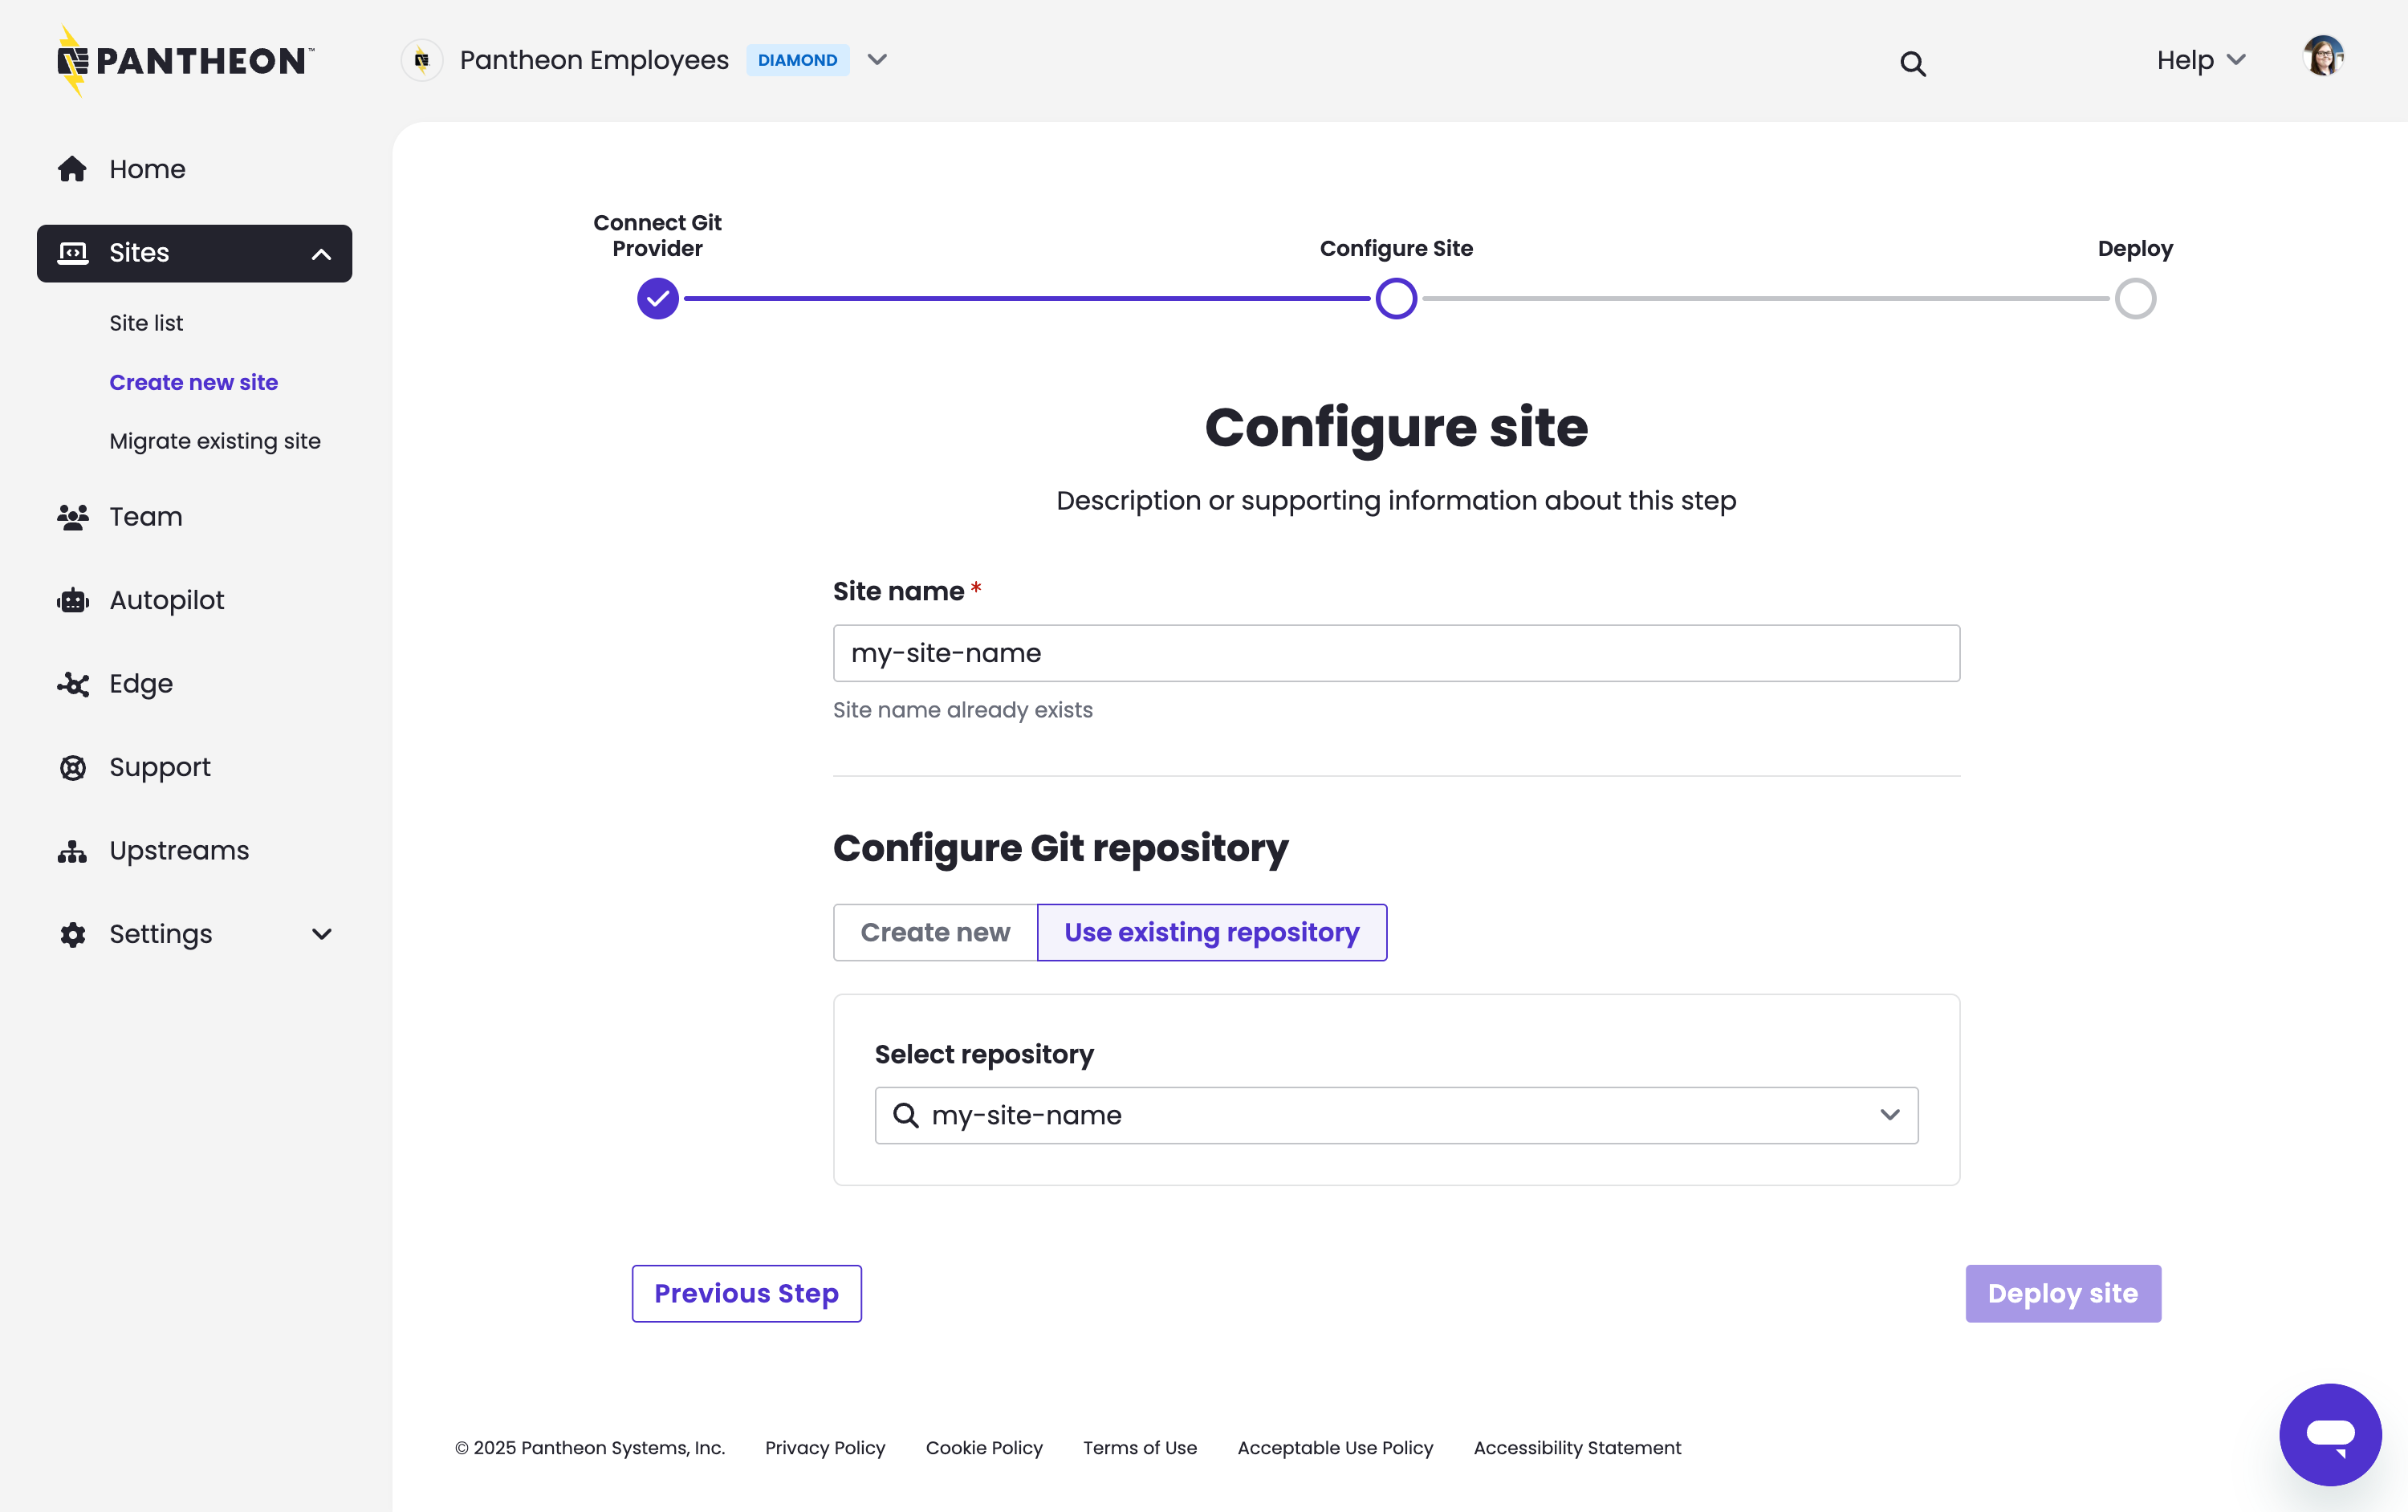
Next enter your Content Publisher Collection ID and Token using the variables PCC_SITE_ID and PCC_TOKEN.

You can name complete the form and site creation will begin.
(Optional) Review Build Status from the CLI
To view the status of that process, run this command, replacing <site> with your sitename:
Publish from Google Docs to your Next.js site
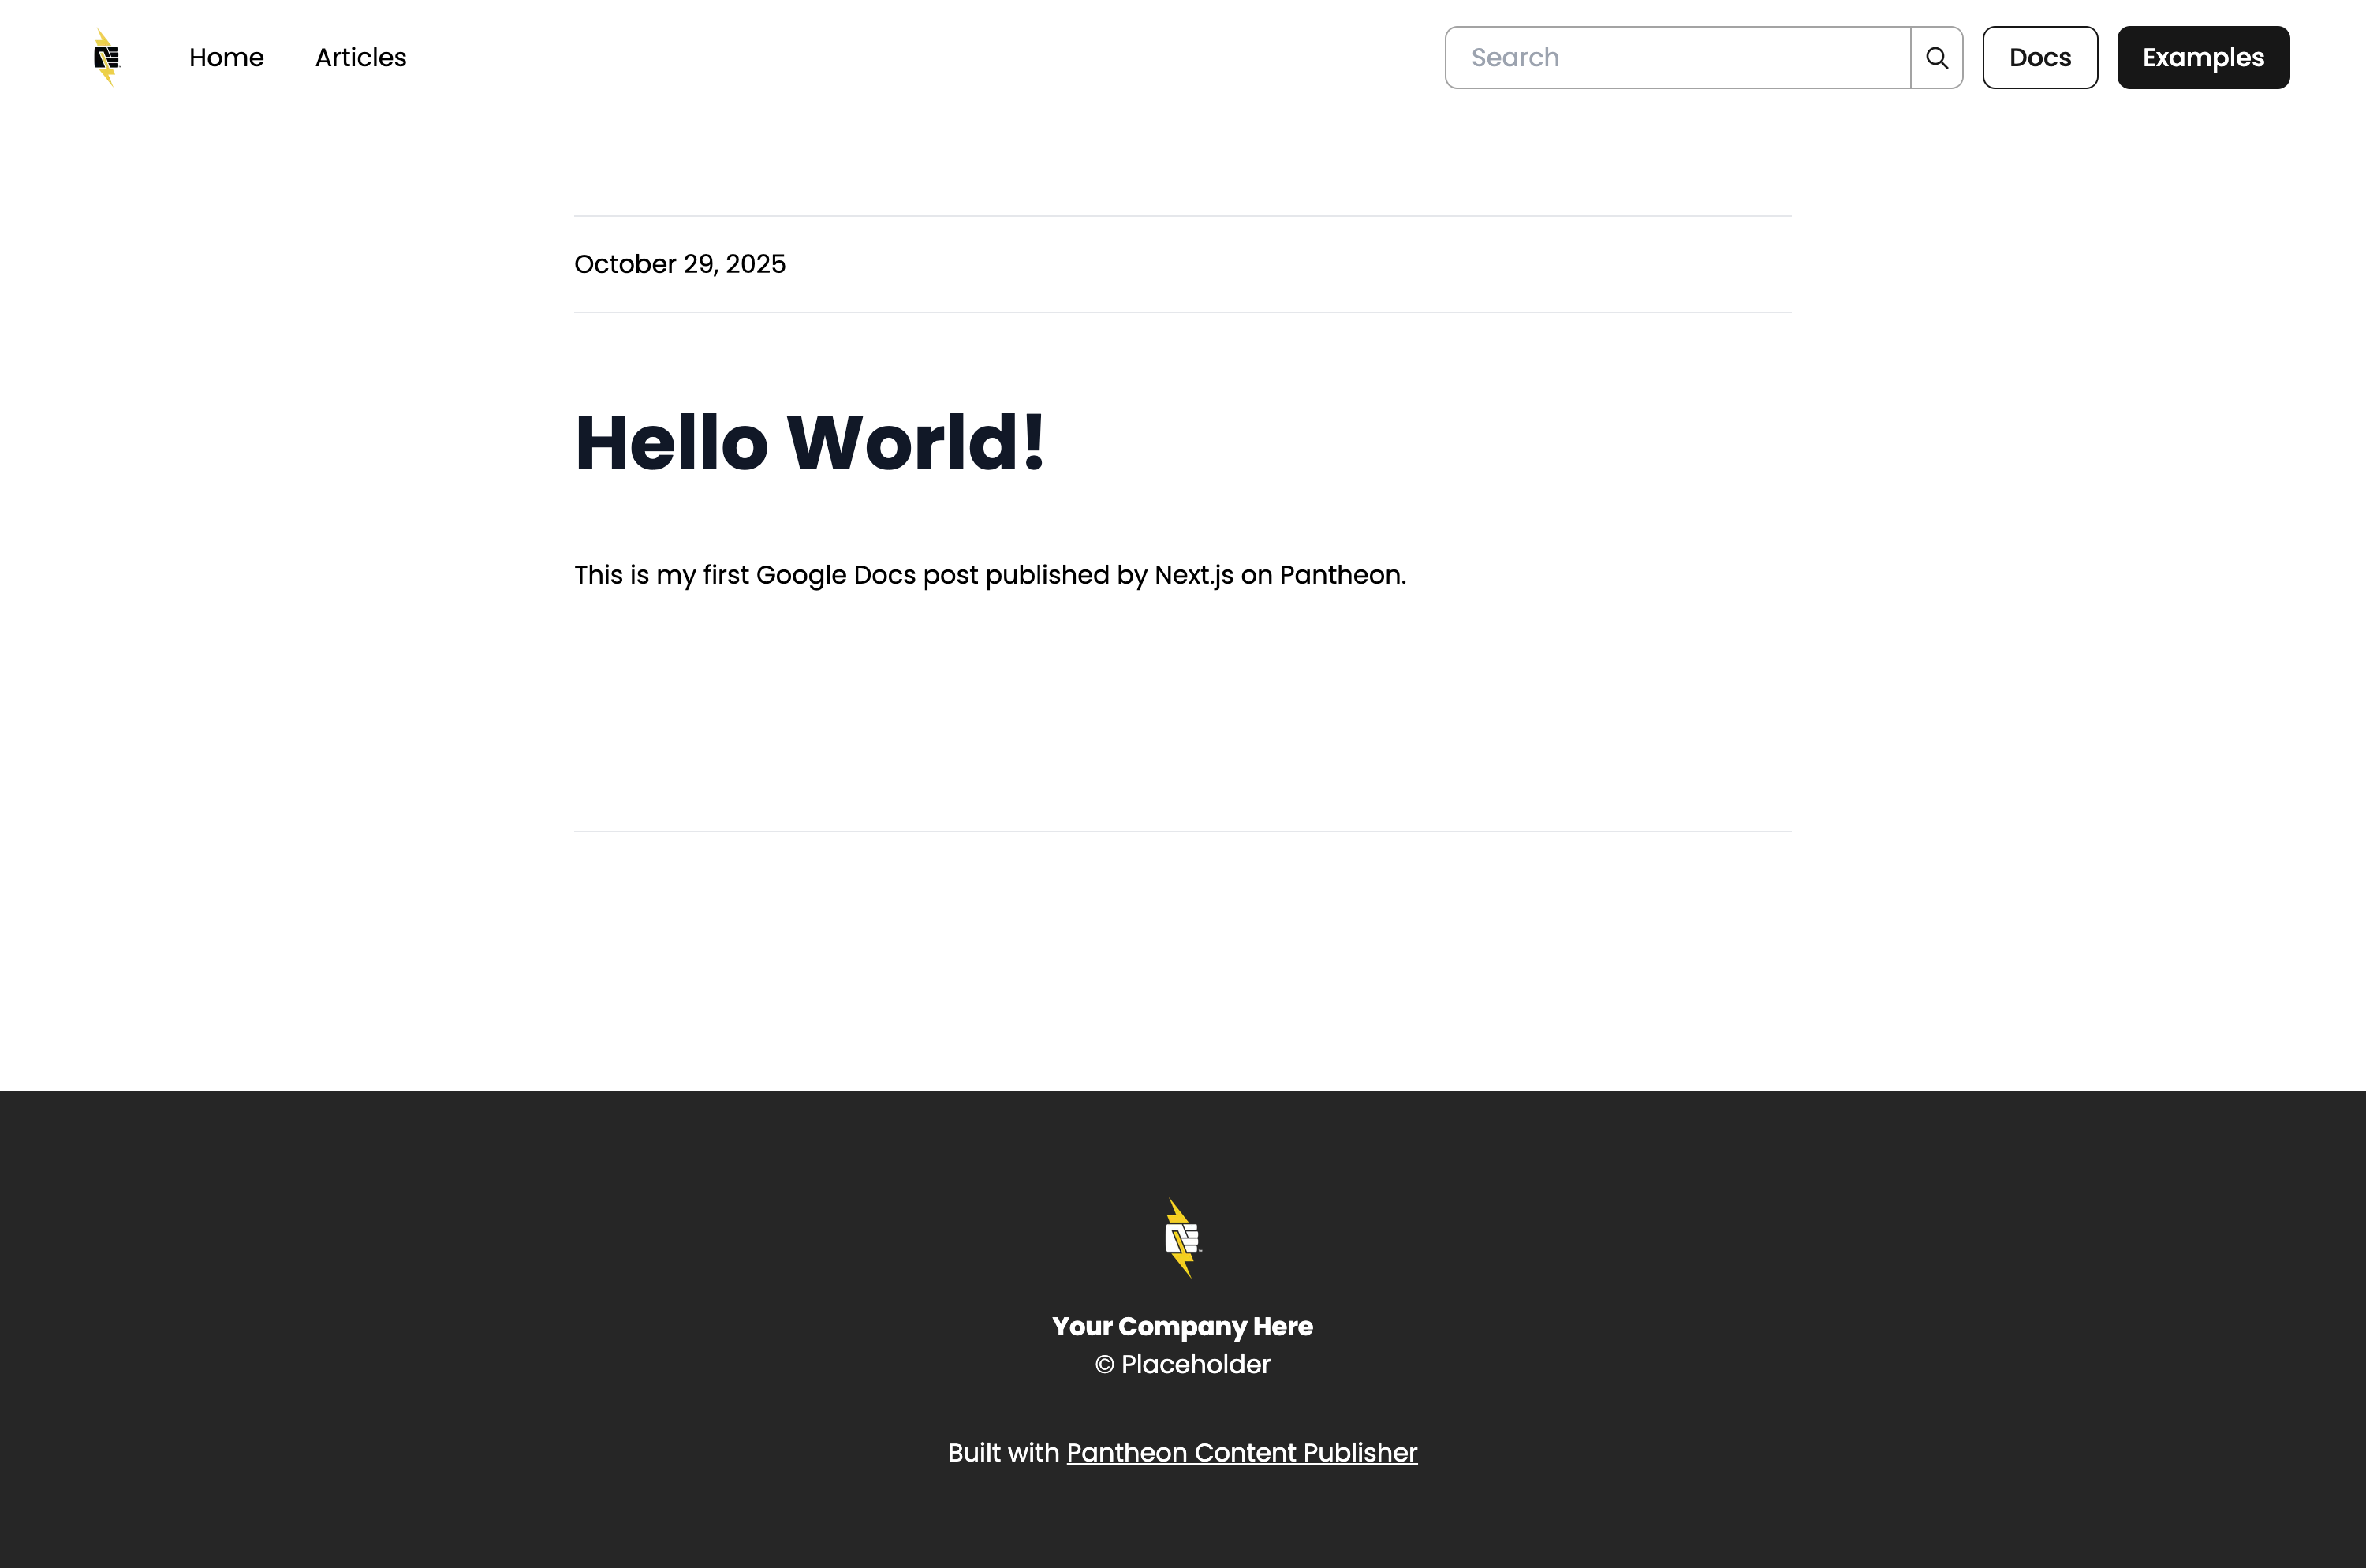
- Create a new Google Doc and connect it to your collection using the Google Docs add-on.
- Publish your new page using the add-on.
- Click View live content and you should see your new page, for example: