Get Started
Learn how to apply updates, deploy code, switch upstreams, and install Drush and WP-CLI with Terminus.
This section provides information on how to apply updates, deploy code, switch upstreams, and install Drush and WP-CLI with Terminus, as well as information on command structure and automatic site and environment detection.
Understand Commands
Basic Format
The basic format of a Terminus command is:
More Information Command
You can find more information on any command:
List of Commands
You can get a list of all available commands:
site.env
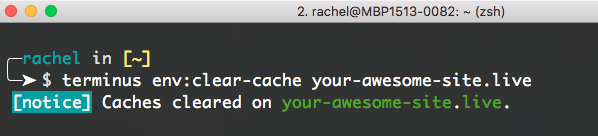
Terminus command structure typically includes <site>.<env> in order to determine the target site and environment to execute against. Note that the <> symbols are part of the example, and should not to be included in your commands. For example, running the env:clear-cache command for the Live environment of a site labeled "Your Awesome Site":
Automatic Site and Environment Detection
Terminus automatically detects the site and environment if a <site>.<env> parameter is not provided to a command that requests one. Terminus detects and operates from the local copy and current branch of the Pantheon site checked out at the current working directory.
The example above is equivalent to terminus env:info mysite.dev.
Drush and WP-CLI
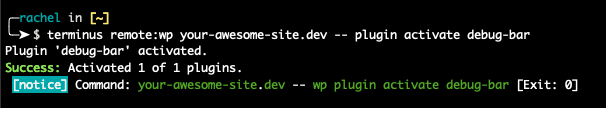
Pantheon supports Drush (Drupal) and WP-CLI (WordPress) commands remotely against a target site environment through Terminus. This is often faster and easier than leveraging such tools via local installations.
The commands to invoke Drush and WP-CLI are:
remote:drushremote:wp
- Include
--followed by the Drush or WP-CLI command and all arguments. For example:
Refer to Drupal Drush Command-Line Utility and Use WP-CLI On The Pantheon Platform for more information.
Apply Updates
You can quickly apply updates from the command line with Terminus, including updates to:
- Core
- Contributed modules
- Themes
- Plugins
Upstream Updates (Core)
Pantheon maintains upstream updates for WordPress and Drupal. Updates can be applied after they have been merged into the upstream and become available for a site.
- List available upstream updates:
If the environment's connection mode is currently set to SFTP with uncommitted work you want to keep, commit before proceeding:
The following command will permanently delete all uncommitted SFTP changes. Commit your work before proceeding if you want to keep SFTP changes.
- Set the environment's connection mode to Git to pull updates into the site from Pantheon's upstream:
- Apply available upstream updates for WordPress and Drupal core from the command line with Terminus:
Module, Theme, and Plugin Updates
Apply updates to all contributed modules, themes, and plugins via Terminus by setting the environment's connection mode to SFTP and invoking Drush (Drupal) or WP-CLI (WordPress) update commands. You can then use Terminus to commit updates to a development environment on Pantheon.
Mass Update
Terminus supports third-party plugins that extend functionality by adding new commands. The following example demonstrates the Mass Update plugin to apply upstream updates (core updates) in bulk. Refer to the Plugins section for instructions on how to install Terminus plugins.
- Install the Mass Update plugin, then use the
--dry-runoption to review available upstream updates without applying them:
The output should be similar to this:
- Resolve warning messages shown in the
--dry-runoutput by setting the connection mode to Git for each applicable site:
The following command will permanently delete all uncommitted SFTP changes. Commit your work before continuing if you want to keep SFTP changes.
- Review the output and then apply the mass update by removing the
--dry-runoption:
Deploy Code
You can use Terminus to test a new set of changes by deploying code from development environments up to the Test environment while pulling the database and files down from Live.
- Run the command below to deploy the code:
- Clear the site after each deployment:
- Test the changes, and then use Terminus to deploy code from Test up to Live:
- Clear the site after each deployment:
Reset Dev Environment to Live
There are a few scenarios where it may be useful to reset your Dev environment (codebase, files, and database) to your Live state:
-
Development work that is not ready to go live has been committed directly to the Dev environment, blocking the deployment pipeline for other work ready to be deployed. After preserving work in progress on a local branch or on a Multidev environment,you can unblock deploys by resetting the Dev environment to reflect the Live environment state.
-
Code changes were force-pushed or incorrectly merged into the Dev environment creating a large or complex Git history that you wish to undo.
-
The state of the Dev environment is stale or out of date with the Live environment with many unneeded changes you want to abandon.
-
The Dev environment has been seriously corrupted and you would like to cleanly reset it to Live.
Switch Upstreams
Every site has an assigned upstream to deliver one-click updates in the Pantheon Site Dashboard. Terminus can be used to manage this site-level configuration. There are a few scenarios where it may be useful to change a site's upstream:
- Convert existing sites from a default framework to a Custom Upstream.
- Convert existing sites from one Custom Upstream to another, for reasons such as:
- Repository has been migrated from Bitbucket to Github, or vice versa.
- Code has been refactored and moved to a new repository.
- Set an empty upstream to disable one-click updates for sites managed by Composer.
- Run the command below to see all available upstreams:
If your Workspace has a Custom Upstream, you can use Terminus to switch existing sites over to the common codebase:
- Use any valid identifier (upstream name, upstream machine name, upstream UUID) returned in
terminus upstream:listto set a new upstream. For example, the upstream name "My Custom Upstream" is used above.
As a safeguard, Terminus will prevent a framework switch such as moving from Drupal to WordPress or vice versa.
Refer to Serving Sites from the Web Subdirectory to set an empty upstream for Composer-managed sites.
- Apply updates to the site to bring in the new codebase after setting the upstream. Refer to the example usage above for information on how to apply updates.
Troubleshoot Upstreams
Terminus Error: Permission to change the upstream of this site
If you encounter this error when setting a site's upstream:
-
Confirm that the authenticated user account has the correct site-level permissions.
-
Check the currently authenticated user: