Install WP SAML Auth
Install the WP SAML Auth plugin
In this step, we'll install the WP SAML Auth plugin and bring up the settings page, which provides values we'll need later.
Choose Your Environment
If your site has Multidev enabled, we suggest working in a new multidev environment to avoid conflicting with the work of other developers on your team. Otherwise, you'll be working from the Dev environment.
If you're using Terminus, set the $env variable to your multidev environment, or dev if not:
Set the Connection Mode
This guide assumes you're working on Pantheon, as opposed to a local development environment. To that end, make sure the connection mode for your working environment is set to SFTP. You can do this from the Pantheon Site Dashboard, or with Terminus:
Install the Plugin
From the WordPress Admin dashboard, go to Plugins and click on Add new. Search for the keywords "wp saml auth" and install the plugin provided by Pantheon. Once installed, activate it.
If you're using Terminus, you can install the plugin with WP-CLI:
Good developers commit after every set of like changes. Commit your changes to version control from the Pantheon Site Dashboard, or with Terminus:
Plugin Settings and Values
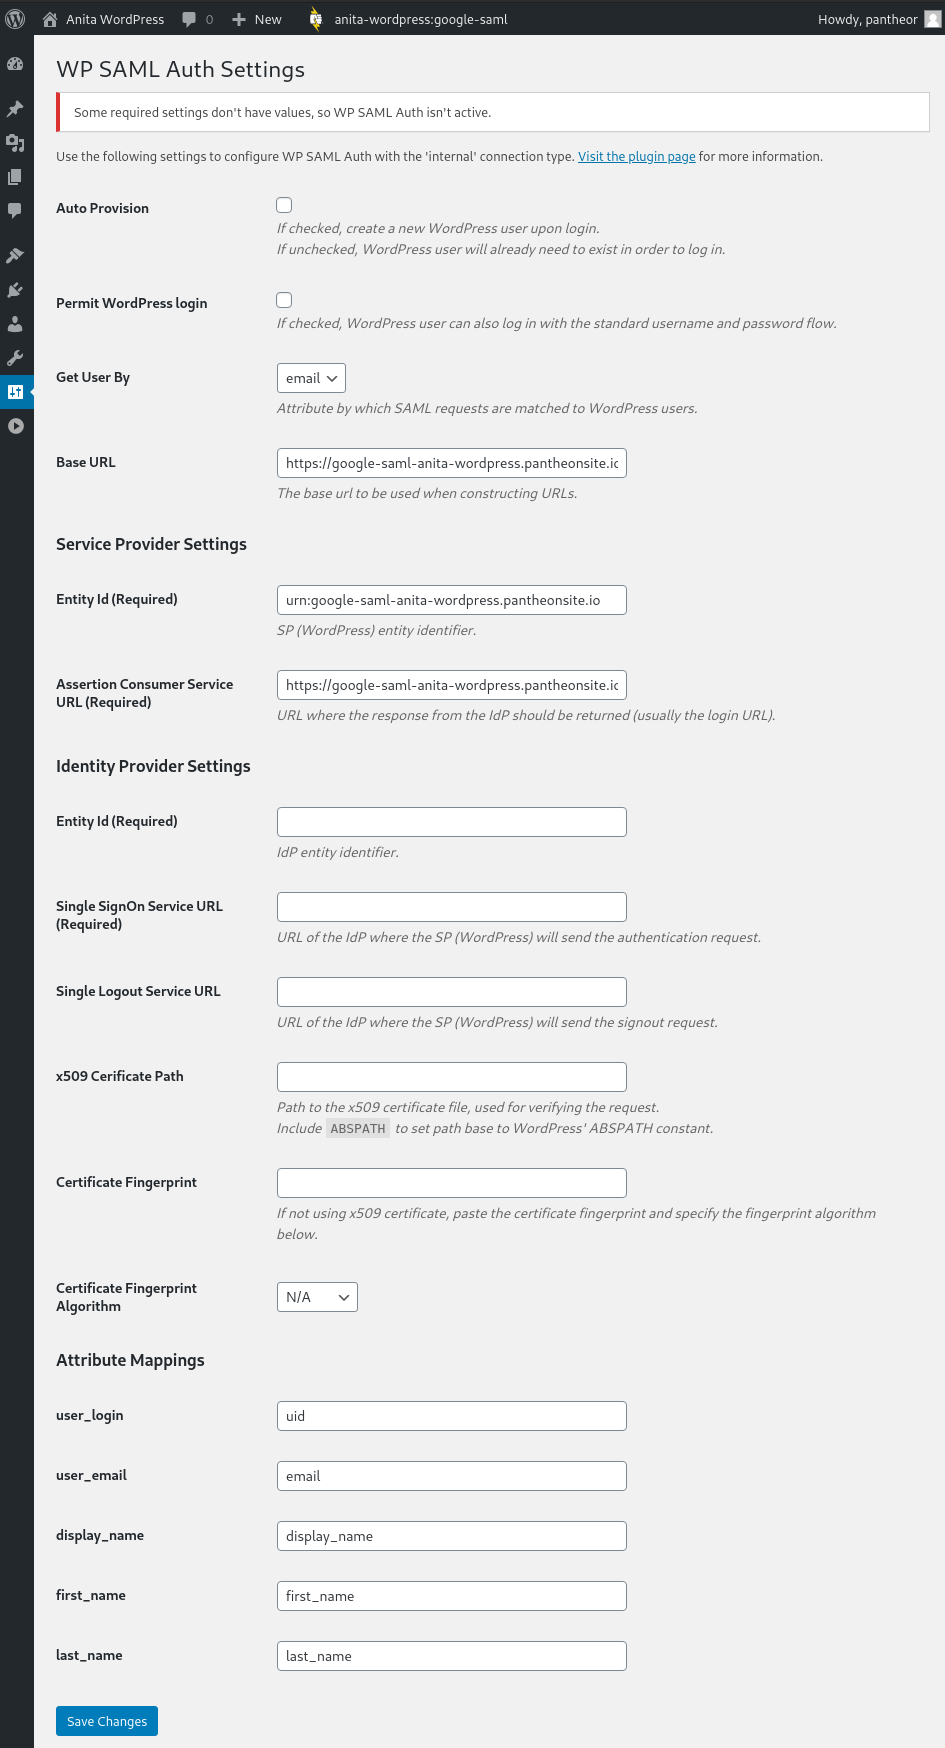
Open the plugin's settings page (/wp-admin/options-general.php?page=wp-saml-auth-settings):
Note that some fields are already filled in, and some are empty. Leave this page open in a separate tab or window, as we'll be referencing and adding to this page in the following steps.
