Create a SAML App
Define a SAML app in the Google Admin dashboard to which you can connect your WordPress site
In this step, we'll create a custom Google Apps SAML application. This will be the gateway between the users in our Google organization and WordPress. We'll also define which Google users have access to the app.
Define a new app in Google Workspace Admin Console
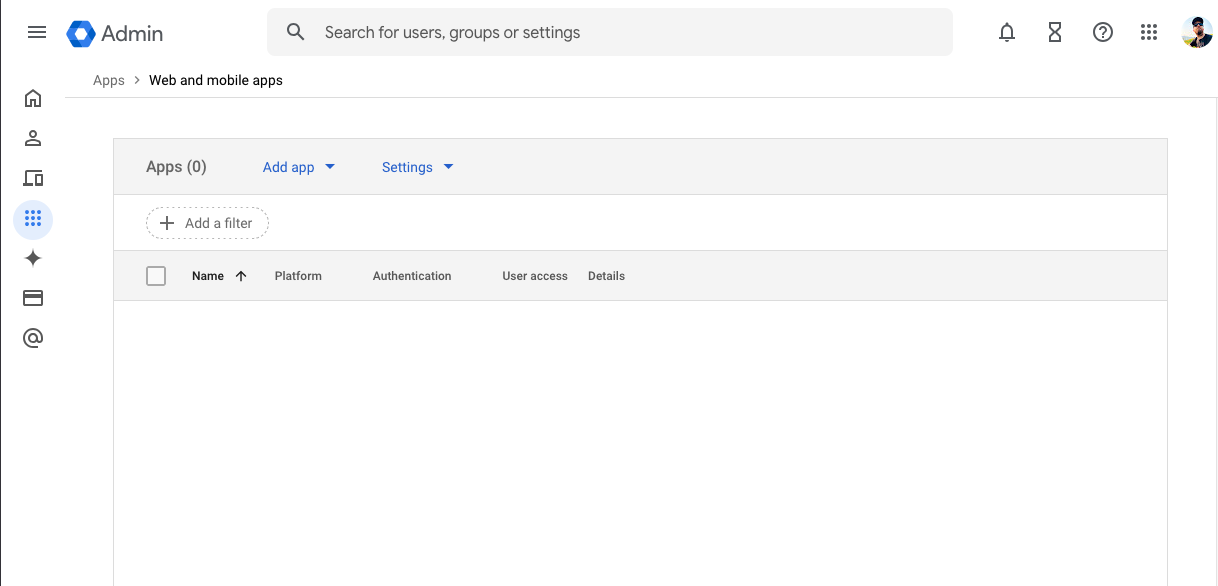
- Find the Web and mobile apps dashboard in the Google Apps admin, and click Add app:
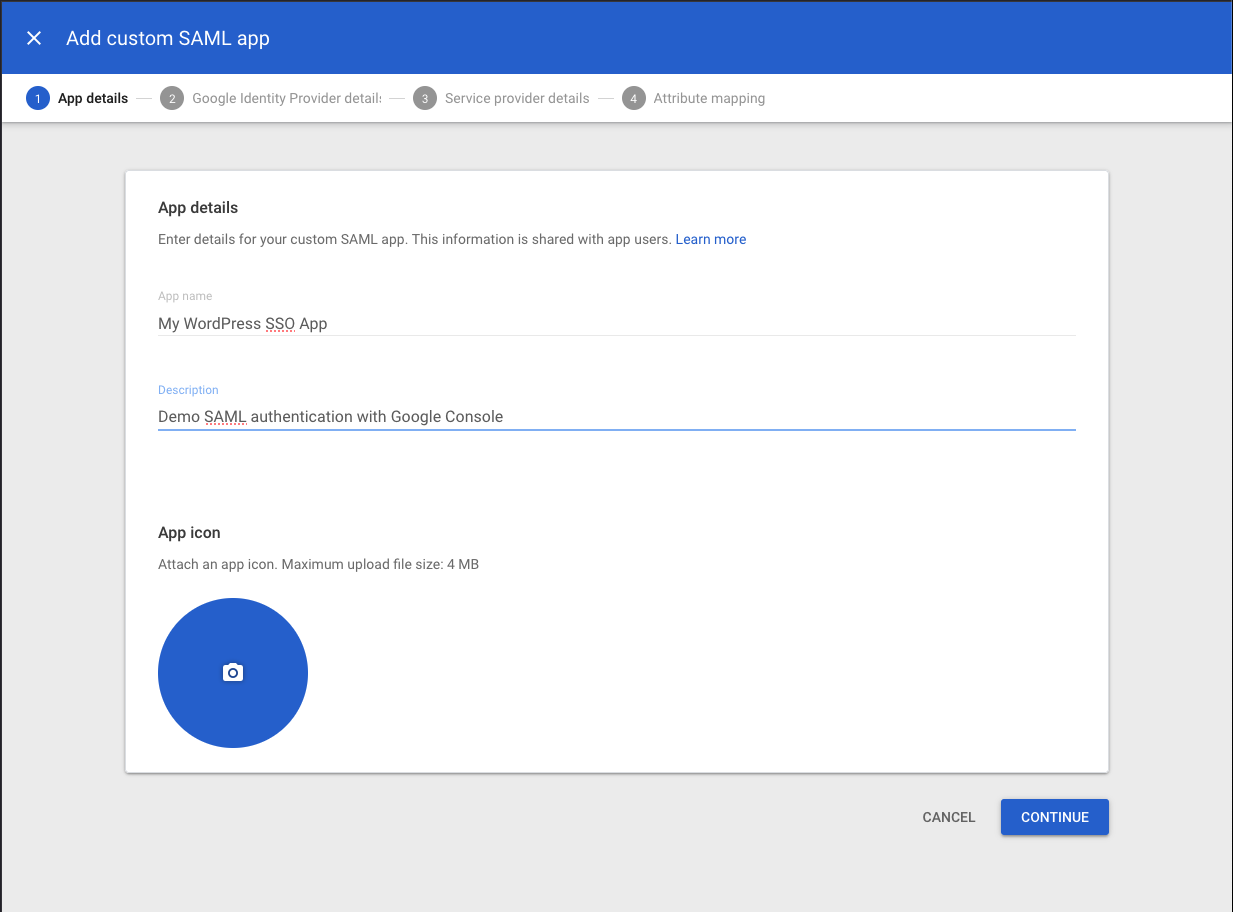
- In the dropdown, click Add custom SAML app:

- Enter a name and description for your app, then click Continue. This is purely for your own reference and is most important if you have multiple SAML apps defined. You can also upload a logo:
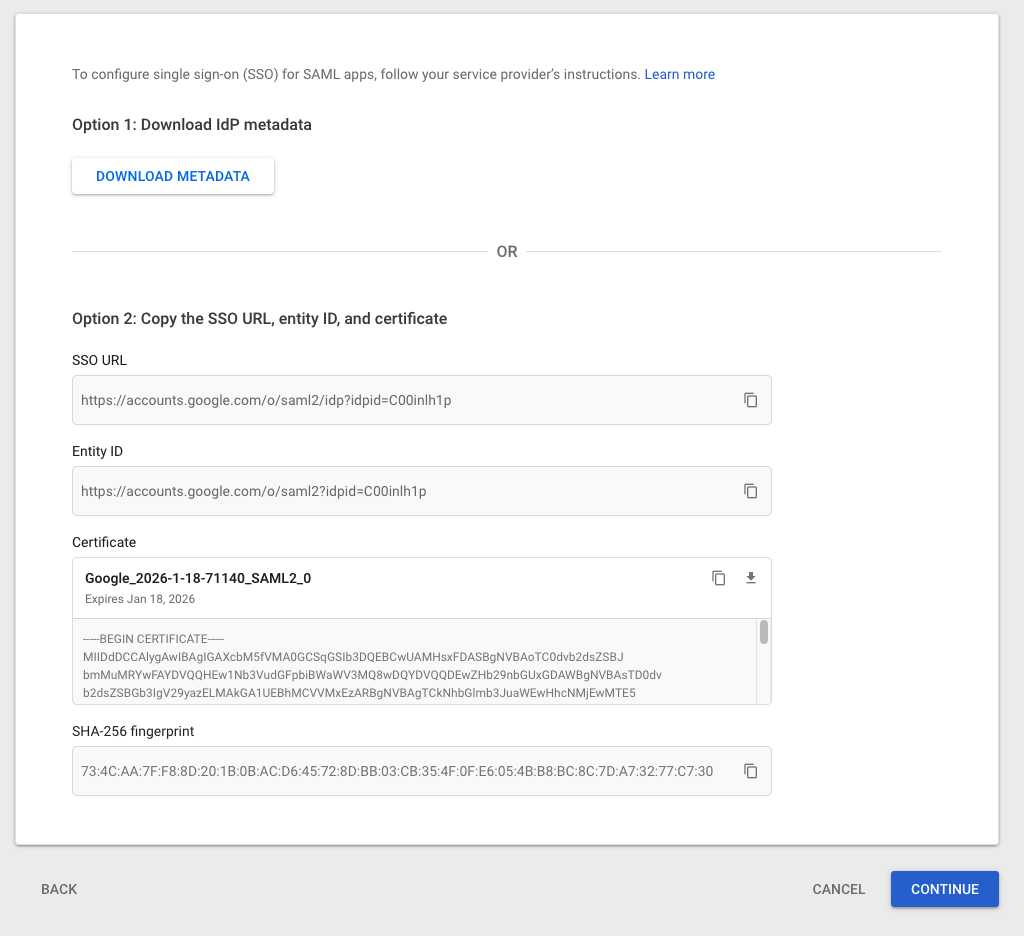
IdP Information
-
The Google IdP Information appears on the next page and provides values and a certificate to pass back to the WP SAML Auth plugin. The key details are in the Option 2 section:
-
SSO URL: URL for WordPress to redirect to when initiating the SSO process.
-
Entity ID: How WordPress knows to recognize Google Apps.
-
Certificate - How Google Apps knows to trust a request coming from WordPress.
-
-
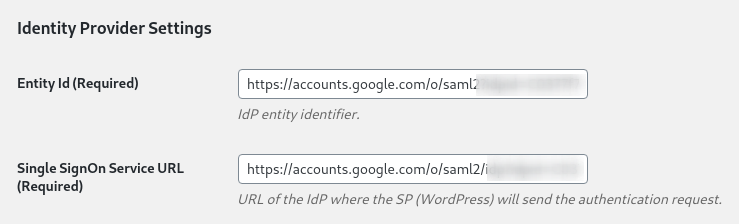
Copy the SSO URL and Entity ID values and paste them into the corresponding fields under Identity Provider Settings on the plugin settings page:
- Download and commit the certificate file to your
privatedirectory so it's inaccessible from the web. You can add upload this file over sftp, or commit it to a local clone of the Git repository, then commit and push. If the latter, you will need to first switch the connection mode to Git:
- Add the certificate path to the WP SAML Auth plugin settings, using the
ABSPATHvariable:

- Click Save Changes on the plugin settings page, and Continue on the Google App modal.
Service Provider Information
- The Service Provider Details page asks for information from the WP SAML Auth plugin, which is the SAML service provider for our WordPress site. Refer back to the plugin settings page for the ACS (Assertion Consumer Service) URL, Entity ID, and Start URL (listed as Base URL). Copy and paste these values:
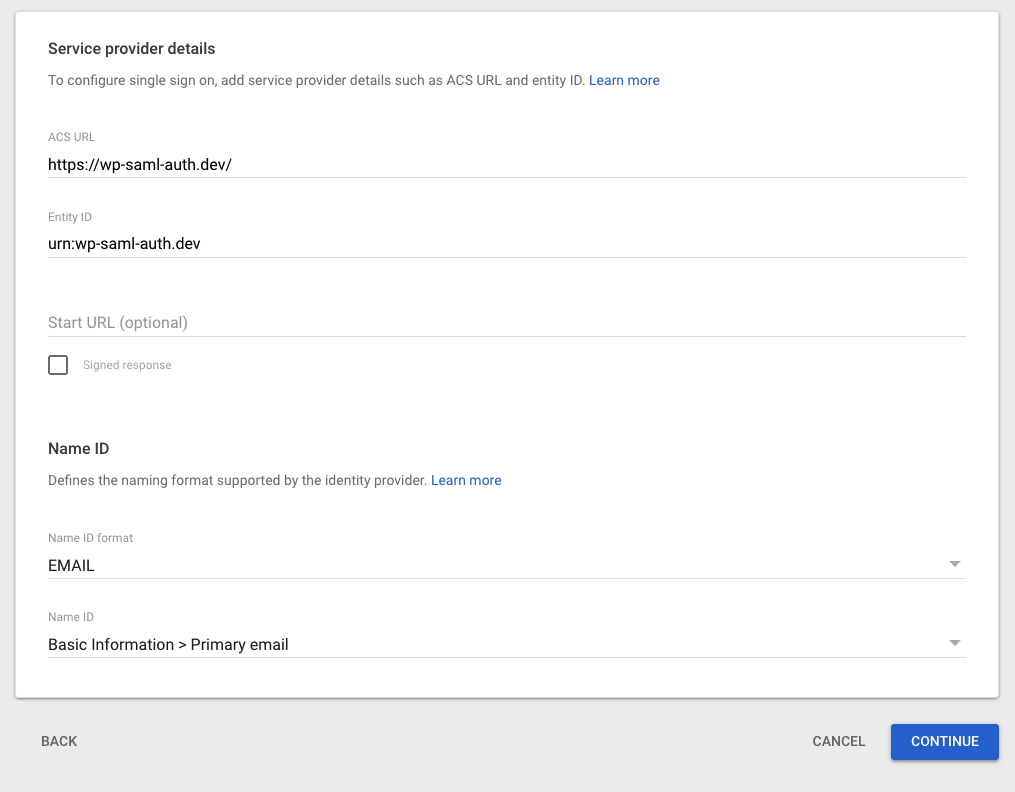
Once you've filled out these fields, click Continue.
Attribute Mapping
-
On the Attributes page, you'll need to specify any attributes you'd like Google Apps to return in the SAML response, and then keys you'd like to use for those attributes.
Without any additional configuration, WP SAML Auth understands this attribute mapping:
- SAML IdP (Google Apps) -> WordPress
email->user_emailuid->user_loginfirst_name->first_namelast_name->last_name
Click Add Mapping, and map at least one identifying attribute. Using email as an example:

- Click FINISH and your application is created.
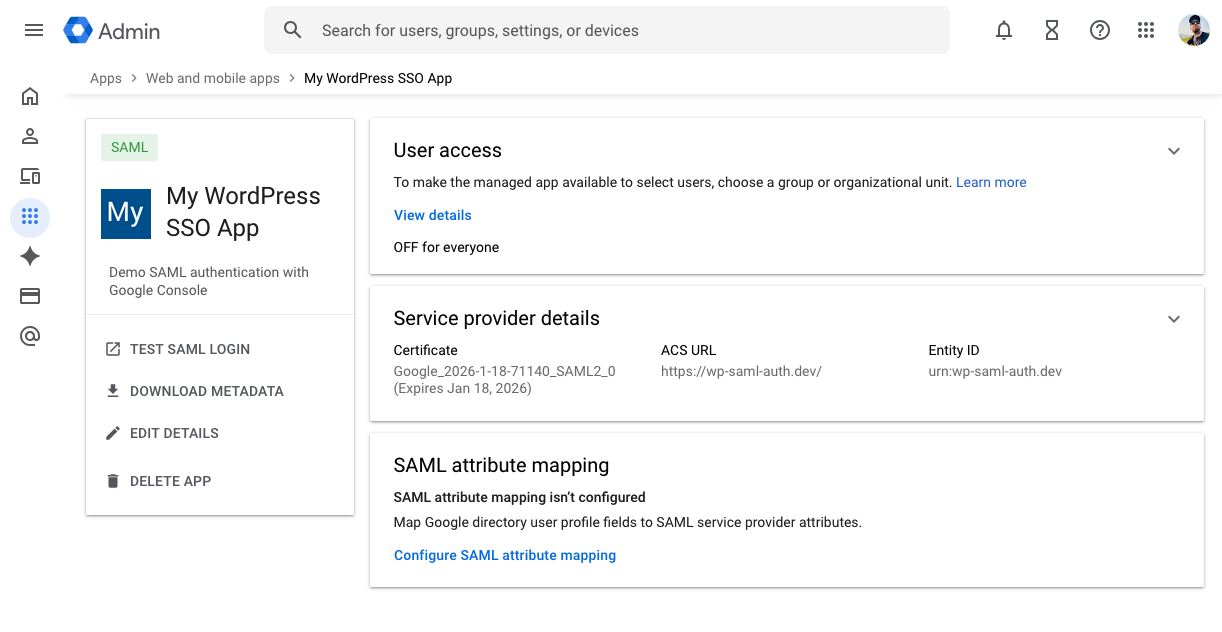
Turn on user access
Before you can use the SAML SSO for Google Workspace, you will need to turn the app on for your users. By default, newly created SAML apps are off for all users. After creating the app, you will be directed to a page for your SAML app, but you can get there from the Web and mobile apps dashboard.
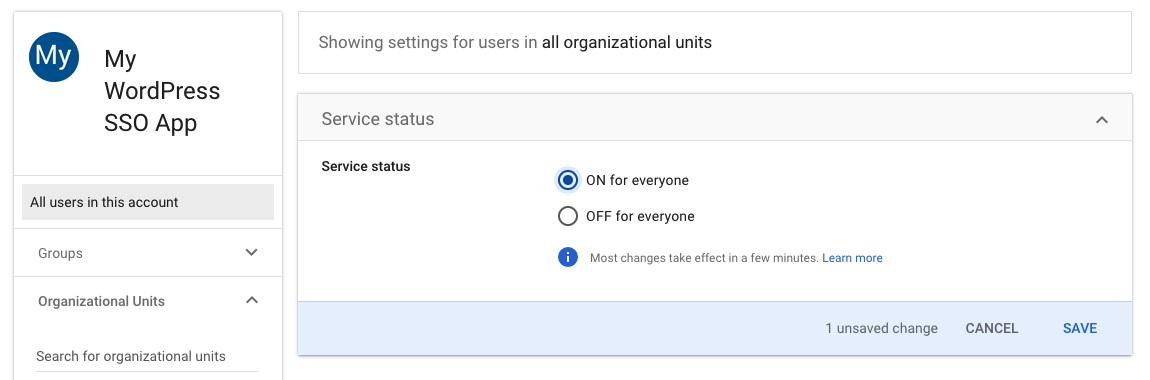
- Click on the Expand User Access down arrow at the top right of the User access section:
- Toggle the Service status to ON for everyone or select specific organizational units to enable the app for. Click Save.
You can now use your Google Workspace login to access your WordPress site!