Create a Site Using a Custom Upstream
Build a new site using a template.
Custom Upstreams act as a scaffold for new sites, allowing developers and site owners of any skill level to kickoff projects at warp speed.
Instead of repeating the same technical work on each individual site, you can build and maintain a common user interface with unified branding and functionality once, in a single source.
Create the Dev Environment
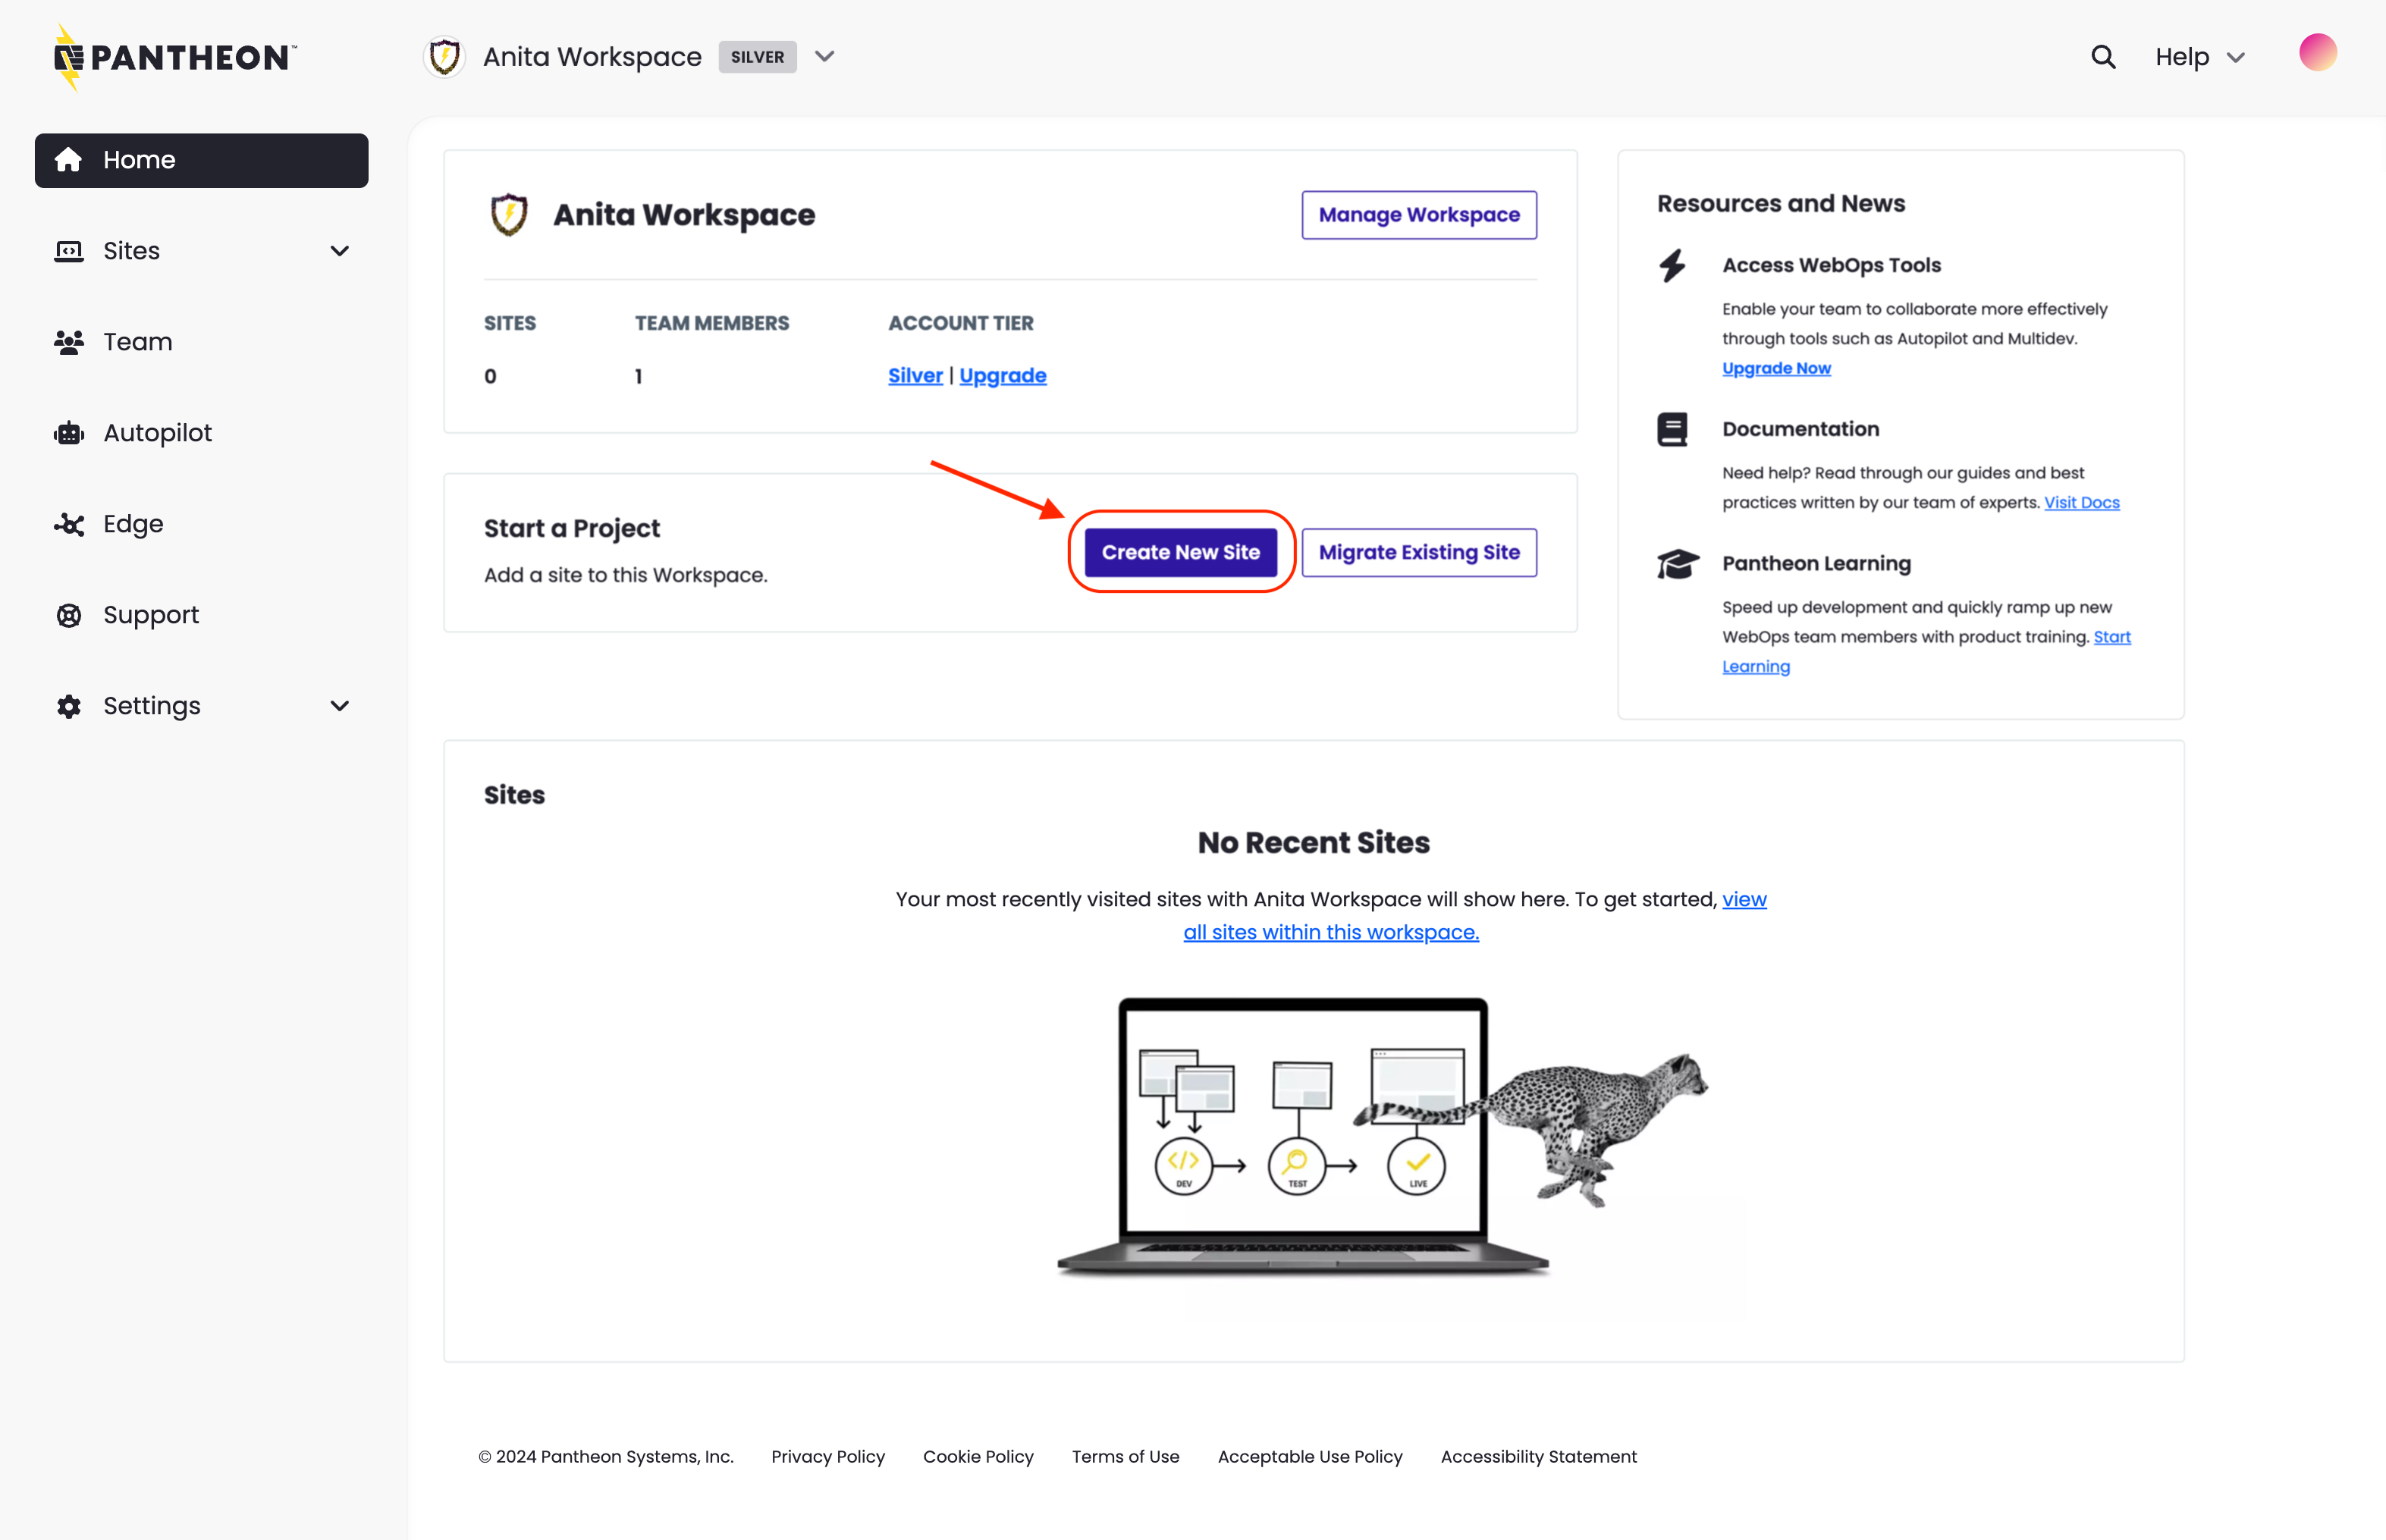
To create a site using a Custom Upstream:
-
Go to the Professional Workspace that contains the Custom Upstream, and select the Create New Site button:
-
Select Custom Upstream.
-
Select the upstream you wish to use.
-
Enter the name and select a region for this site, then click Continue. It can take several minutes to create a new site on Pantheon.
 Information:Note
You can navigate away from this page during this process, but later, you'll have to go to the Sites tab to access your site. If possible, stay on this tab to simplify accessing the site when the creation is complete.
-
Click Visit your Pantheon Site Dashboard when the process is complete.
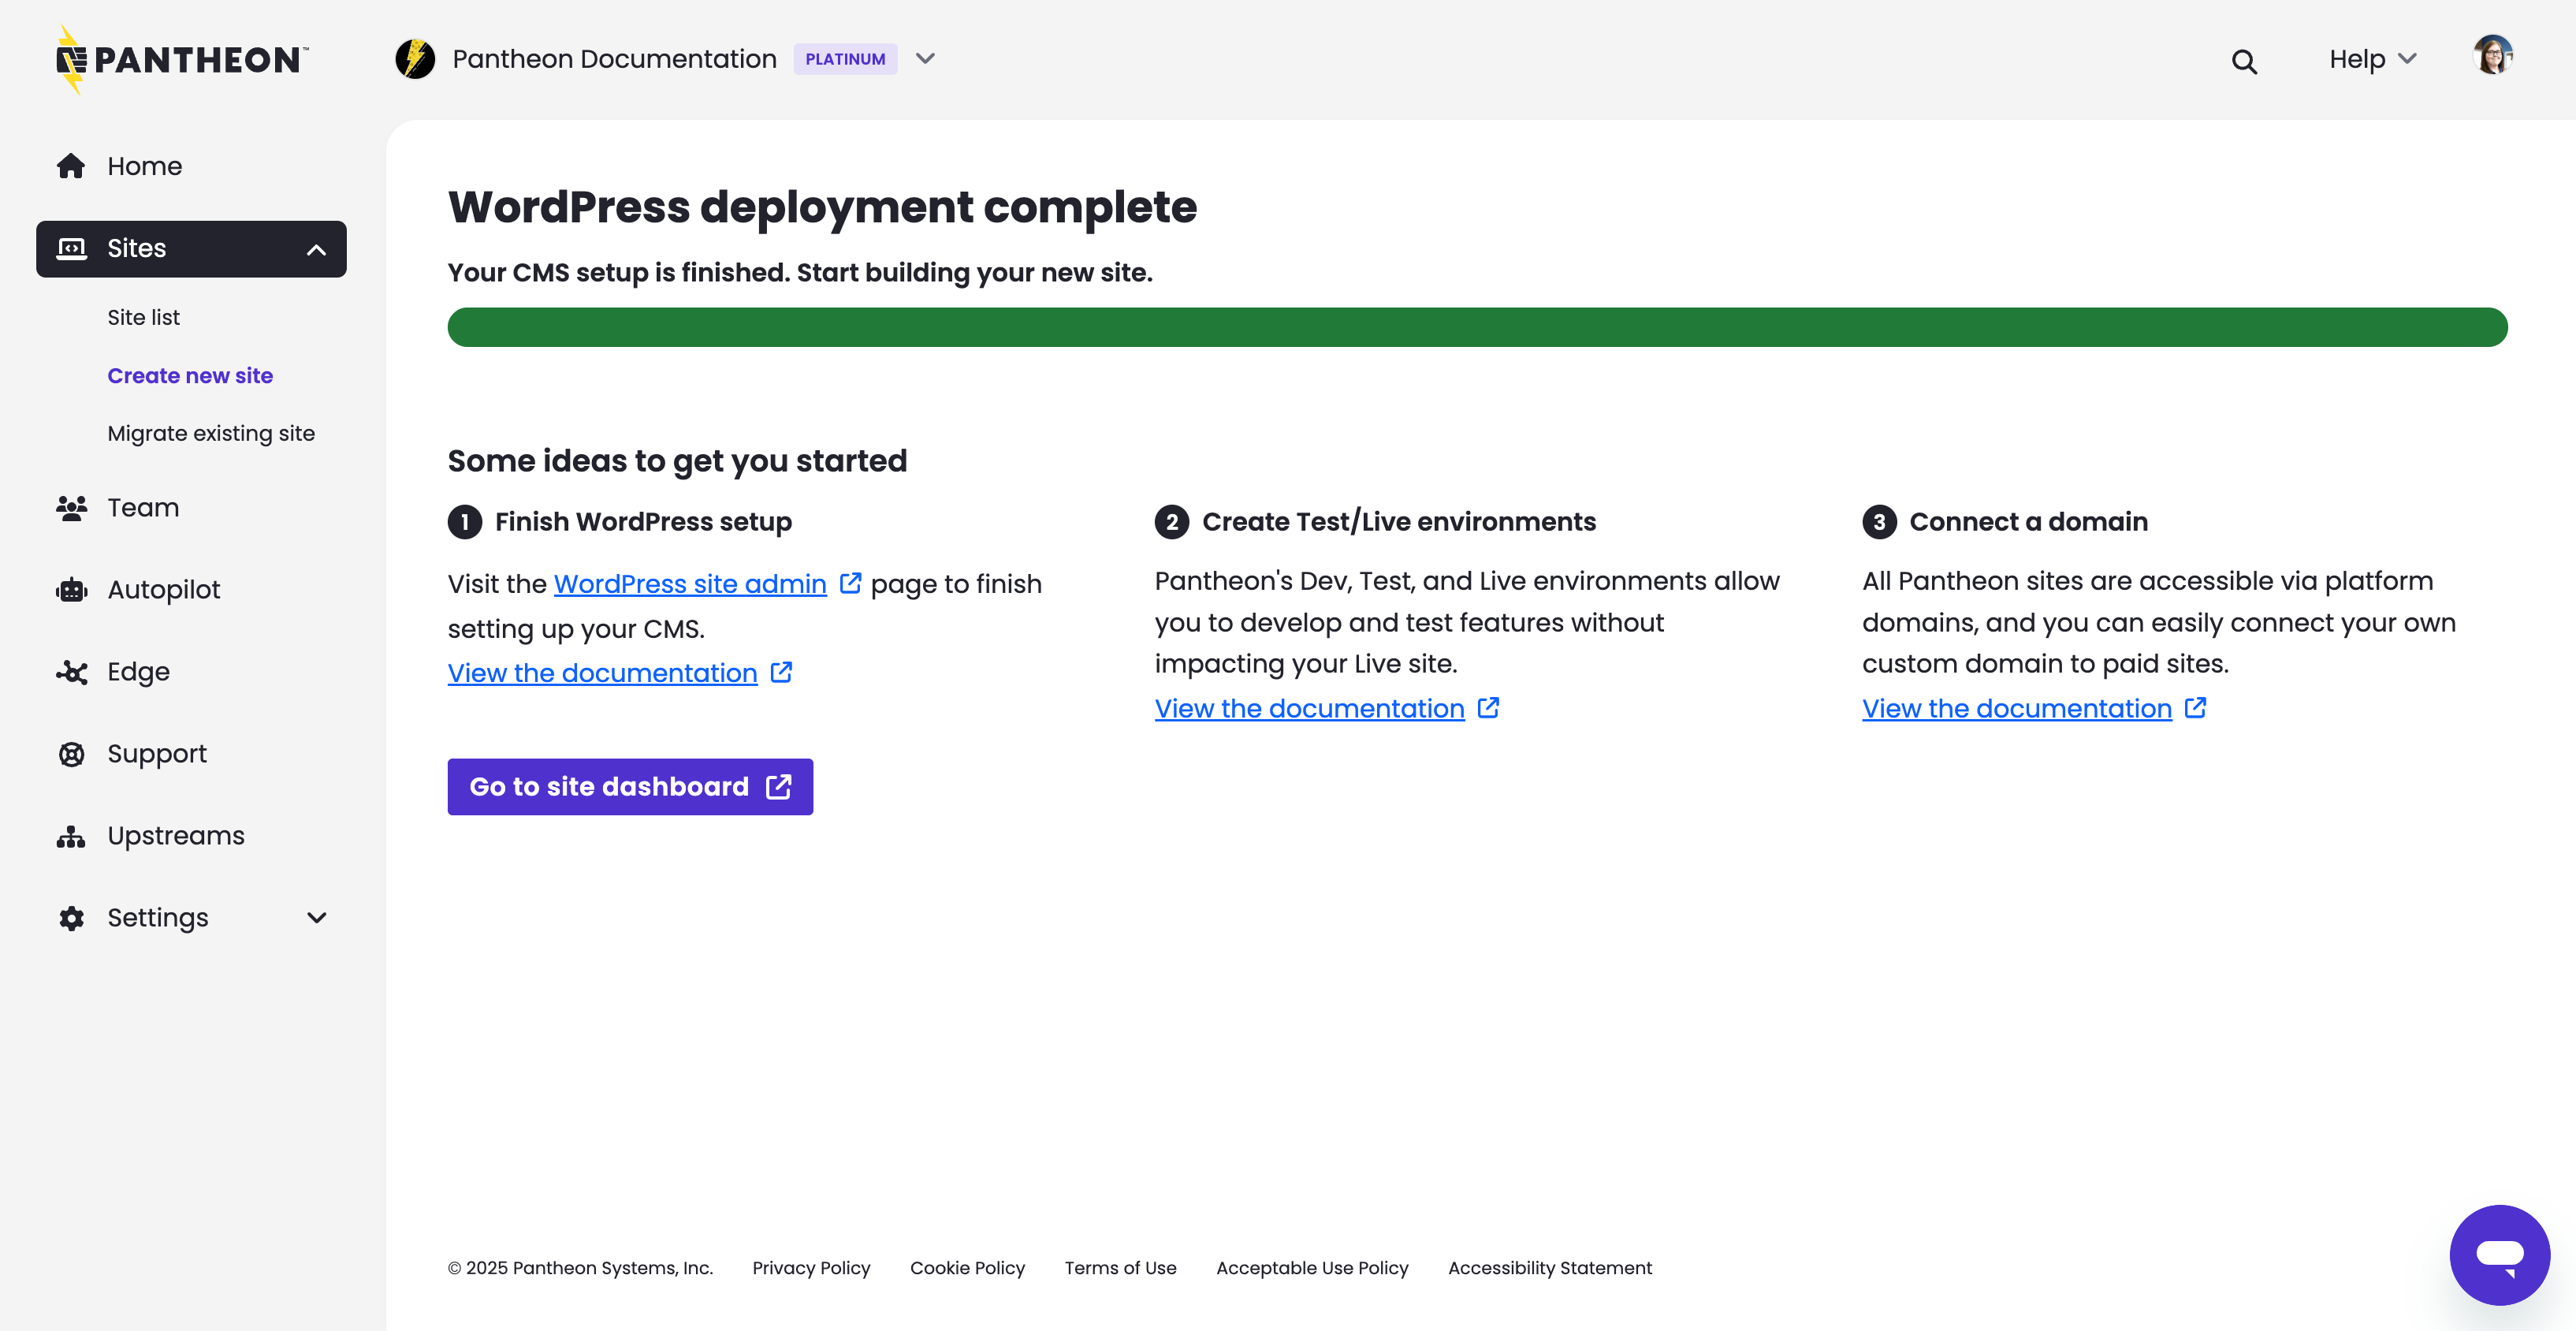
You've now created the core portion of your Dev environment; now you have to install the CMS.
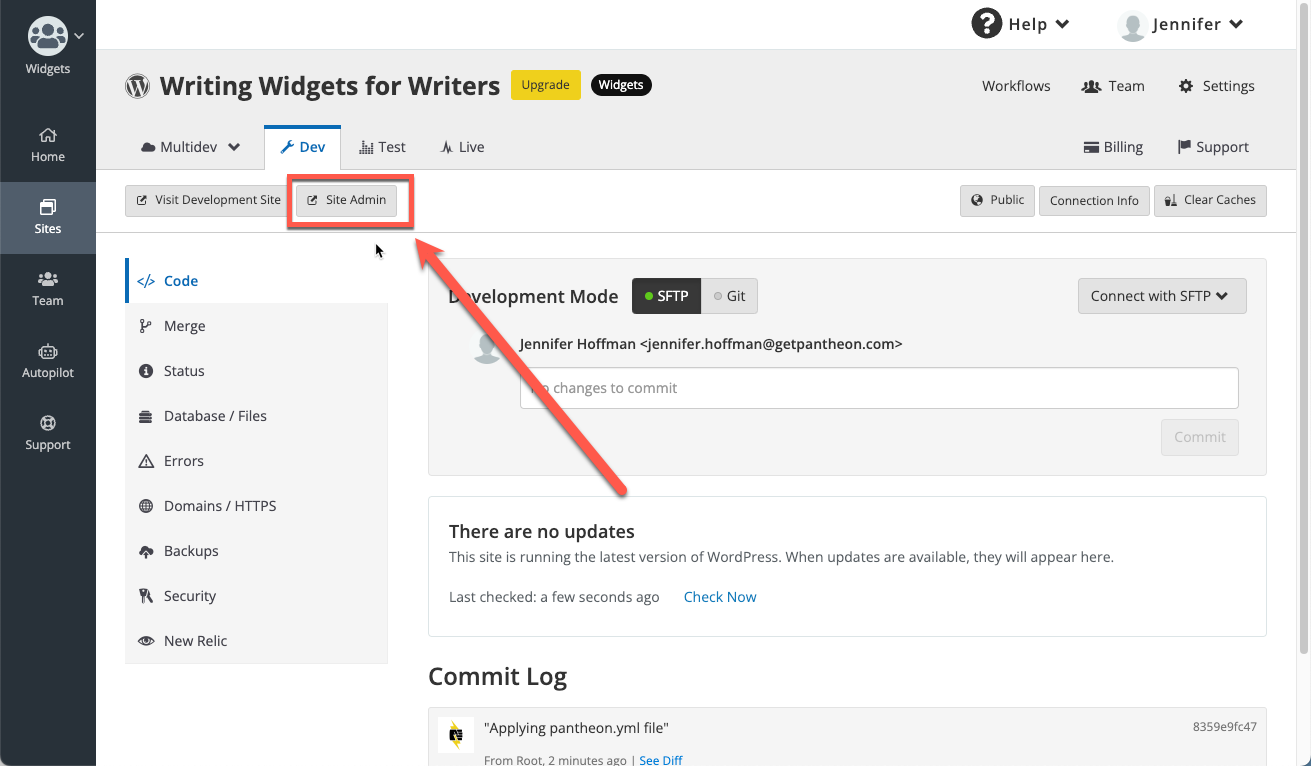
-
Click Site Admin.
-
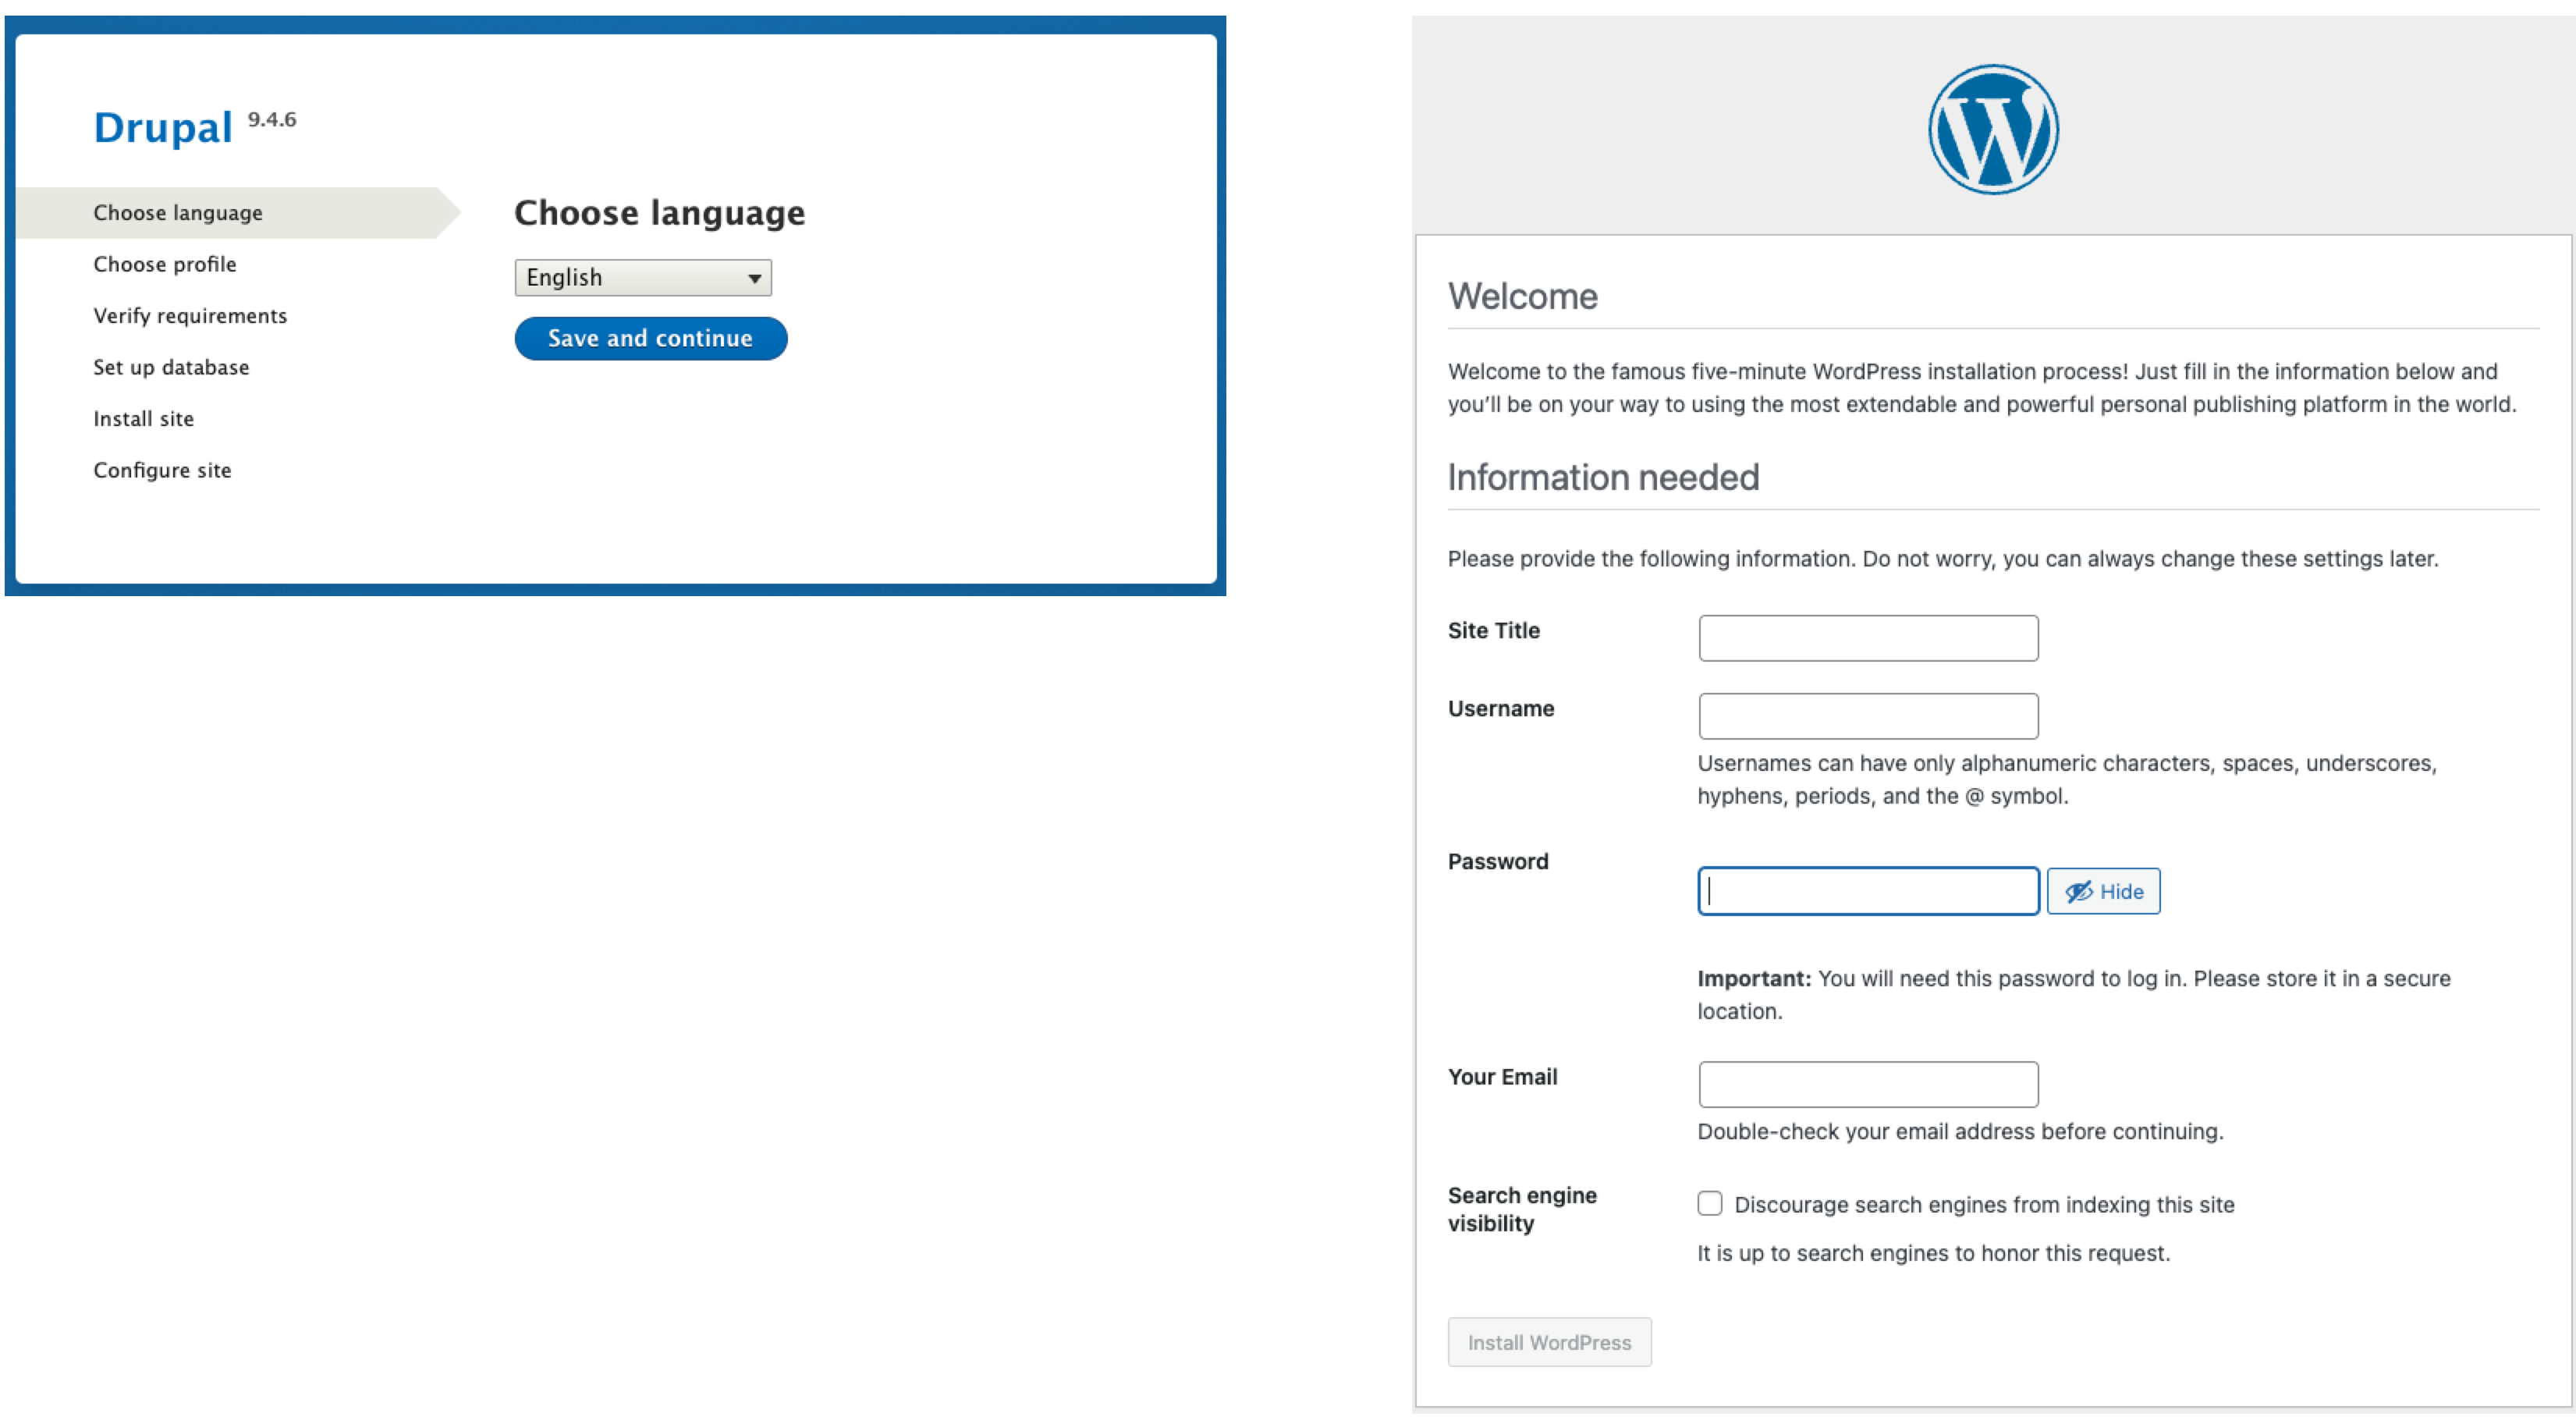
You will be presented with either a Drupal or WordPress setup screen. You may also see an interstitial warning message when visiting an environment for the first time.
-
Enter the information on the screen, and when done, return to the browser tab containing your Site Dashboard.
Information:NoteBe sure to record your new username and password. You will use this to log in to your CMS in all environments (Dev, Test, Live).
You have successfully finished adding a site in its Dev environment. Click Visit Dev Site to view your site.
Initialize the Test environment
To create your Test environment:
-
Click the Test tab, then click Initialize Test Environment to create your Test environment.
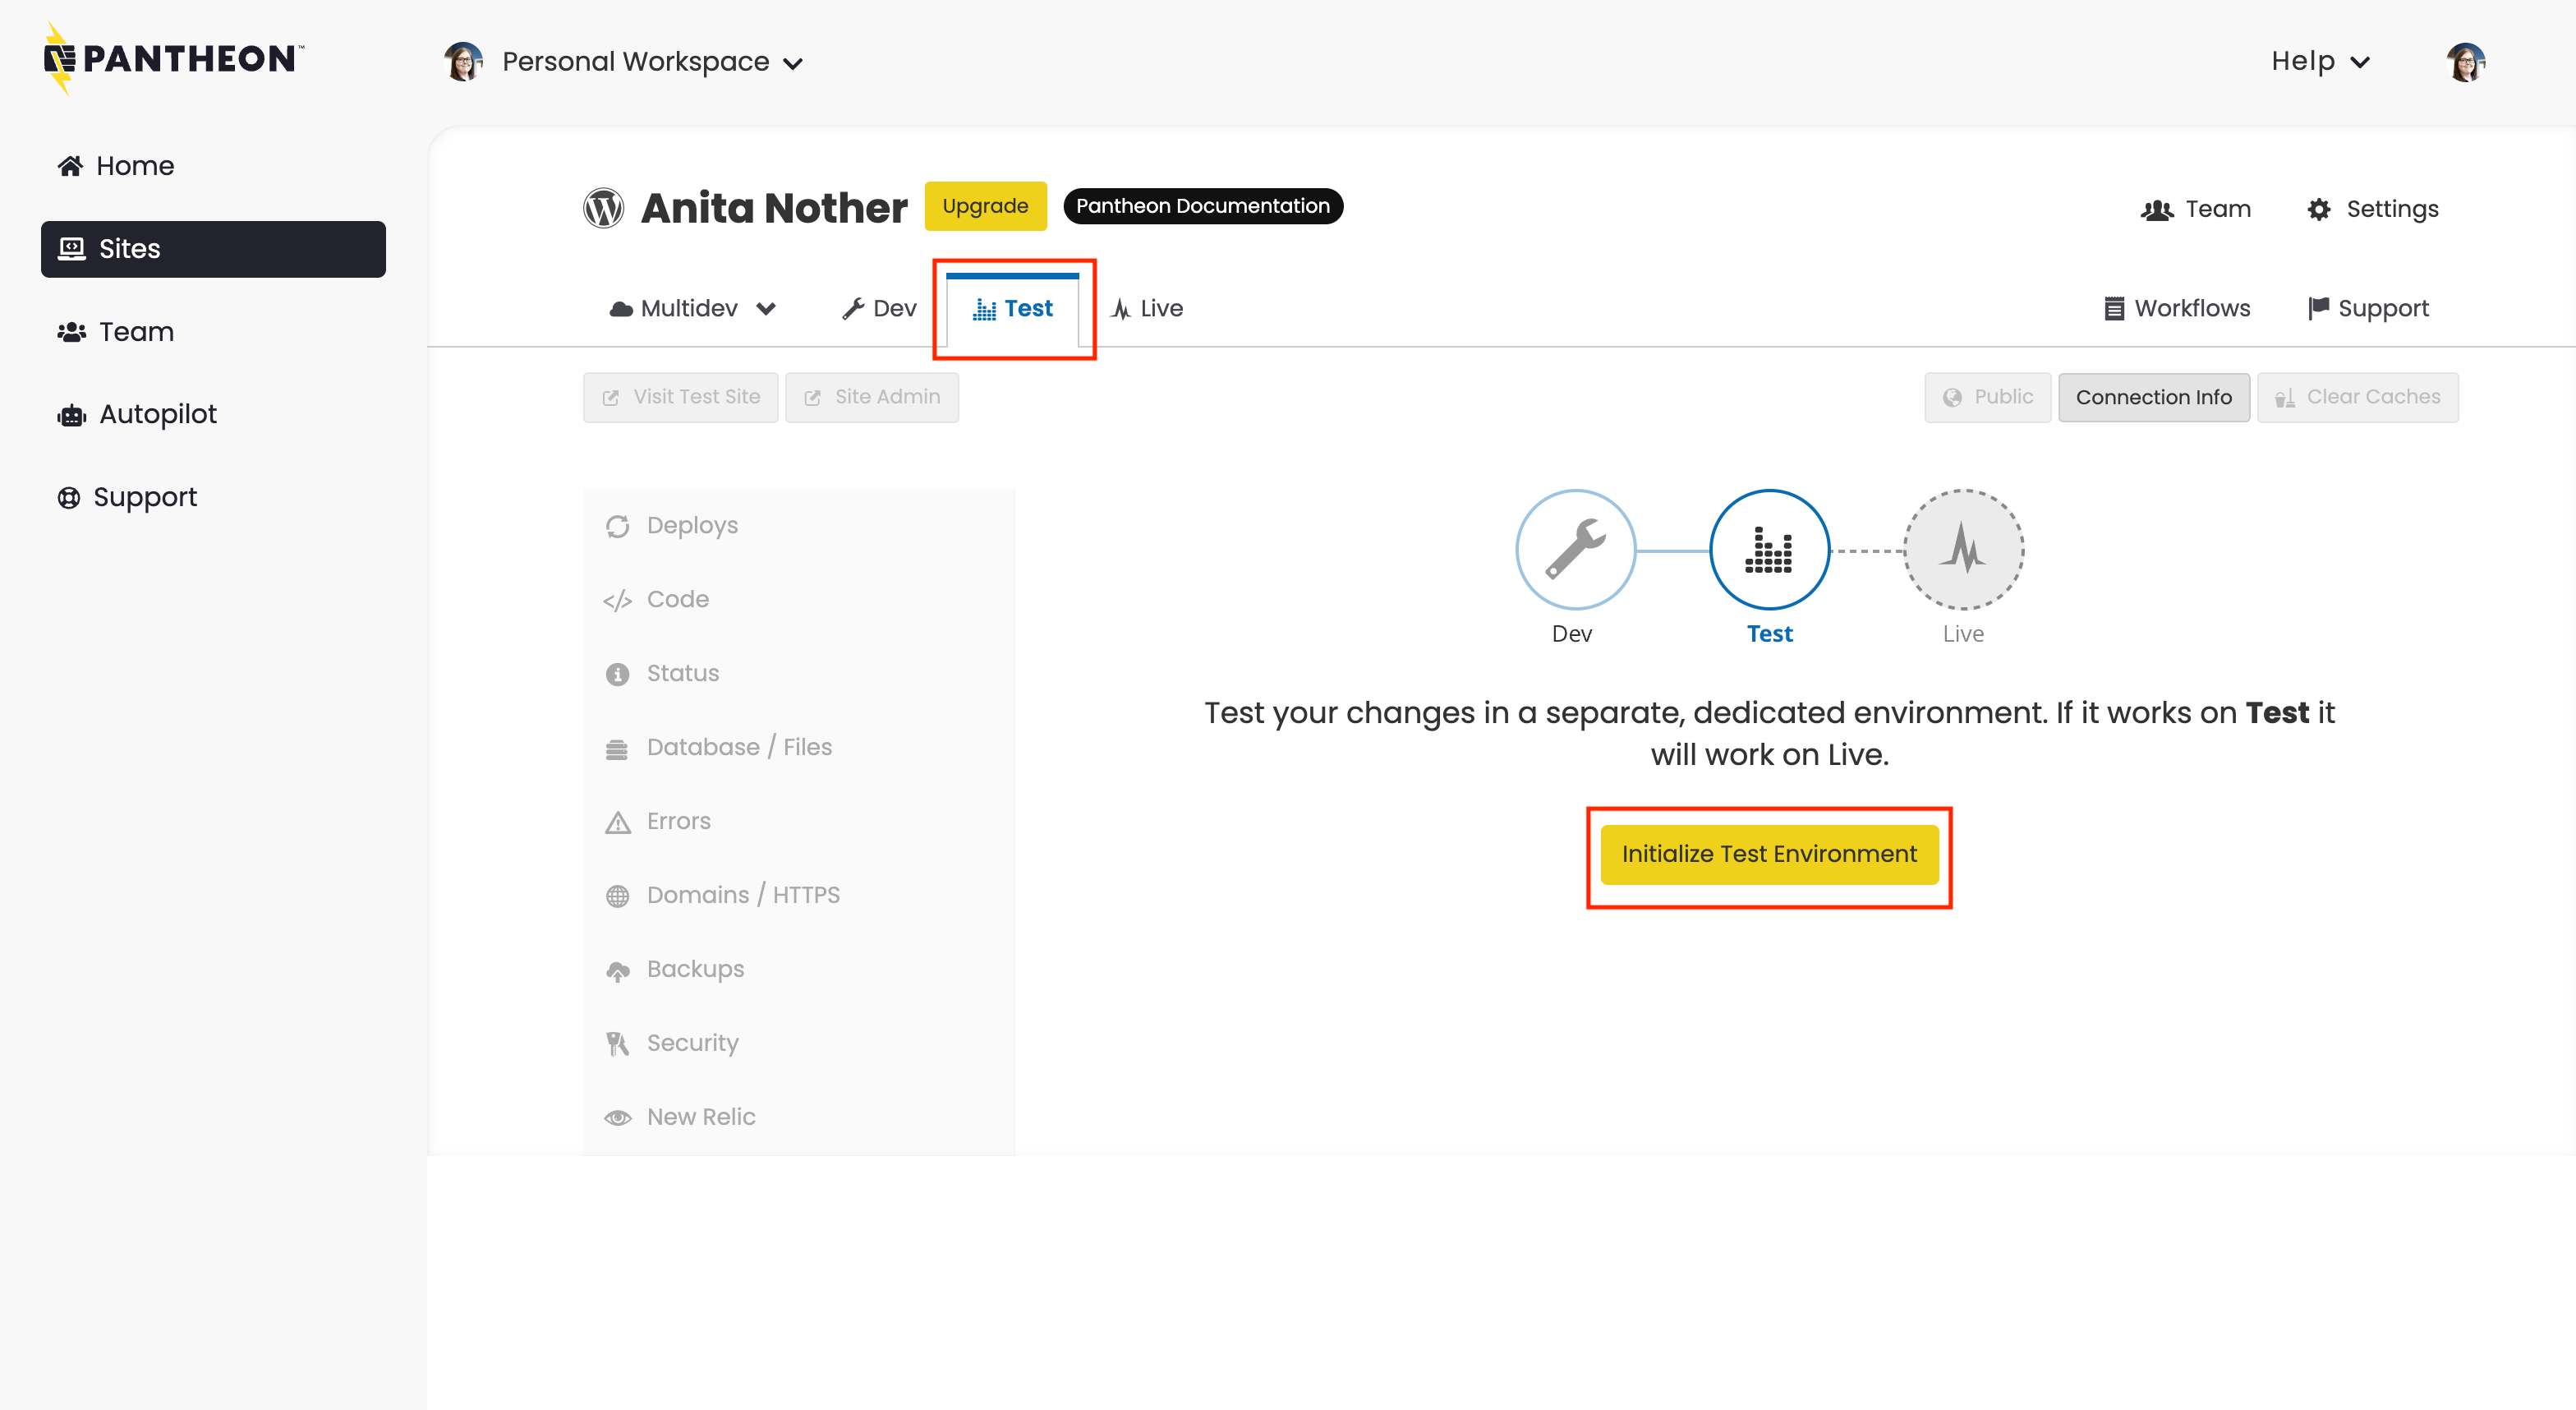
This takes a few moments.
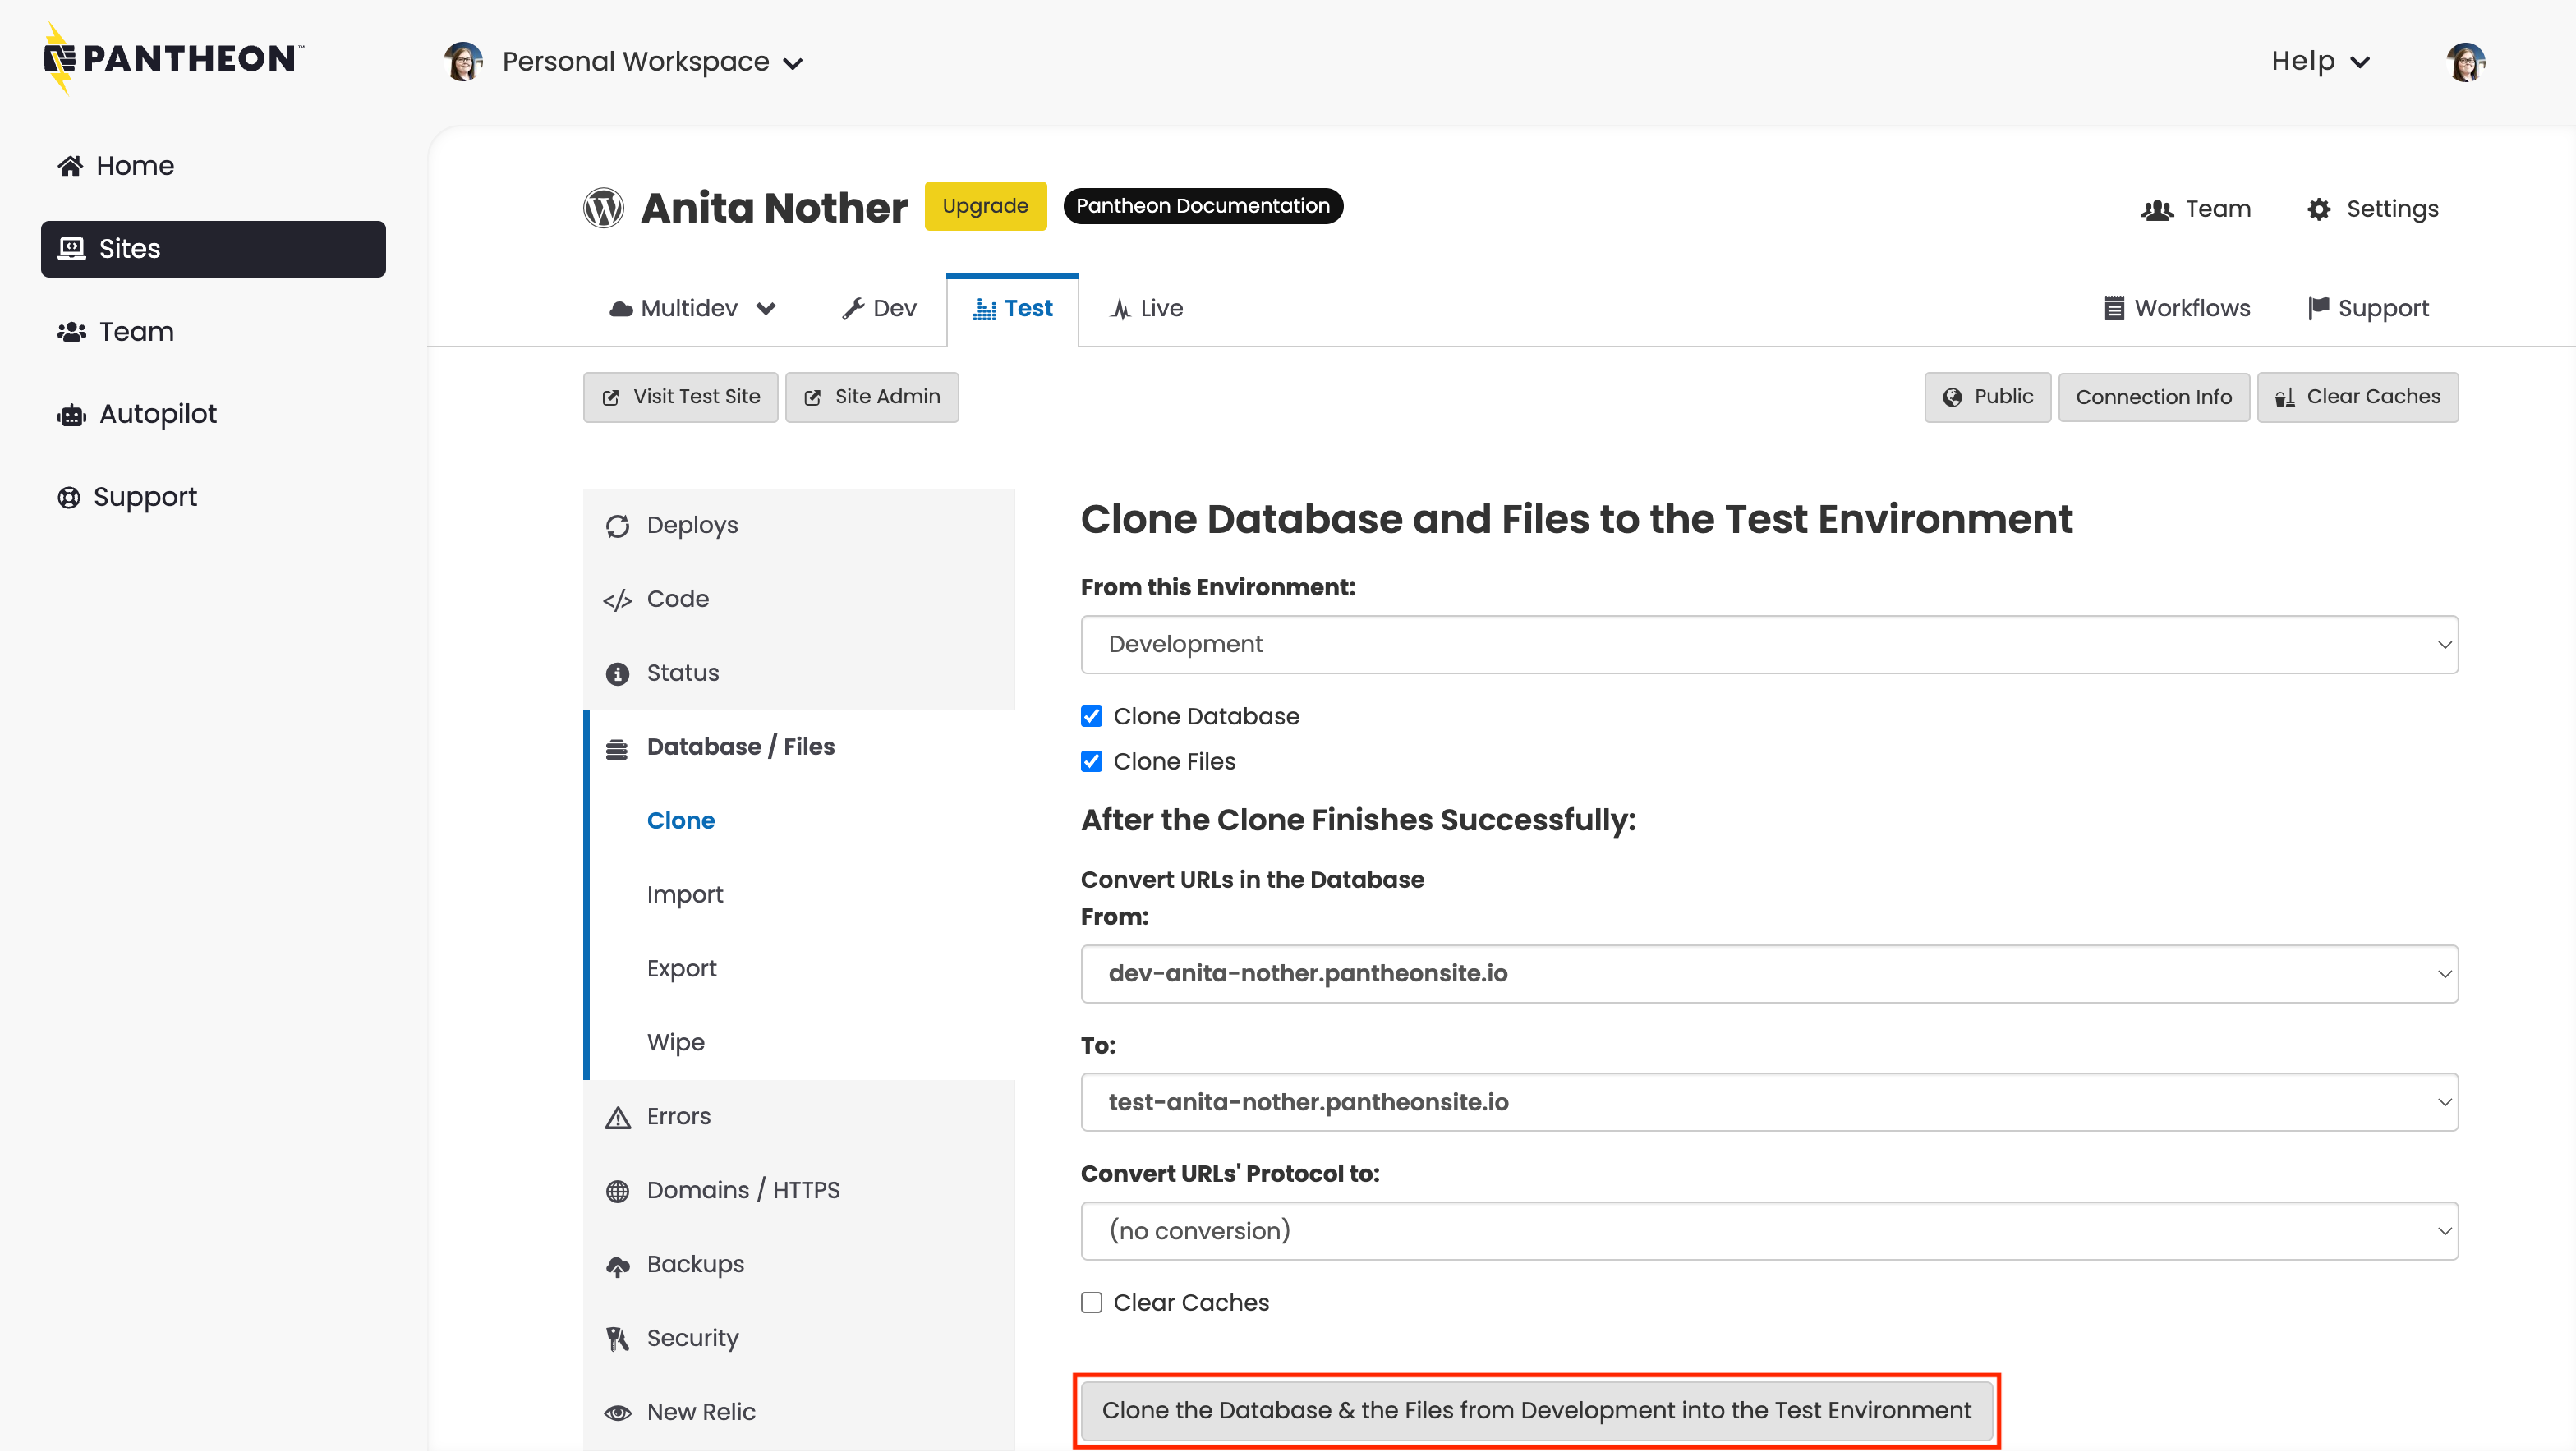
-
Go to the Database / Files tab and select the following:
- From this Environment: Development
- Clone Database: Checked
- Clone Files: Checked
-
Click Clone the Database & the Files from Development into the Test Environment.
Create the Test environment
To create your Test environment:
-
Click the Test tab, then click Initialize Test Environment to create your Test environment.
This takes a few moments.
-
Go to the Database / Files tab and select the following:
- From this Environment: Development
- Clone Database: Checked
- Clone Files: Checked
-
Click Clone the Database & the Files from Development into the Test Environment.
You have successfully finished adding a site in its Test environment. Click Visit Test Site to view your site.
Create the Live environment
After you purchase a plan, you can deploy your site live. But first, you have to create the Live environment.
When you complete this step, your site will be live for anyone to see, at the Pantheon URL. For detailed information about launching your site, refer to our Launch Essentials guide.
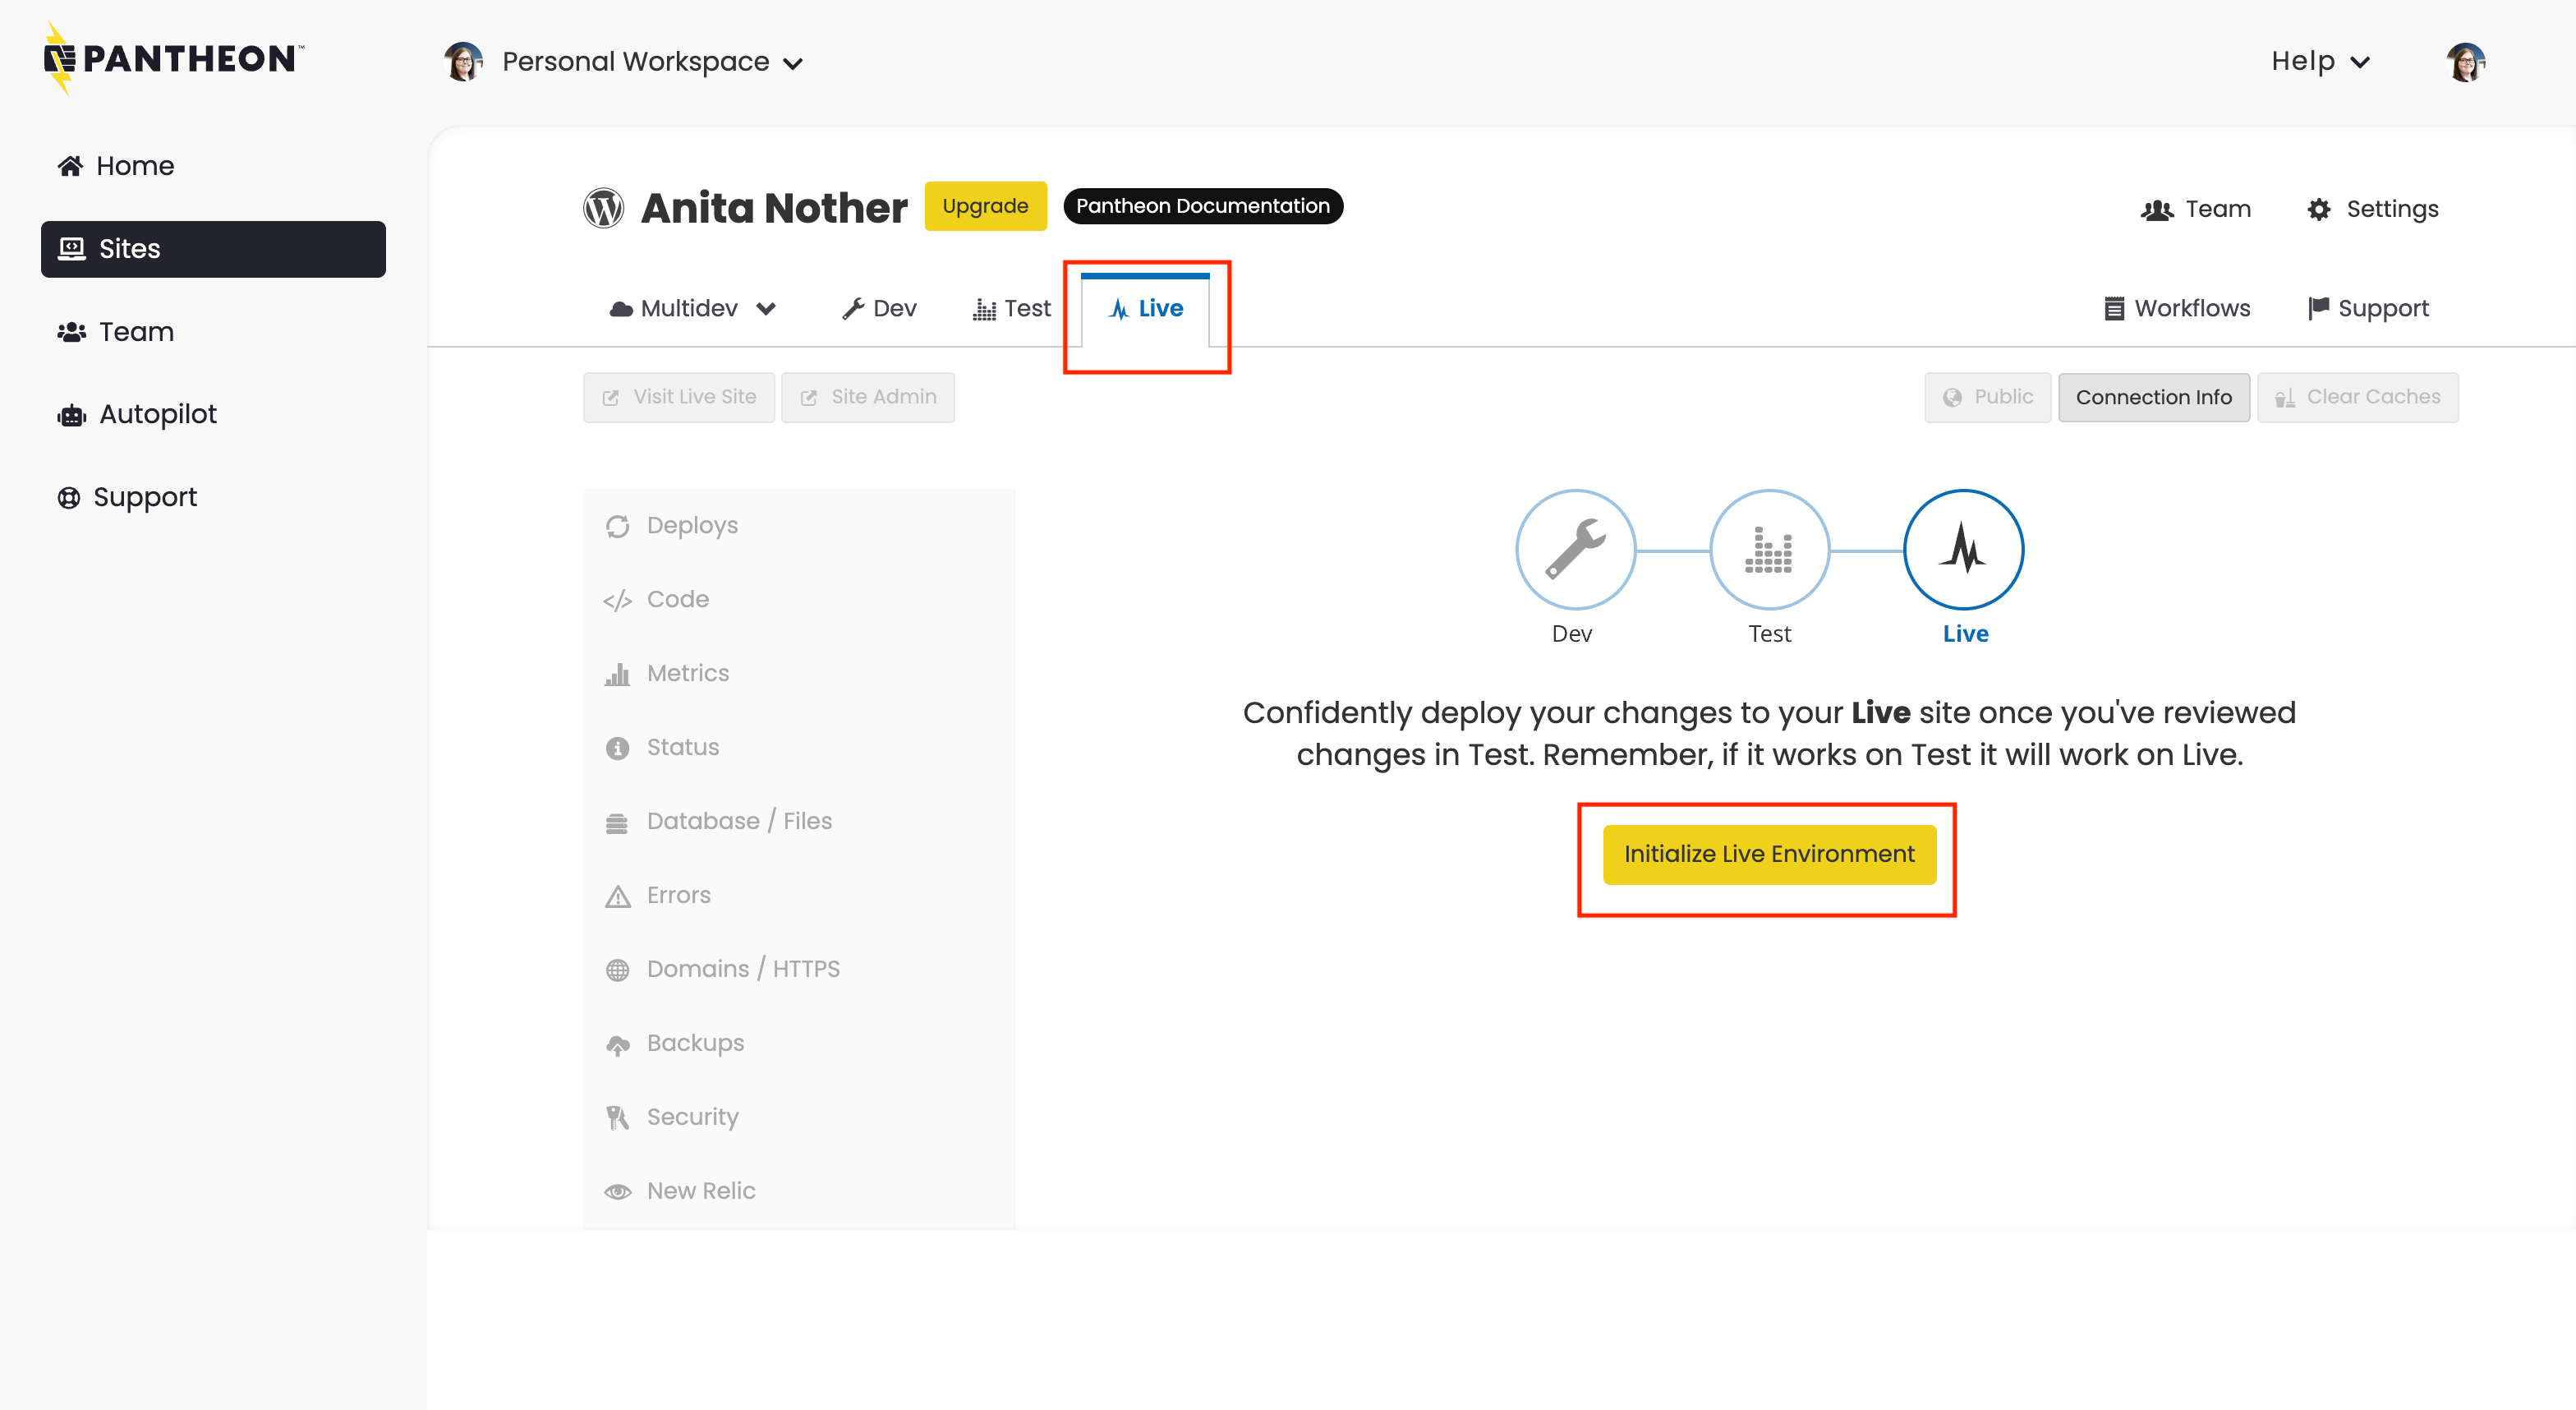
To create your Live environment:
- Go to the Site Dashboard.
- Click the Live tab.
- Click Initialize Live Environment to create your Live environment.
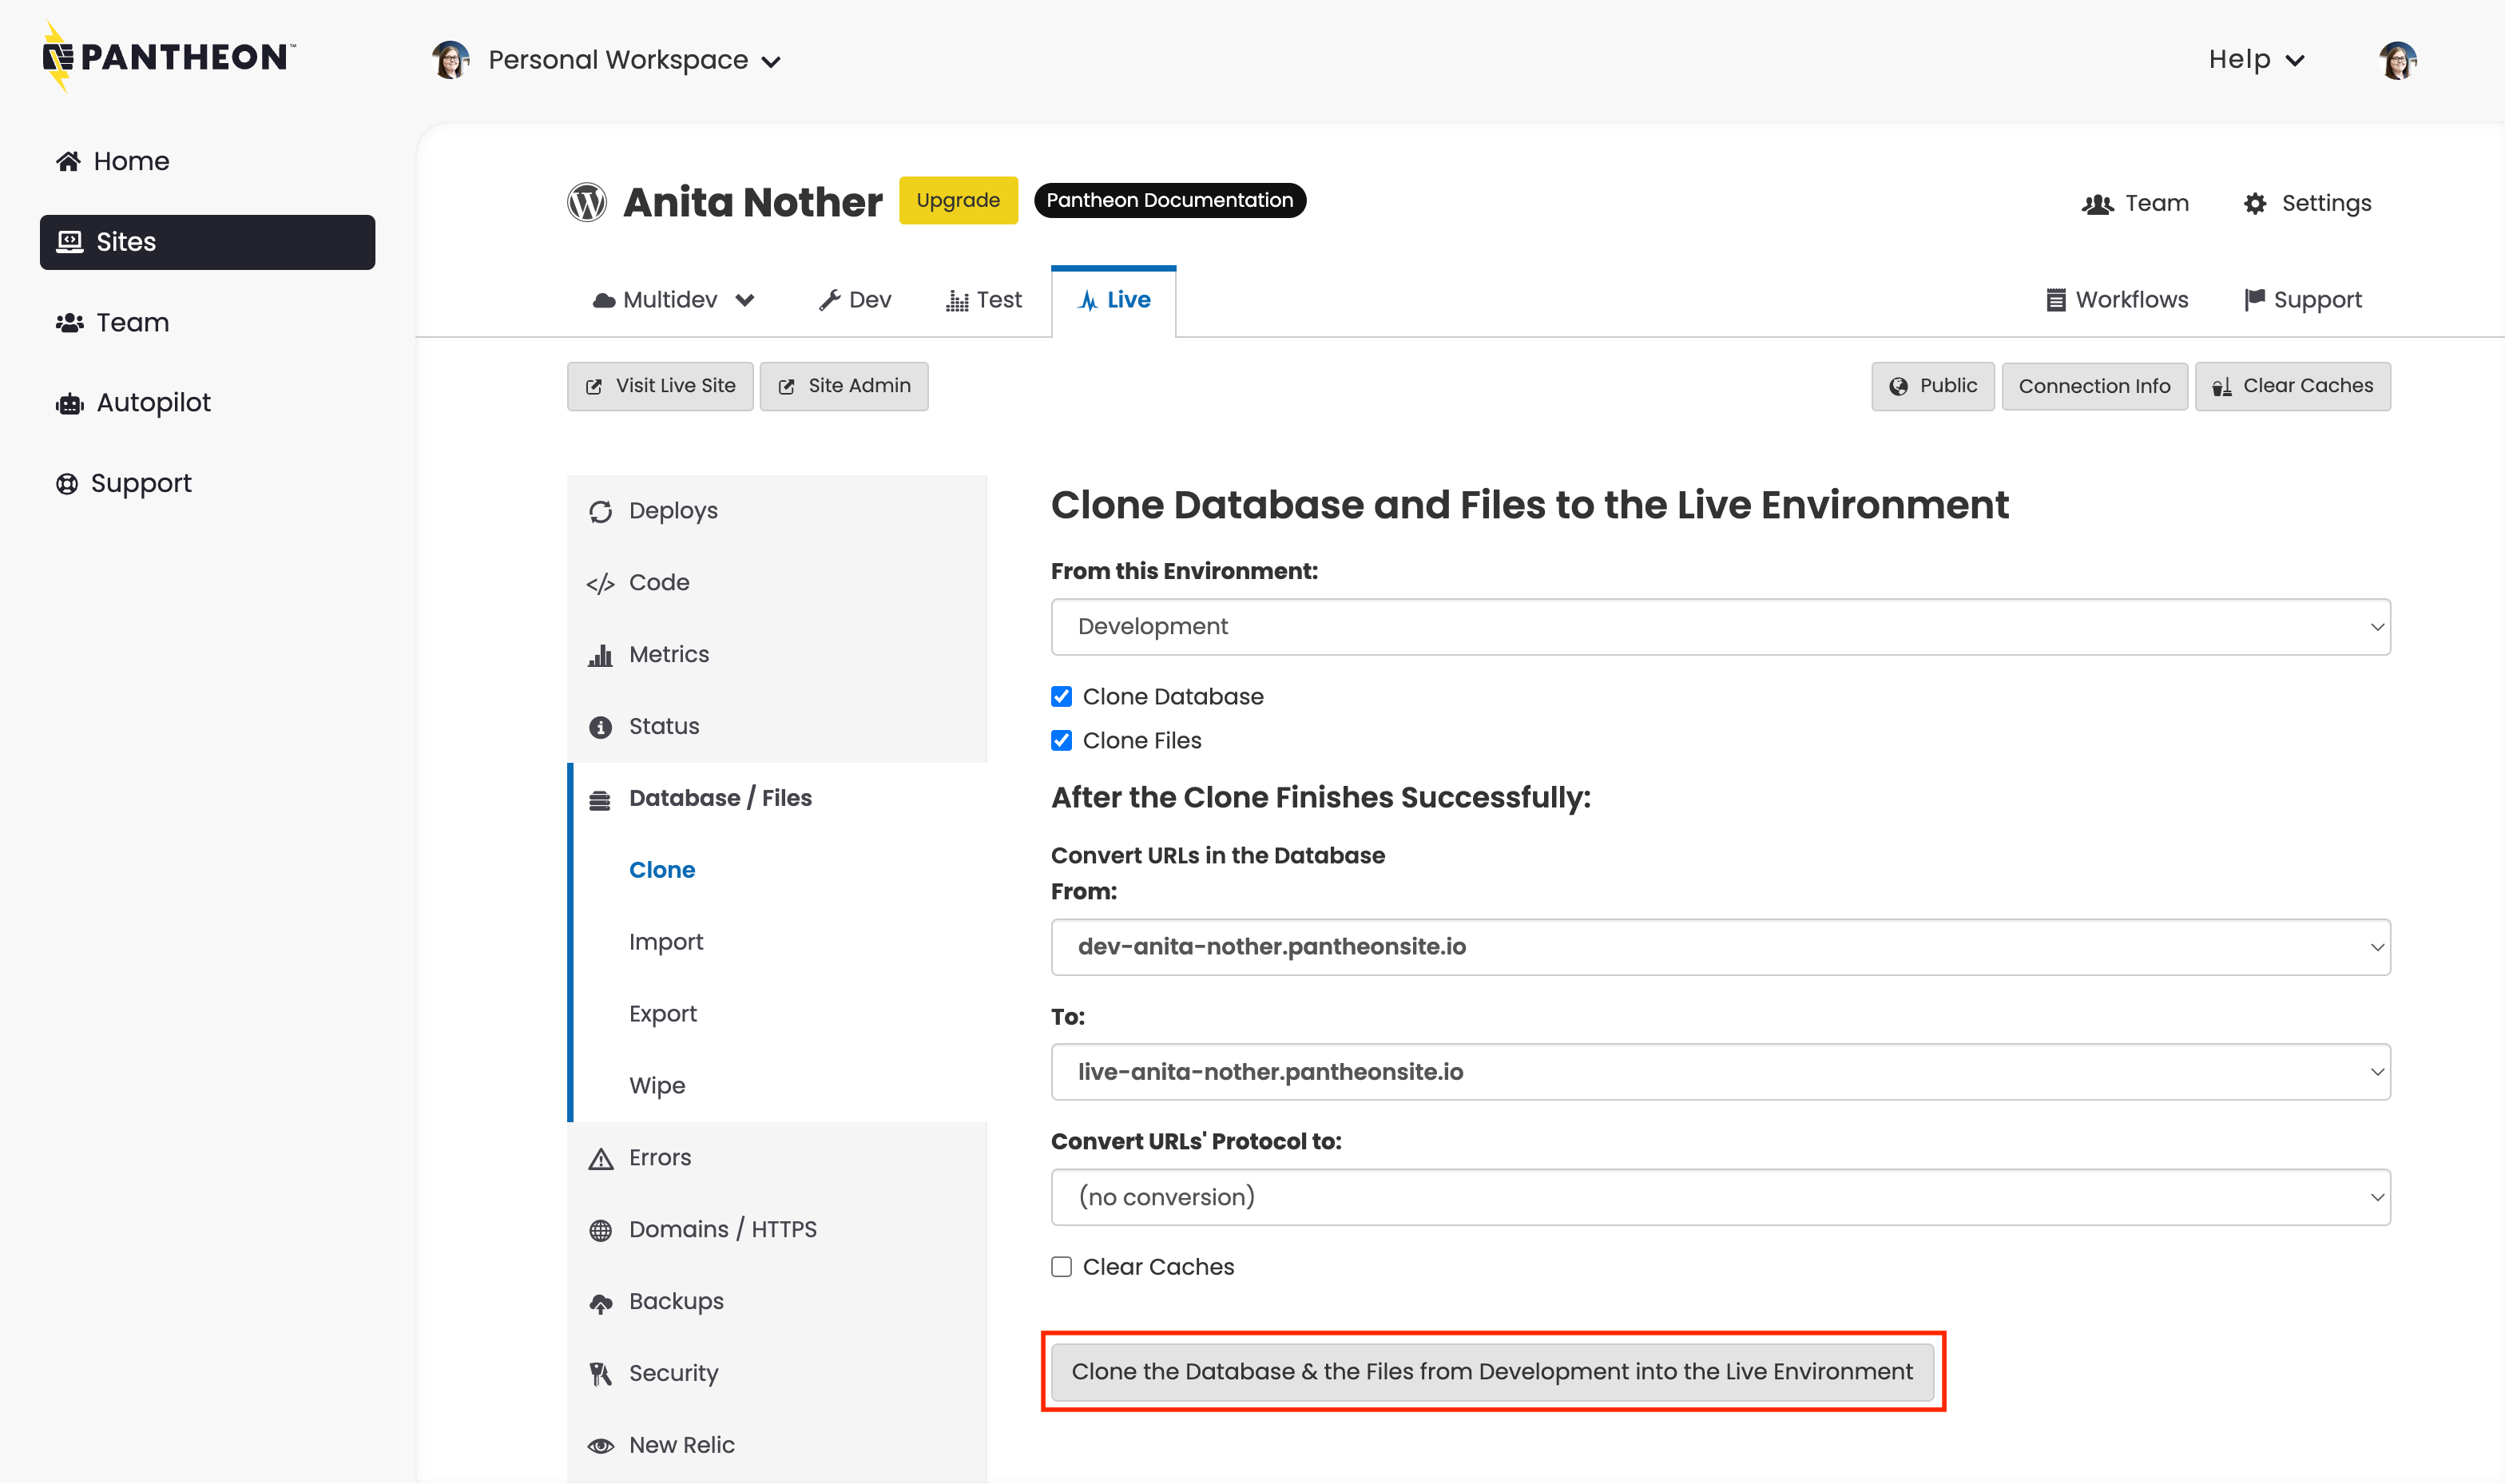
-
Go to the the Database / Files tab and select the following:
- From this Environment: Development
- Clone Database: Checked
- Clone Files: Checked
-
Click Clone the Database & the Files from Test into the Live Environment.
-
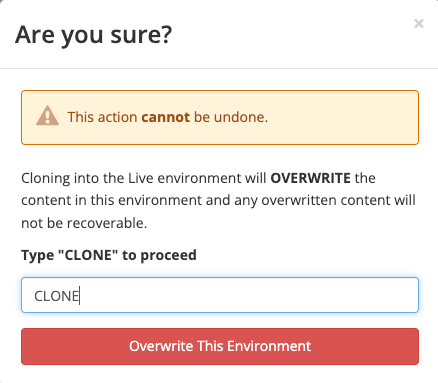
Type "CLONE" and then click Overwrite This Environment when prompted to confirm you want to go live.
You have successfully finished adding a site in its Live environment. Click Visit Live Site to view your site.
At this point, you have a live site with a Pantheon URL, like http://my-site.pantheonsite.io/. To change that to a more friendly URL, you'll need to purchase a domain from a DNS provider. Refer to our Domains on Pantheon Guide for more information.