Add a Site
Create or migrate a site on Pantheon.
There are dozens of ways to add a site on Pantheon. This section covers the most common scenarios for new users: creating a new CMS site (a site running WordPress or Drupal), or migrating an existing WordPress or Drupal site. For additional scenarios, see the Adding a Site to Pantheon section at the end of this document.
Create a New CMS Site
Pantheon CMS site contains three components: code, files, and a database containing the content and configurations of your Content Management System (CMS). When you create a site, you are creating each of these components in the Dev environment. Then, when you are ready, you will create your Test and Live environments.
Create the Dev Environment
To create a CMS site:
-
Go to the workspace and select the Create New Site button:
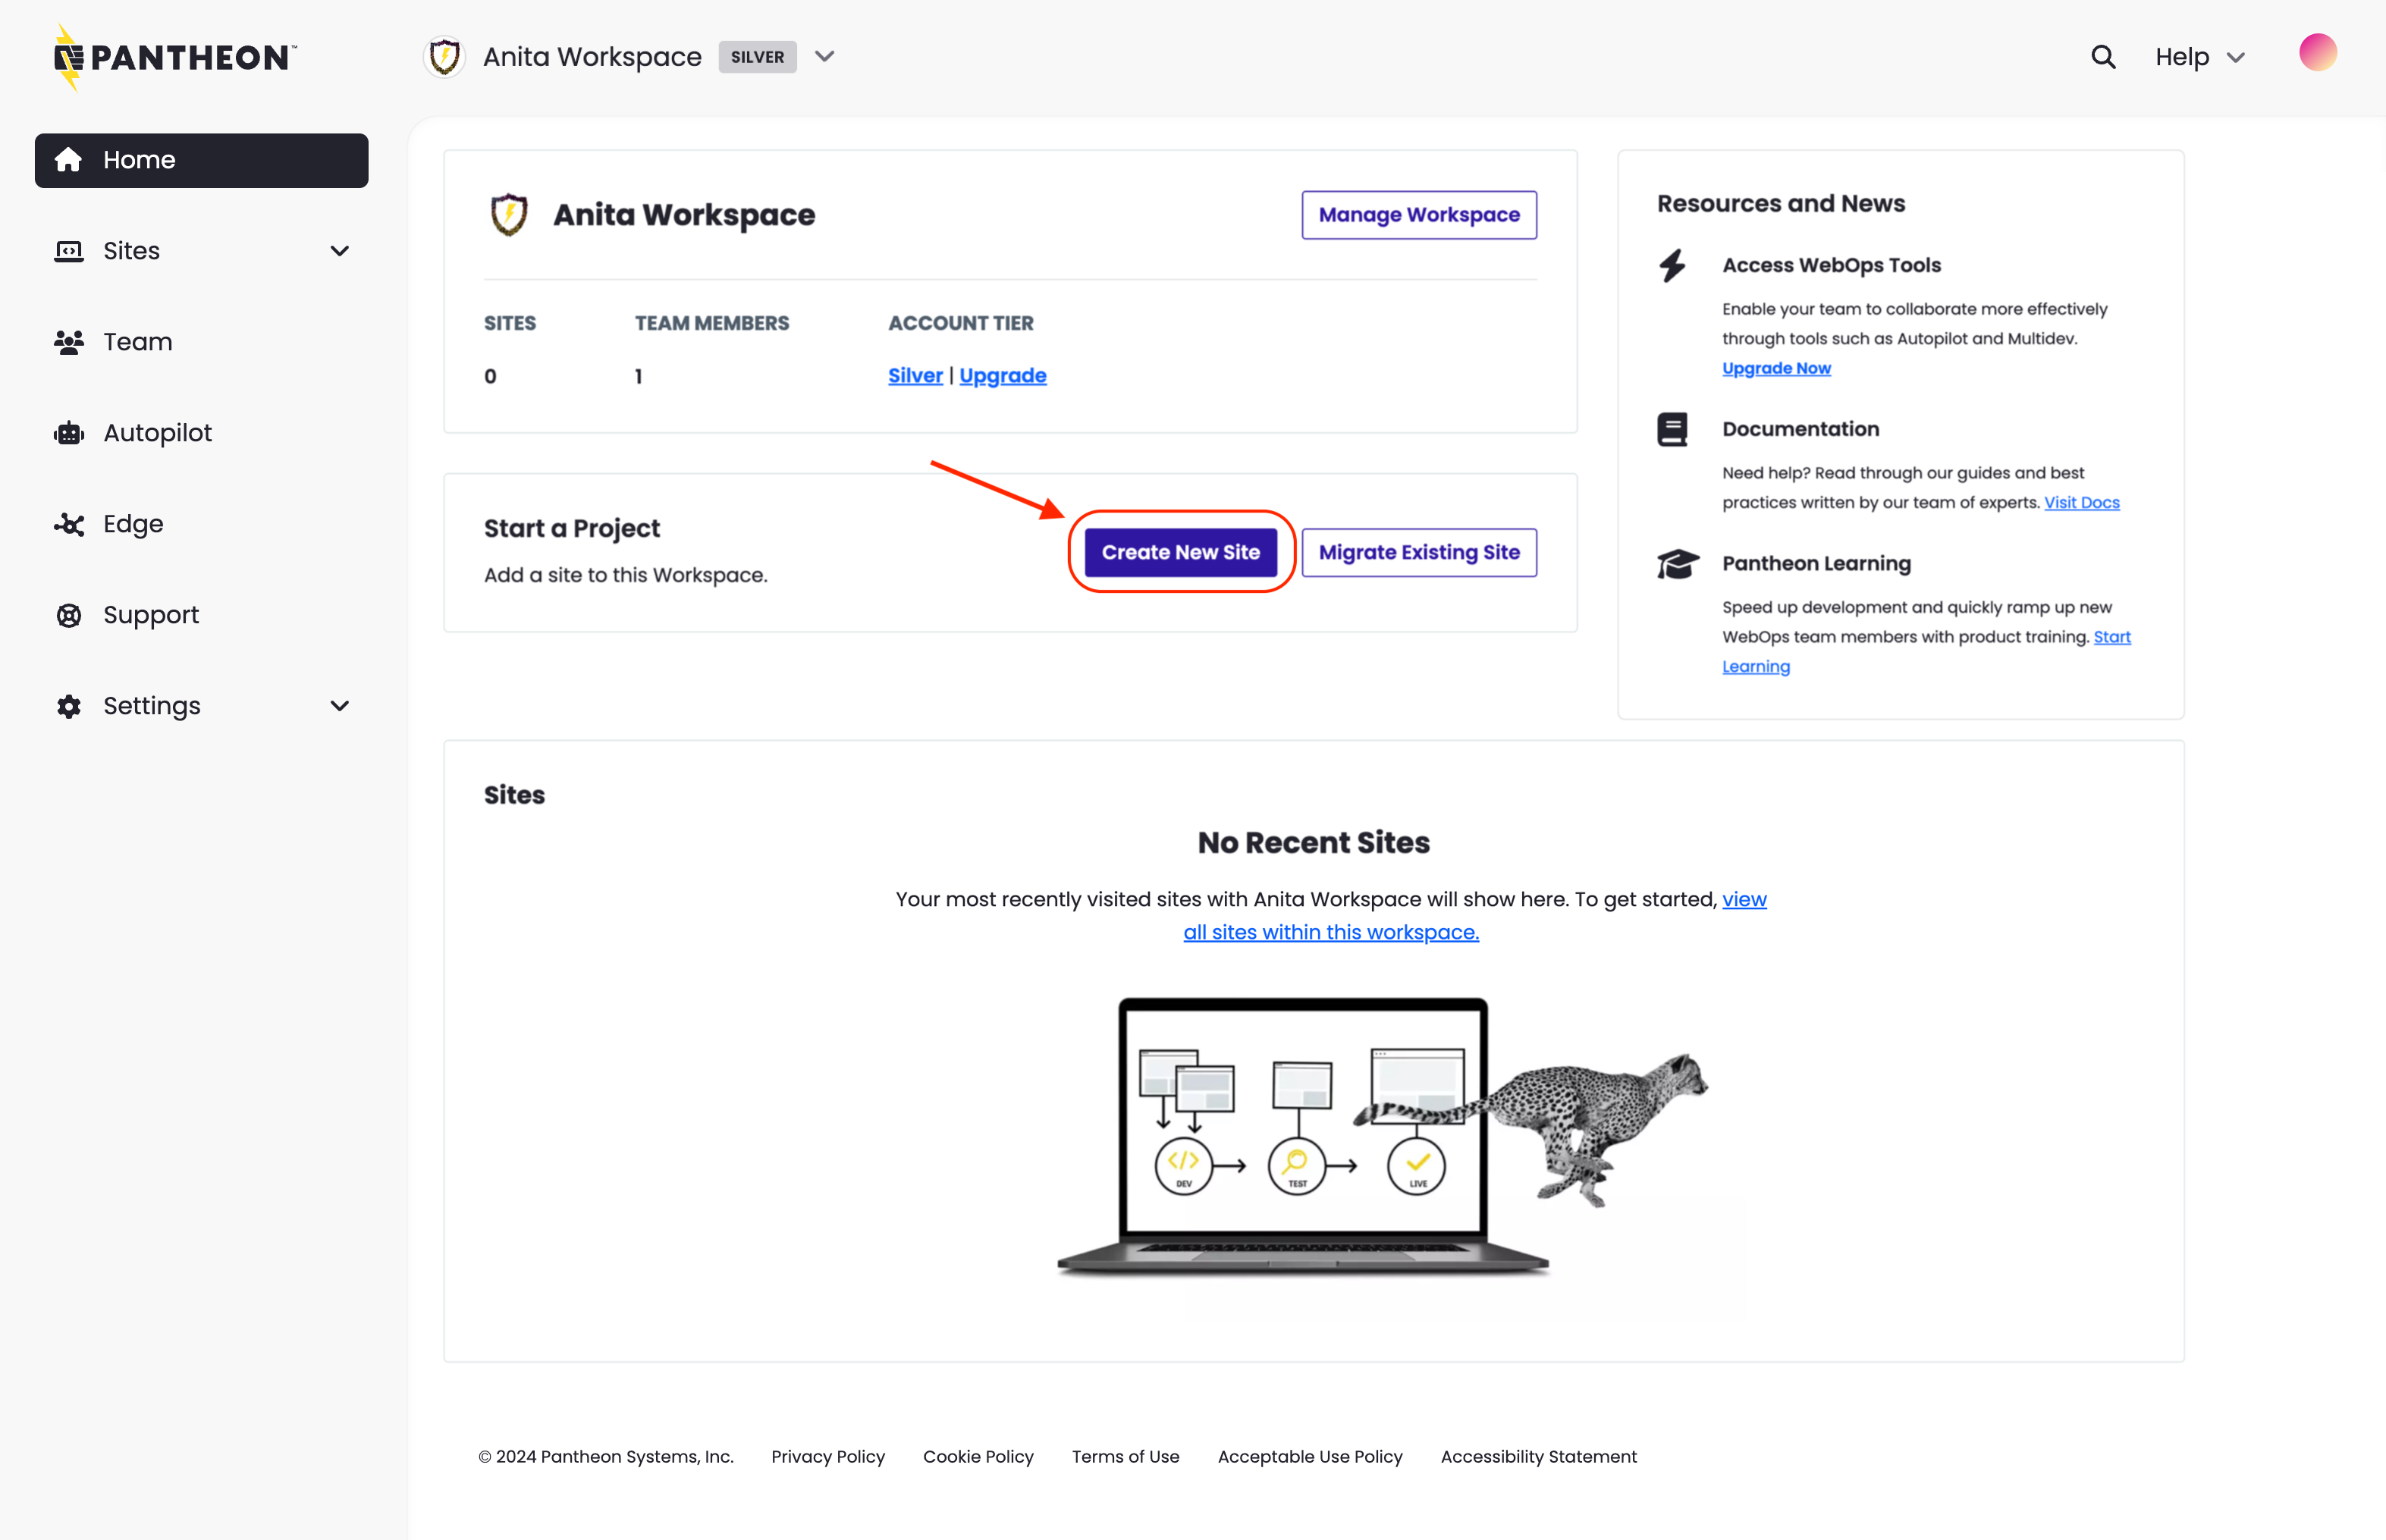
-
Select WordPress or Drupal.
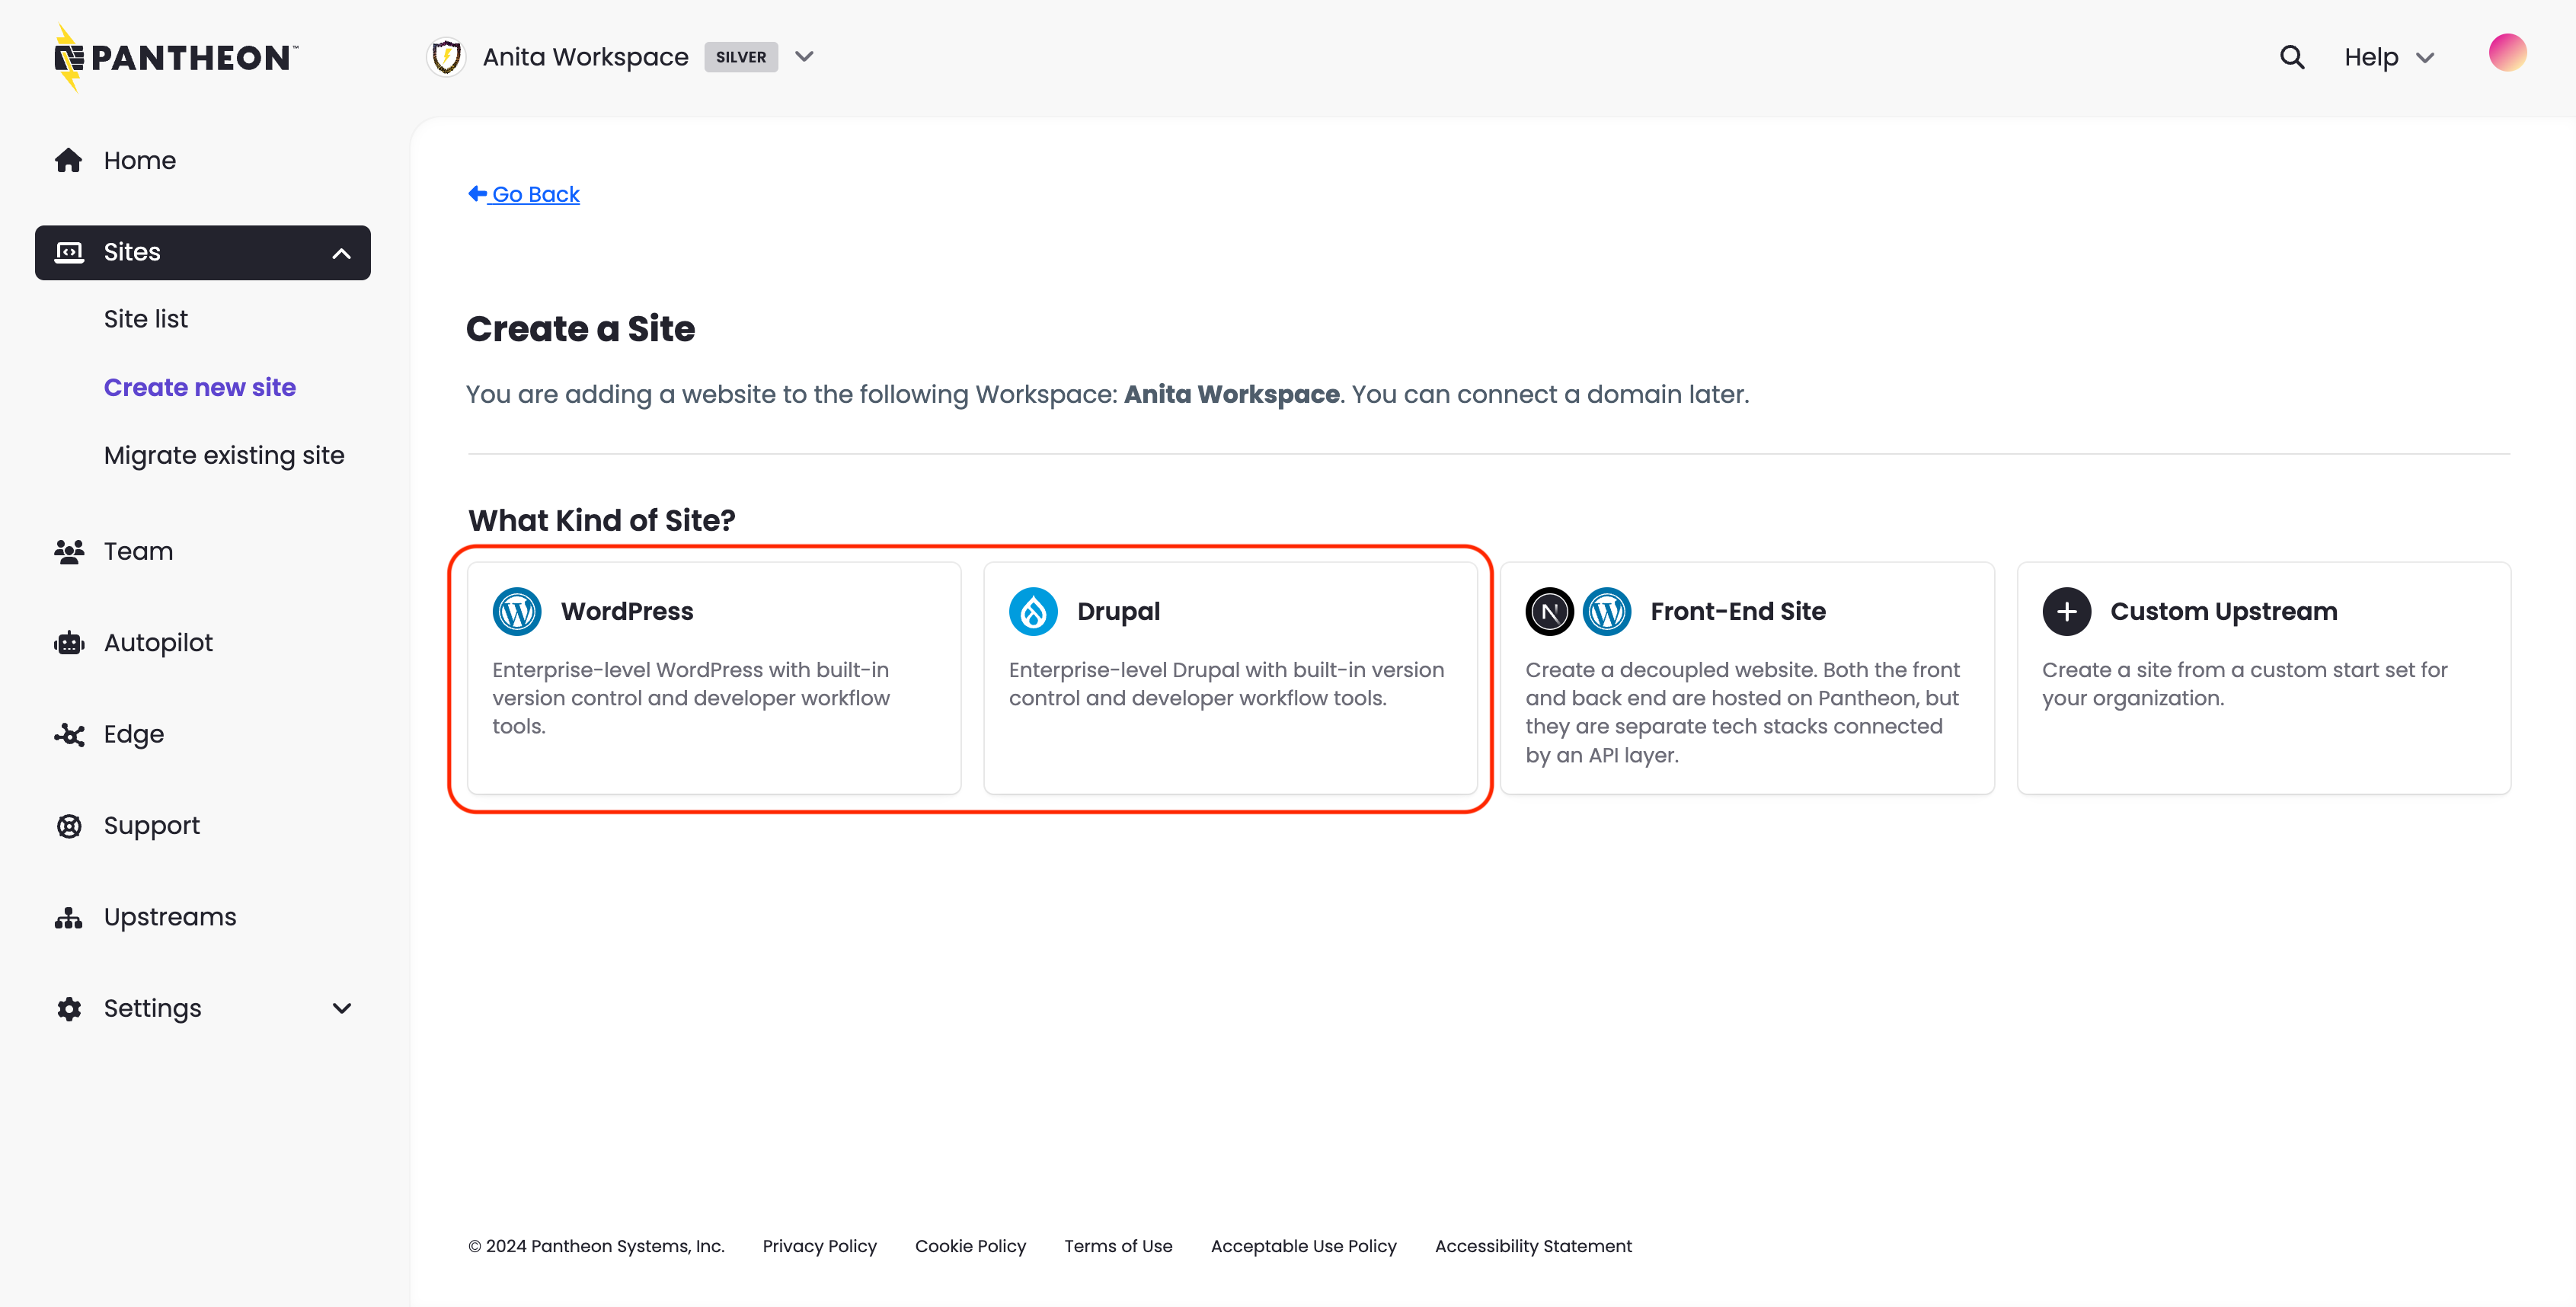
If you select Drupal, you will have the option to select the Drupal version you want to use.

-
Enter the following information and click Continue:
- Sitename
- Select a region for this site.
- If this site is to be part of a Professional Workspace, select a Workspace from Choose a Workspace for the Site.

-
The deployment process begins. It can take several minutes to create a new site on Pantheon.
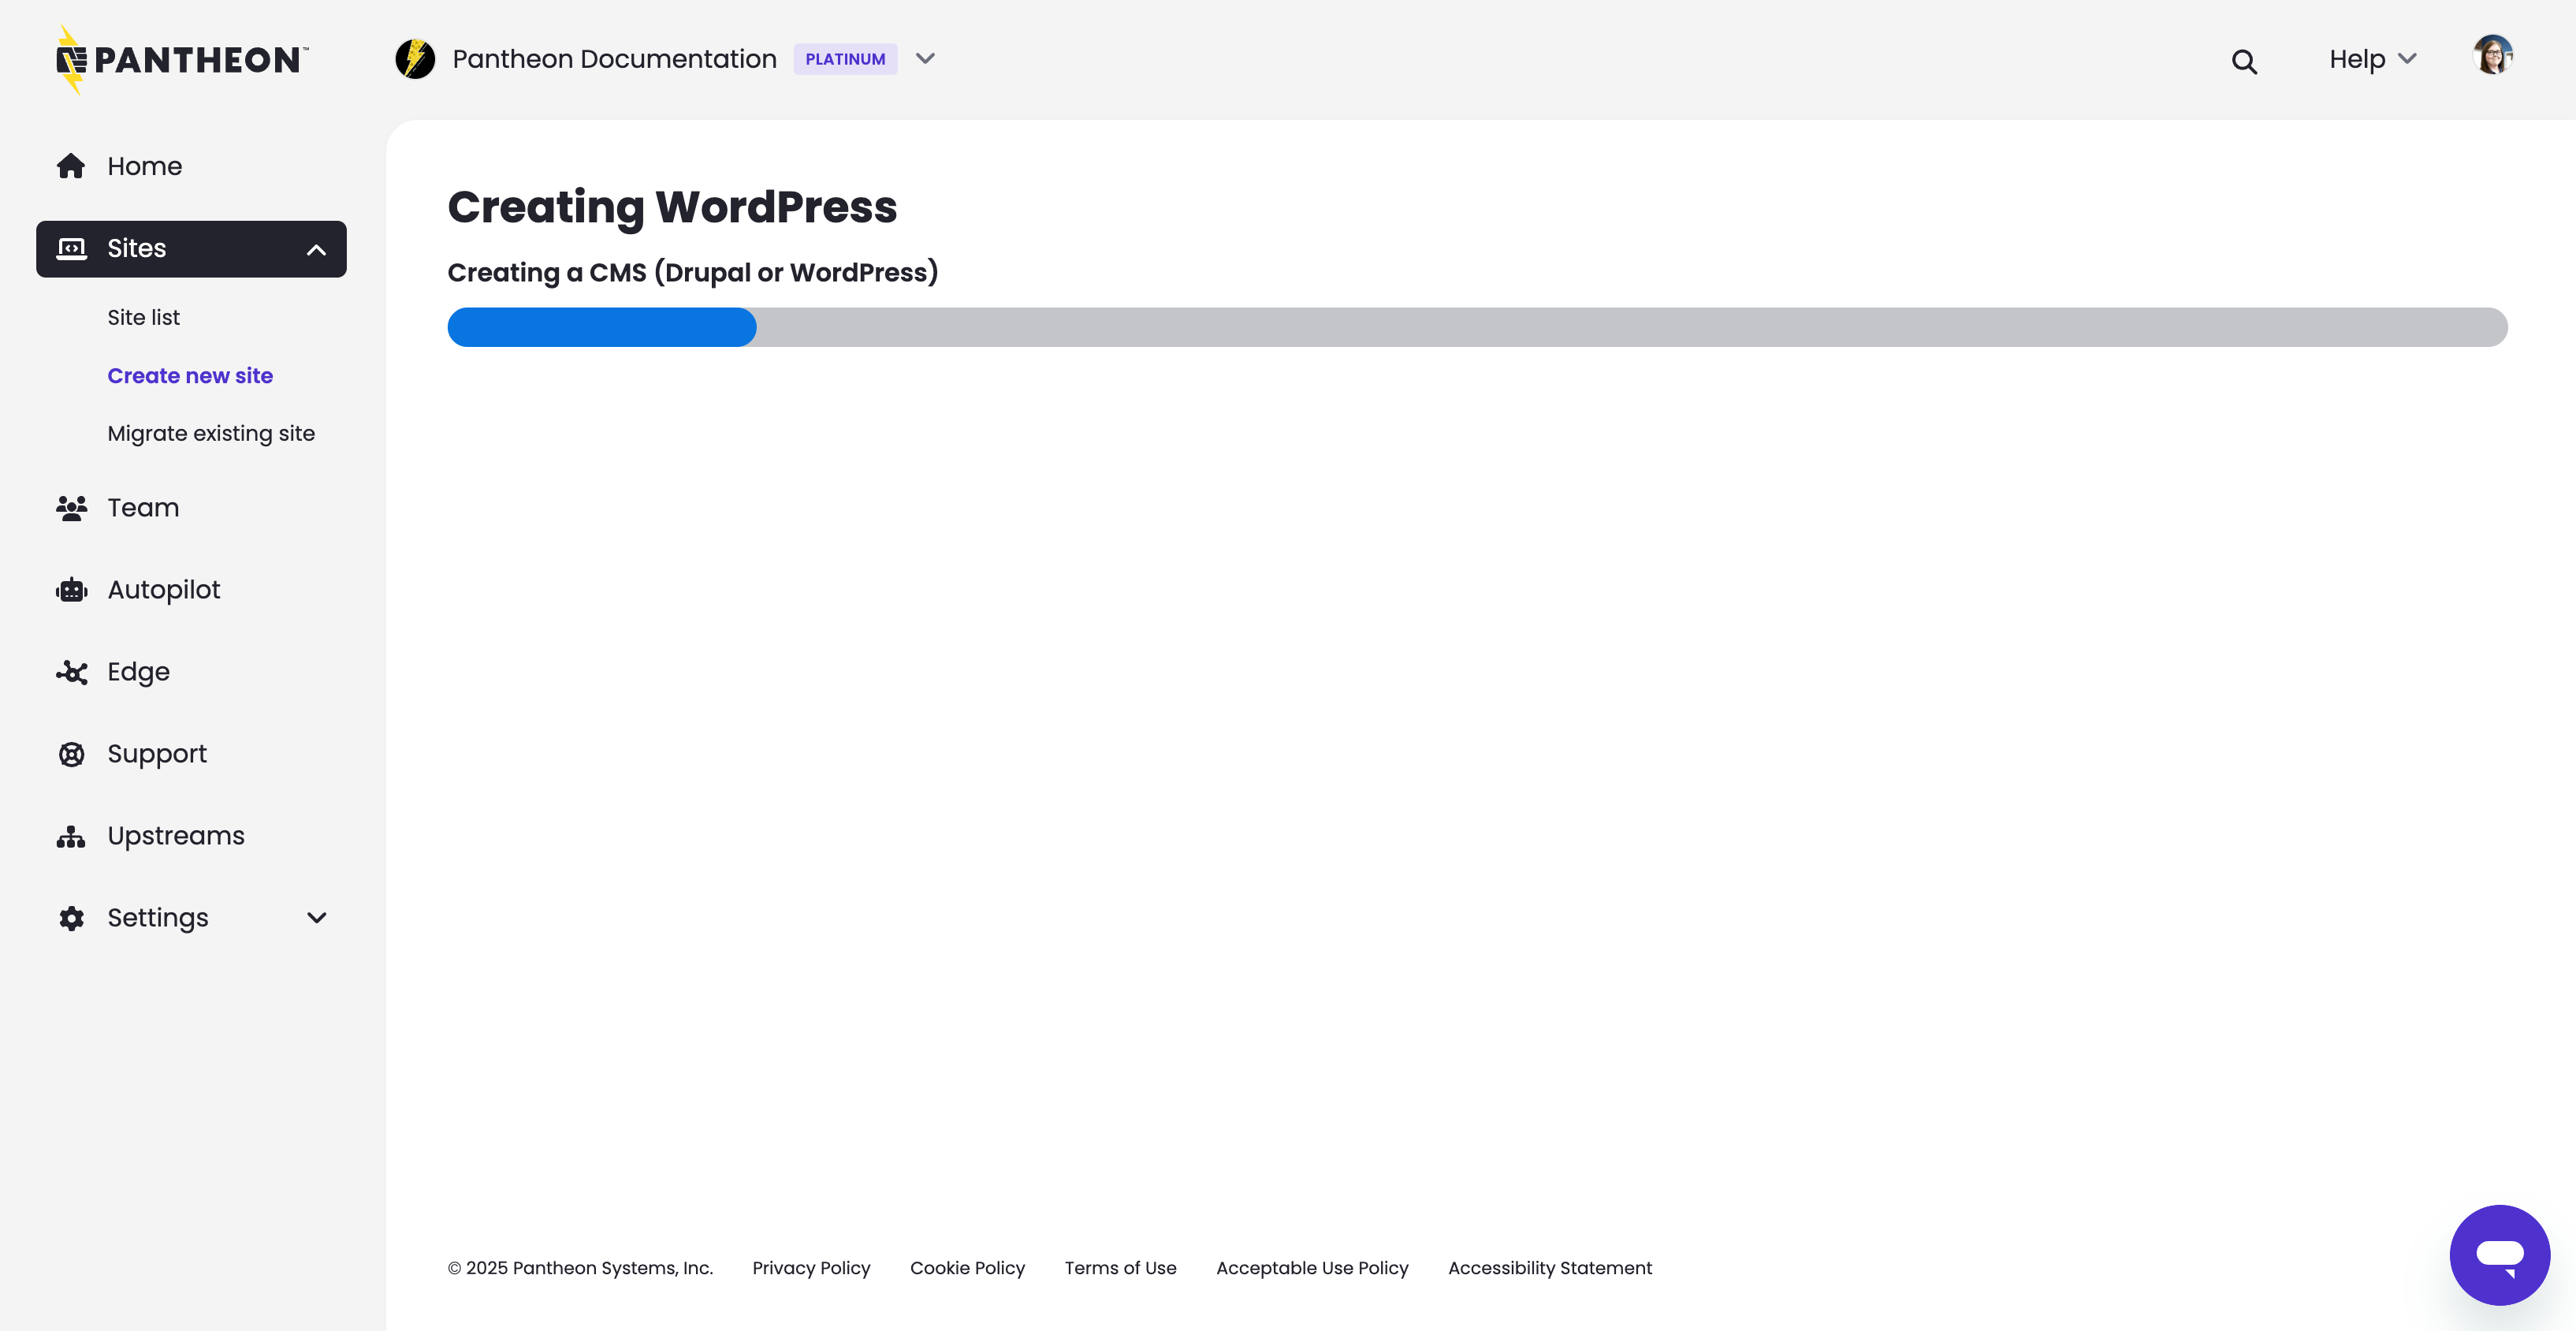 Information:Note
You can navigate away from this page during this process, but later, you'll have access the site via the Sites tab in your Workspace.
-
Click Go to site dashboard when the process is complete.
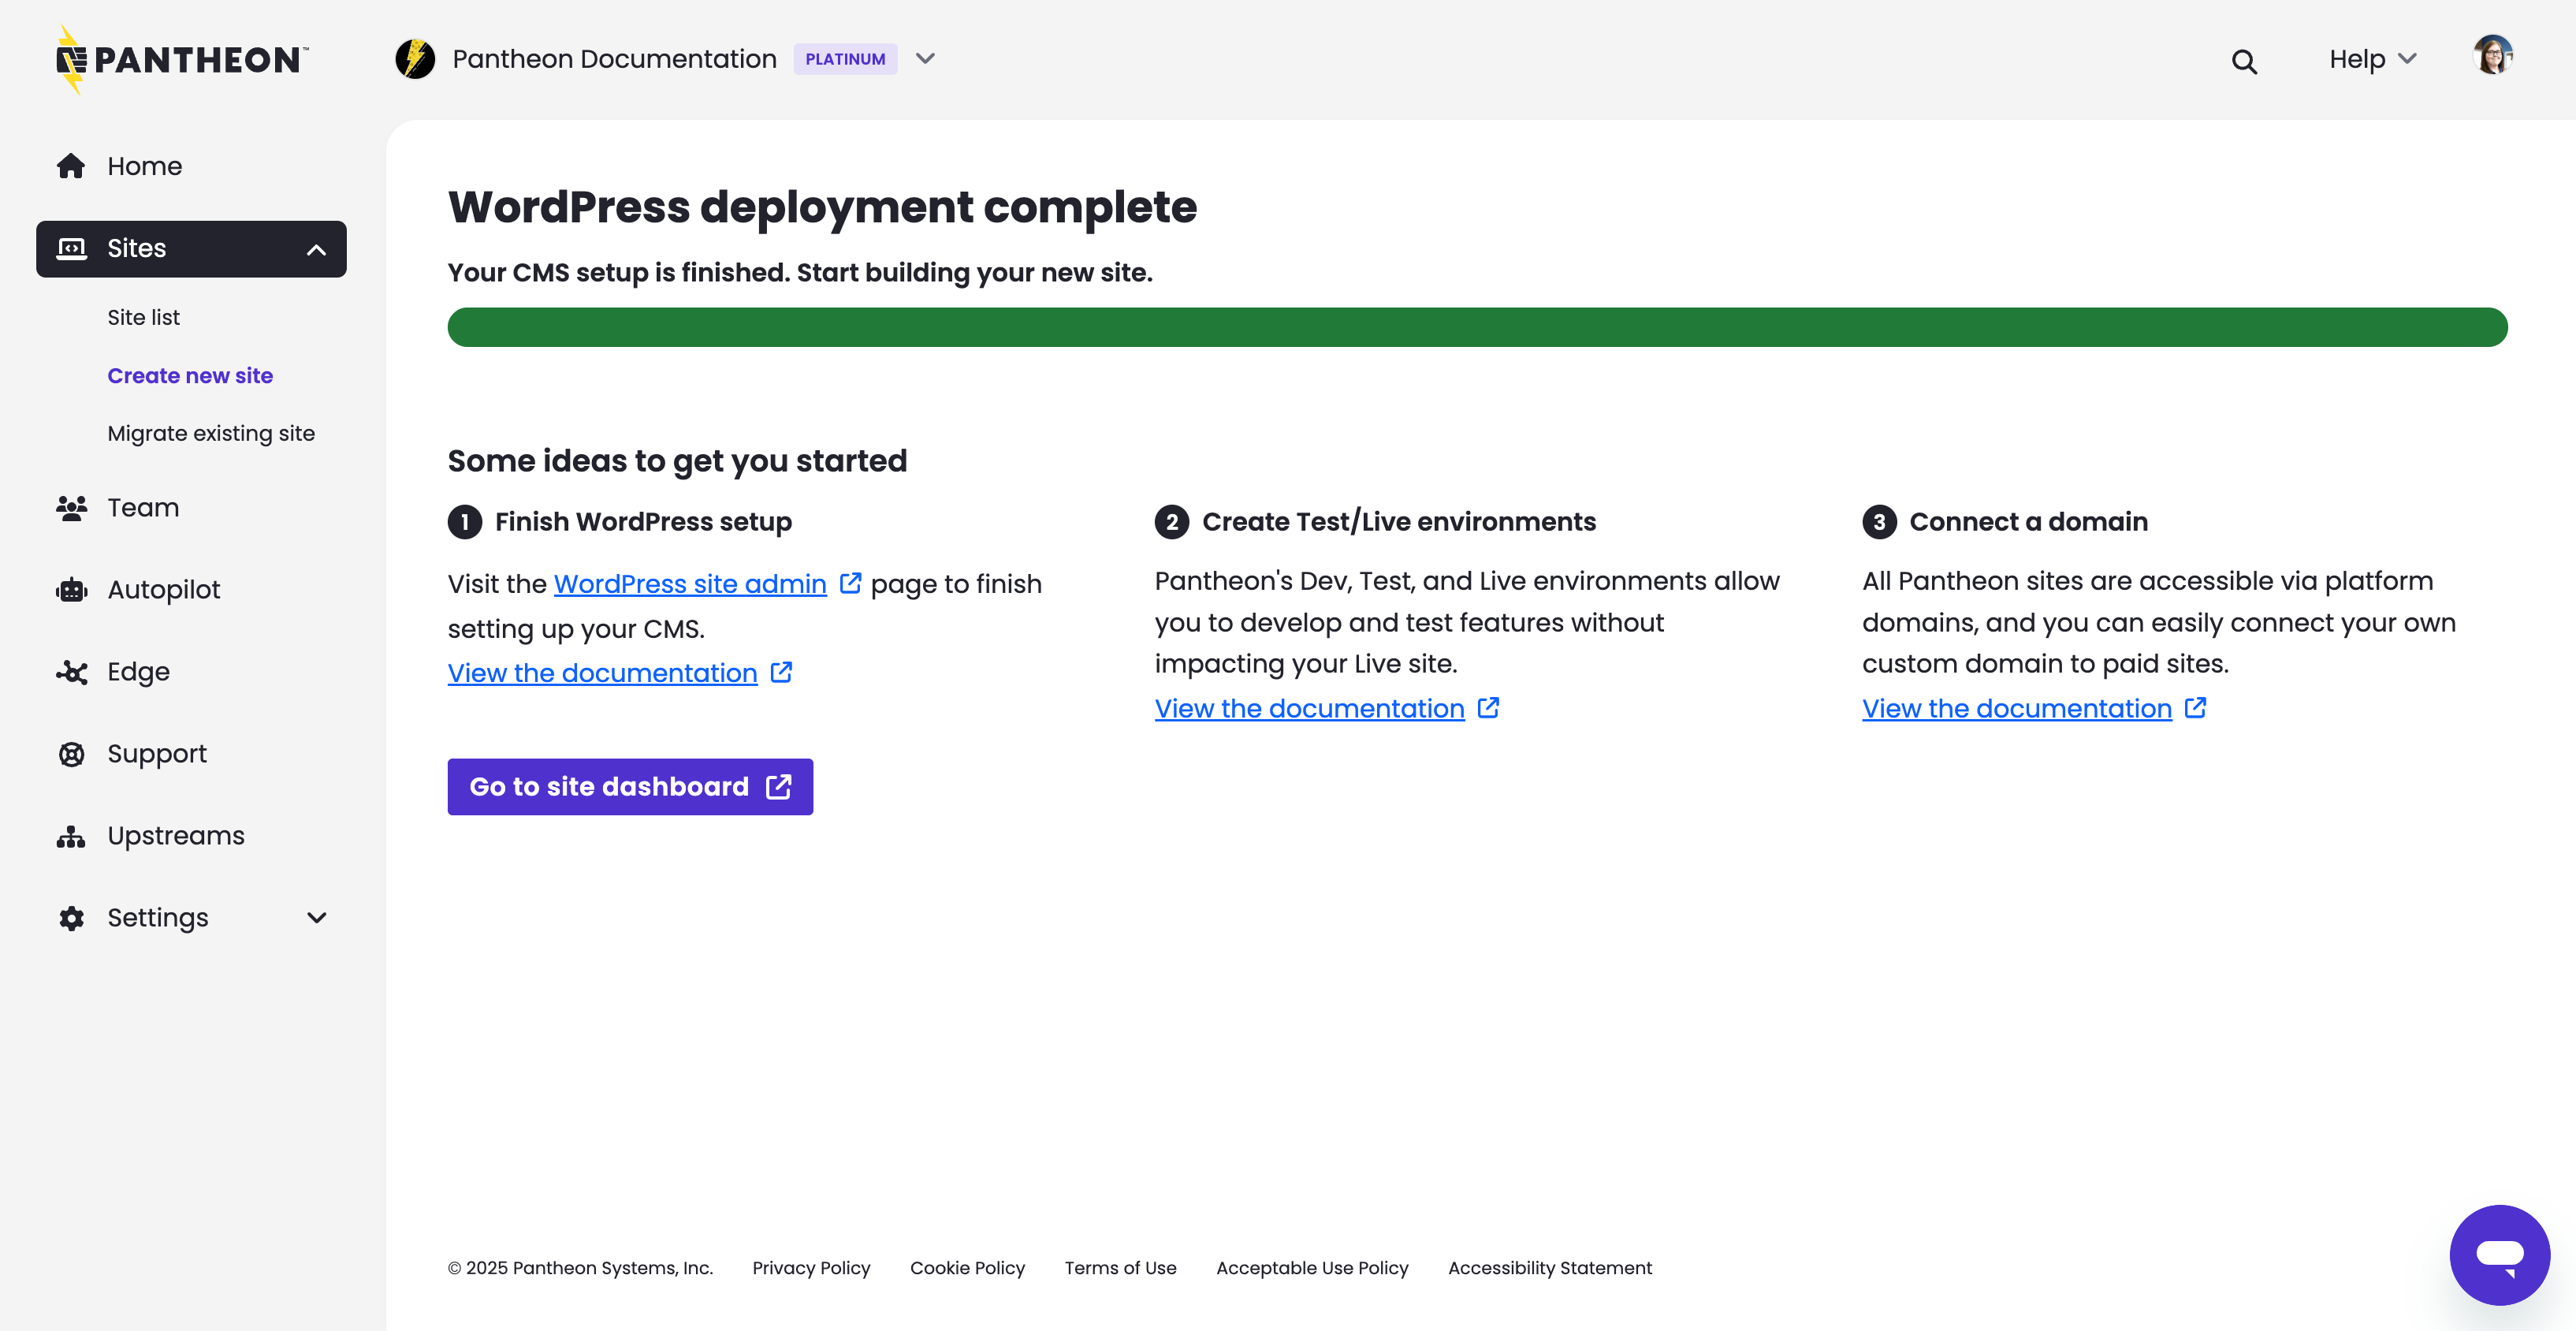
You've now created the core portion of your Dev environment; now you have to install the CMS.
Install the CMS
-
Click Site Admin.
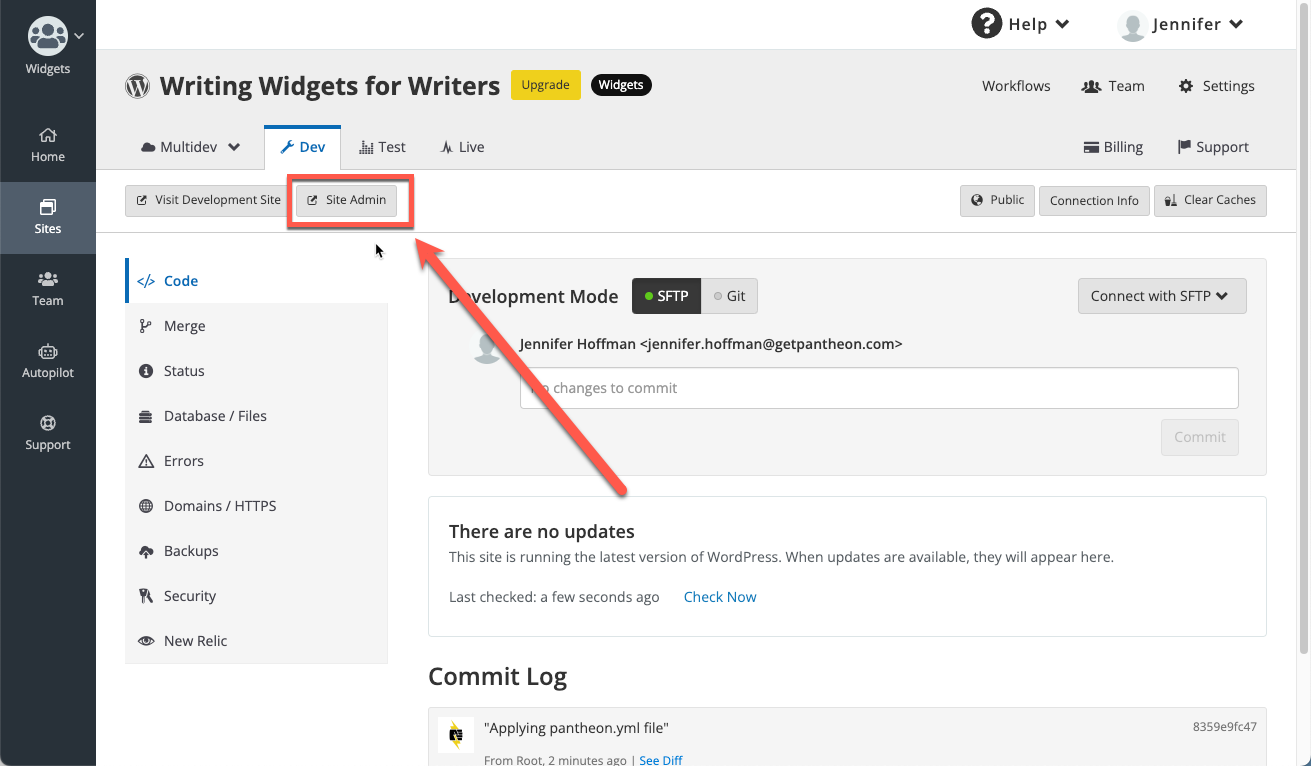
-
You will be presented with either a Drupal or WordPress setup screen. You may also see an interstitial warning message when visiting an environment for the first time.
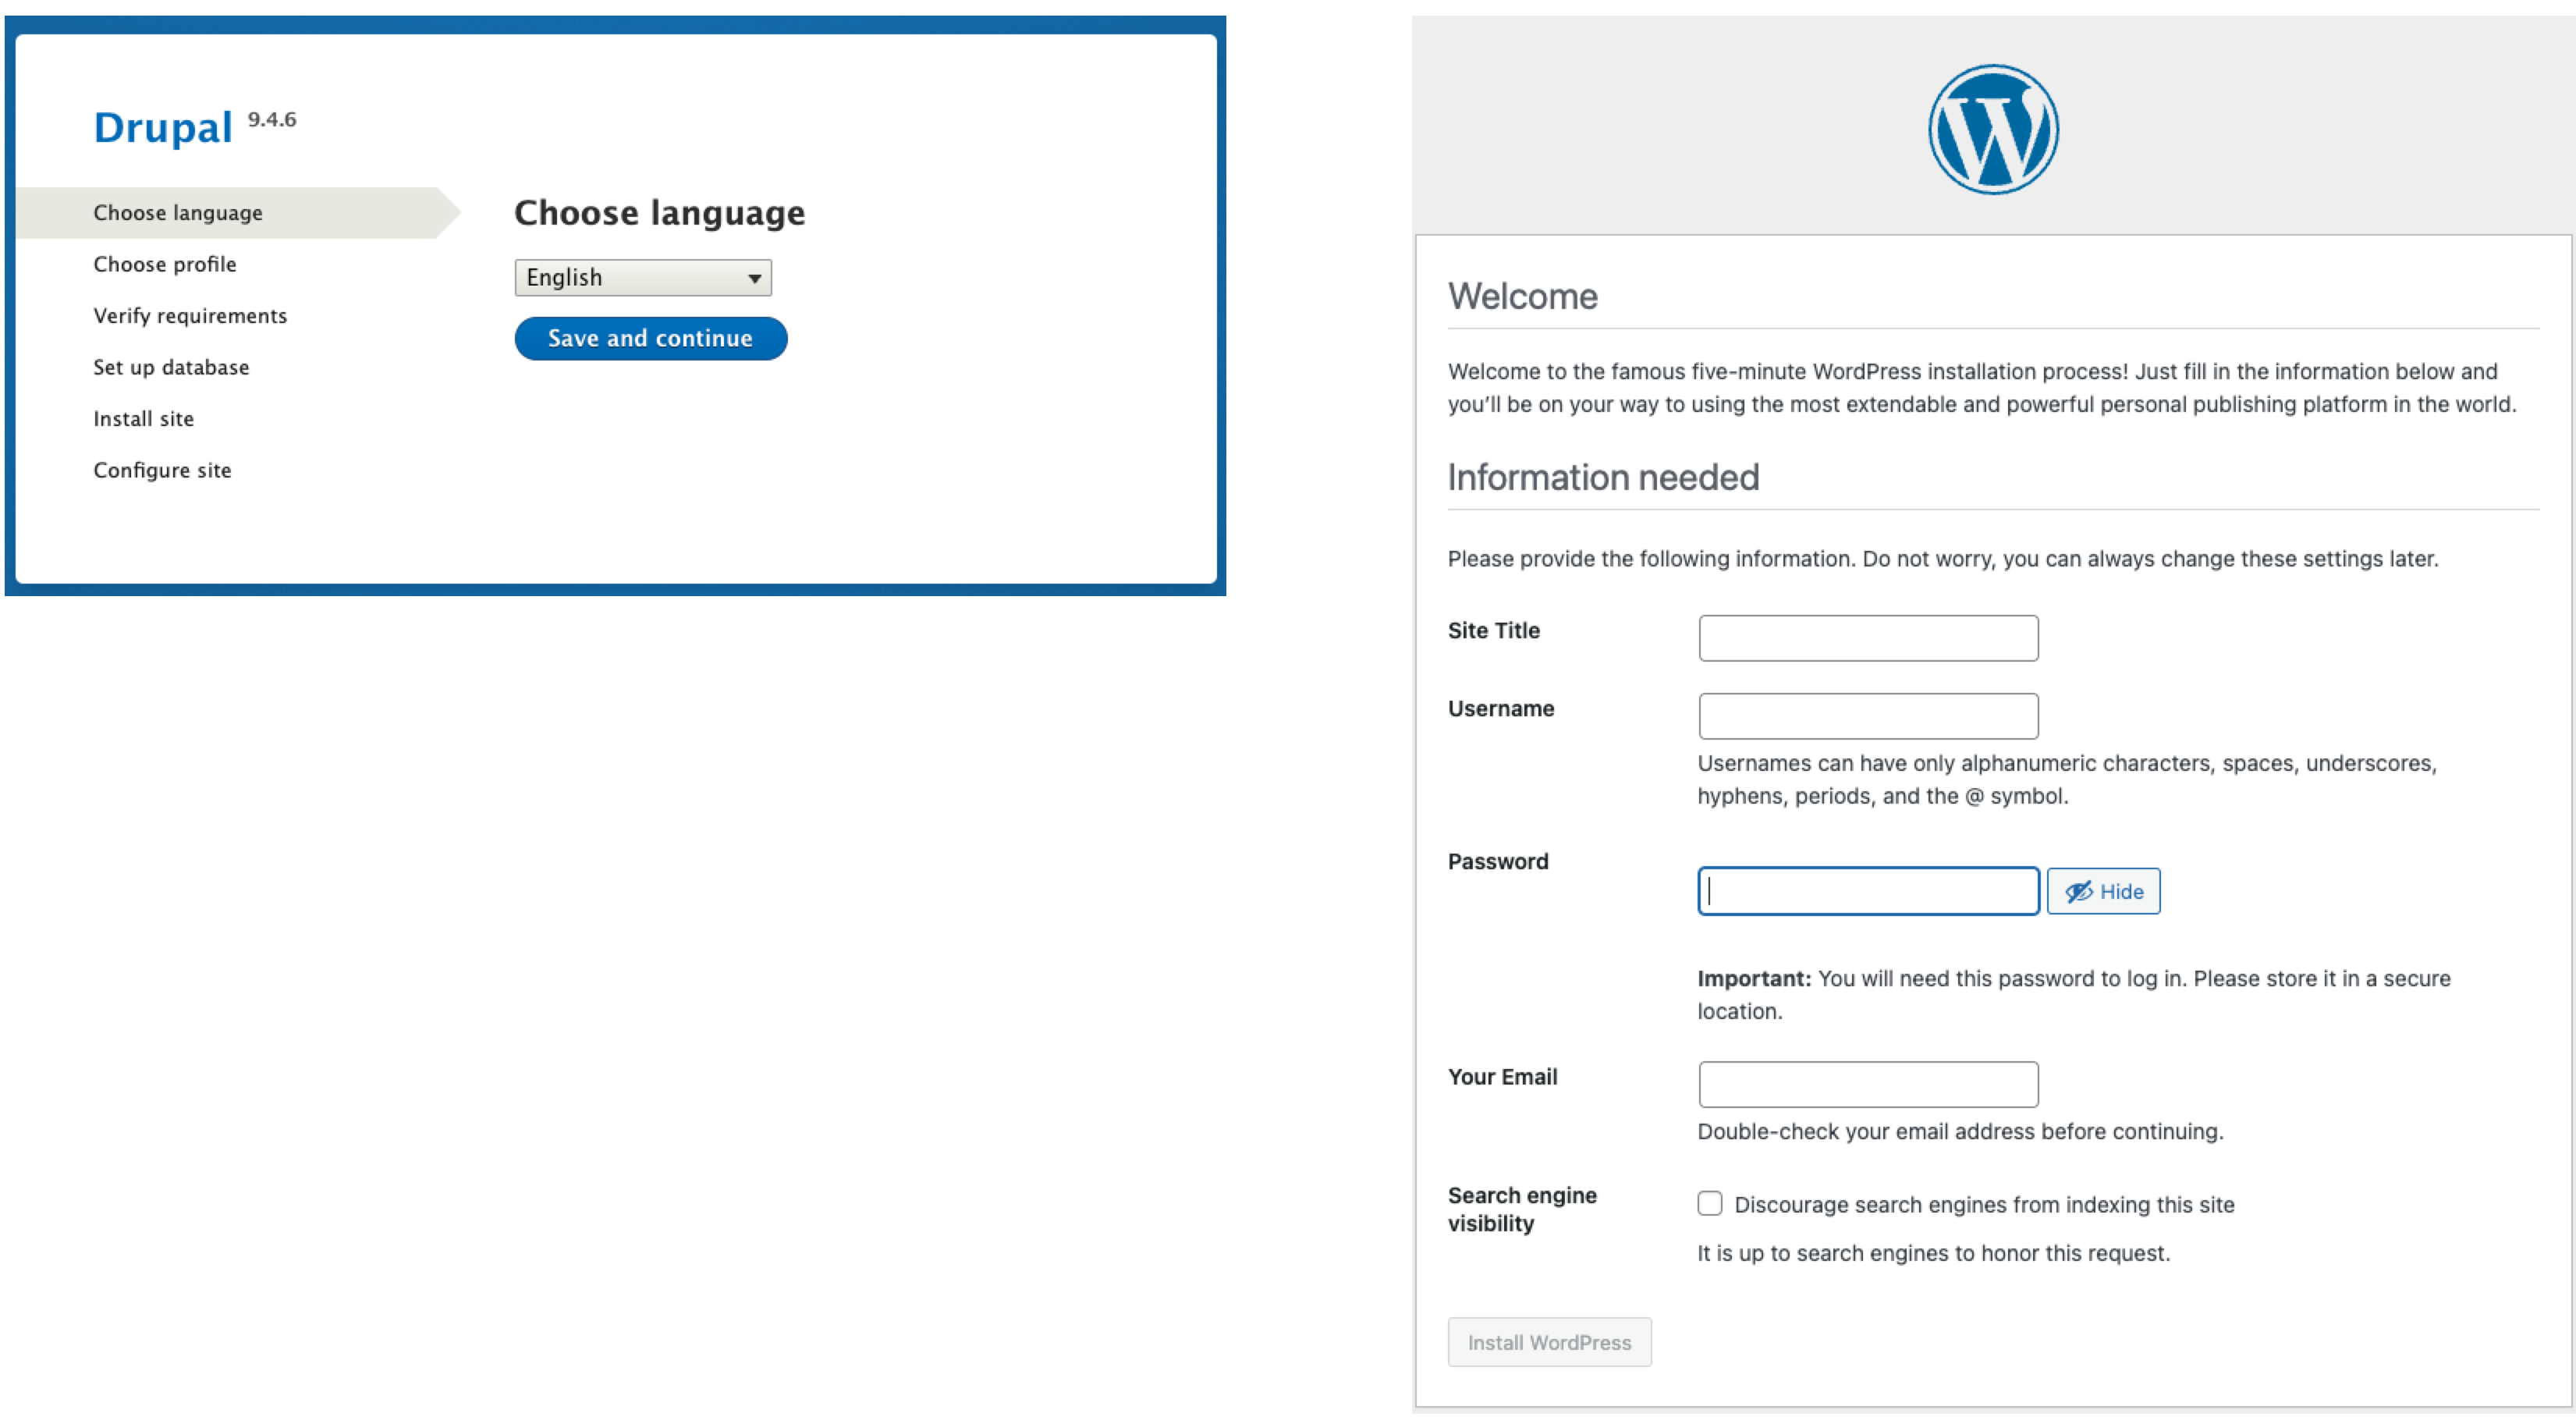
-
Enter the information on the screen, and when done, return to the browser tab containing your Site Dashboard.
Information:NoteBe sure to record your new username and password. You will use this to log in to your CMS in all environments (Dev, Test, Live).
You have successfully finished adding a site in its Dev environment. Click Visit Dev Site to view your site.
Create the Test environment
To create your Test environment:
-
Click the Test tab, then click Initialize Test Environment to create your Test environment.
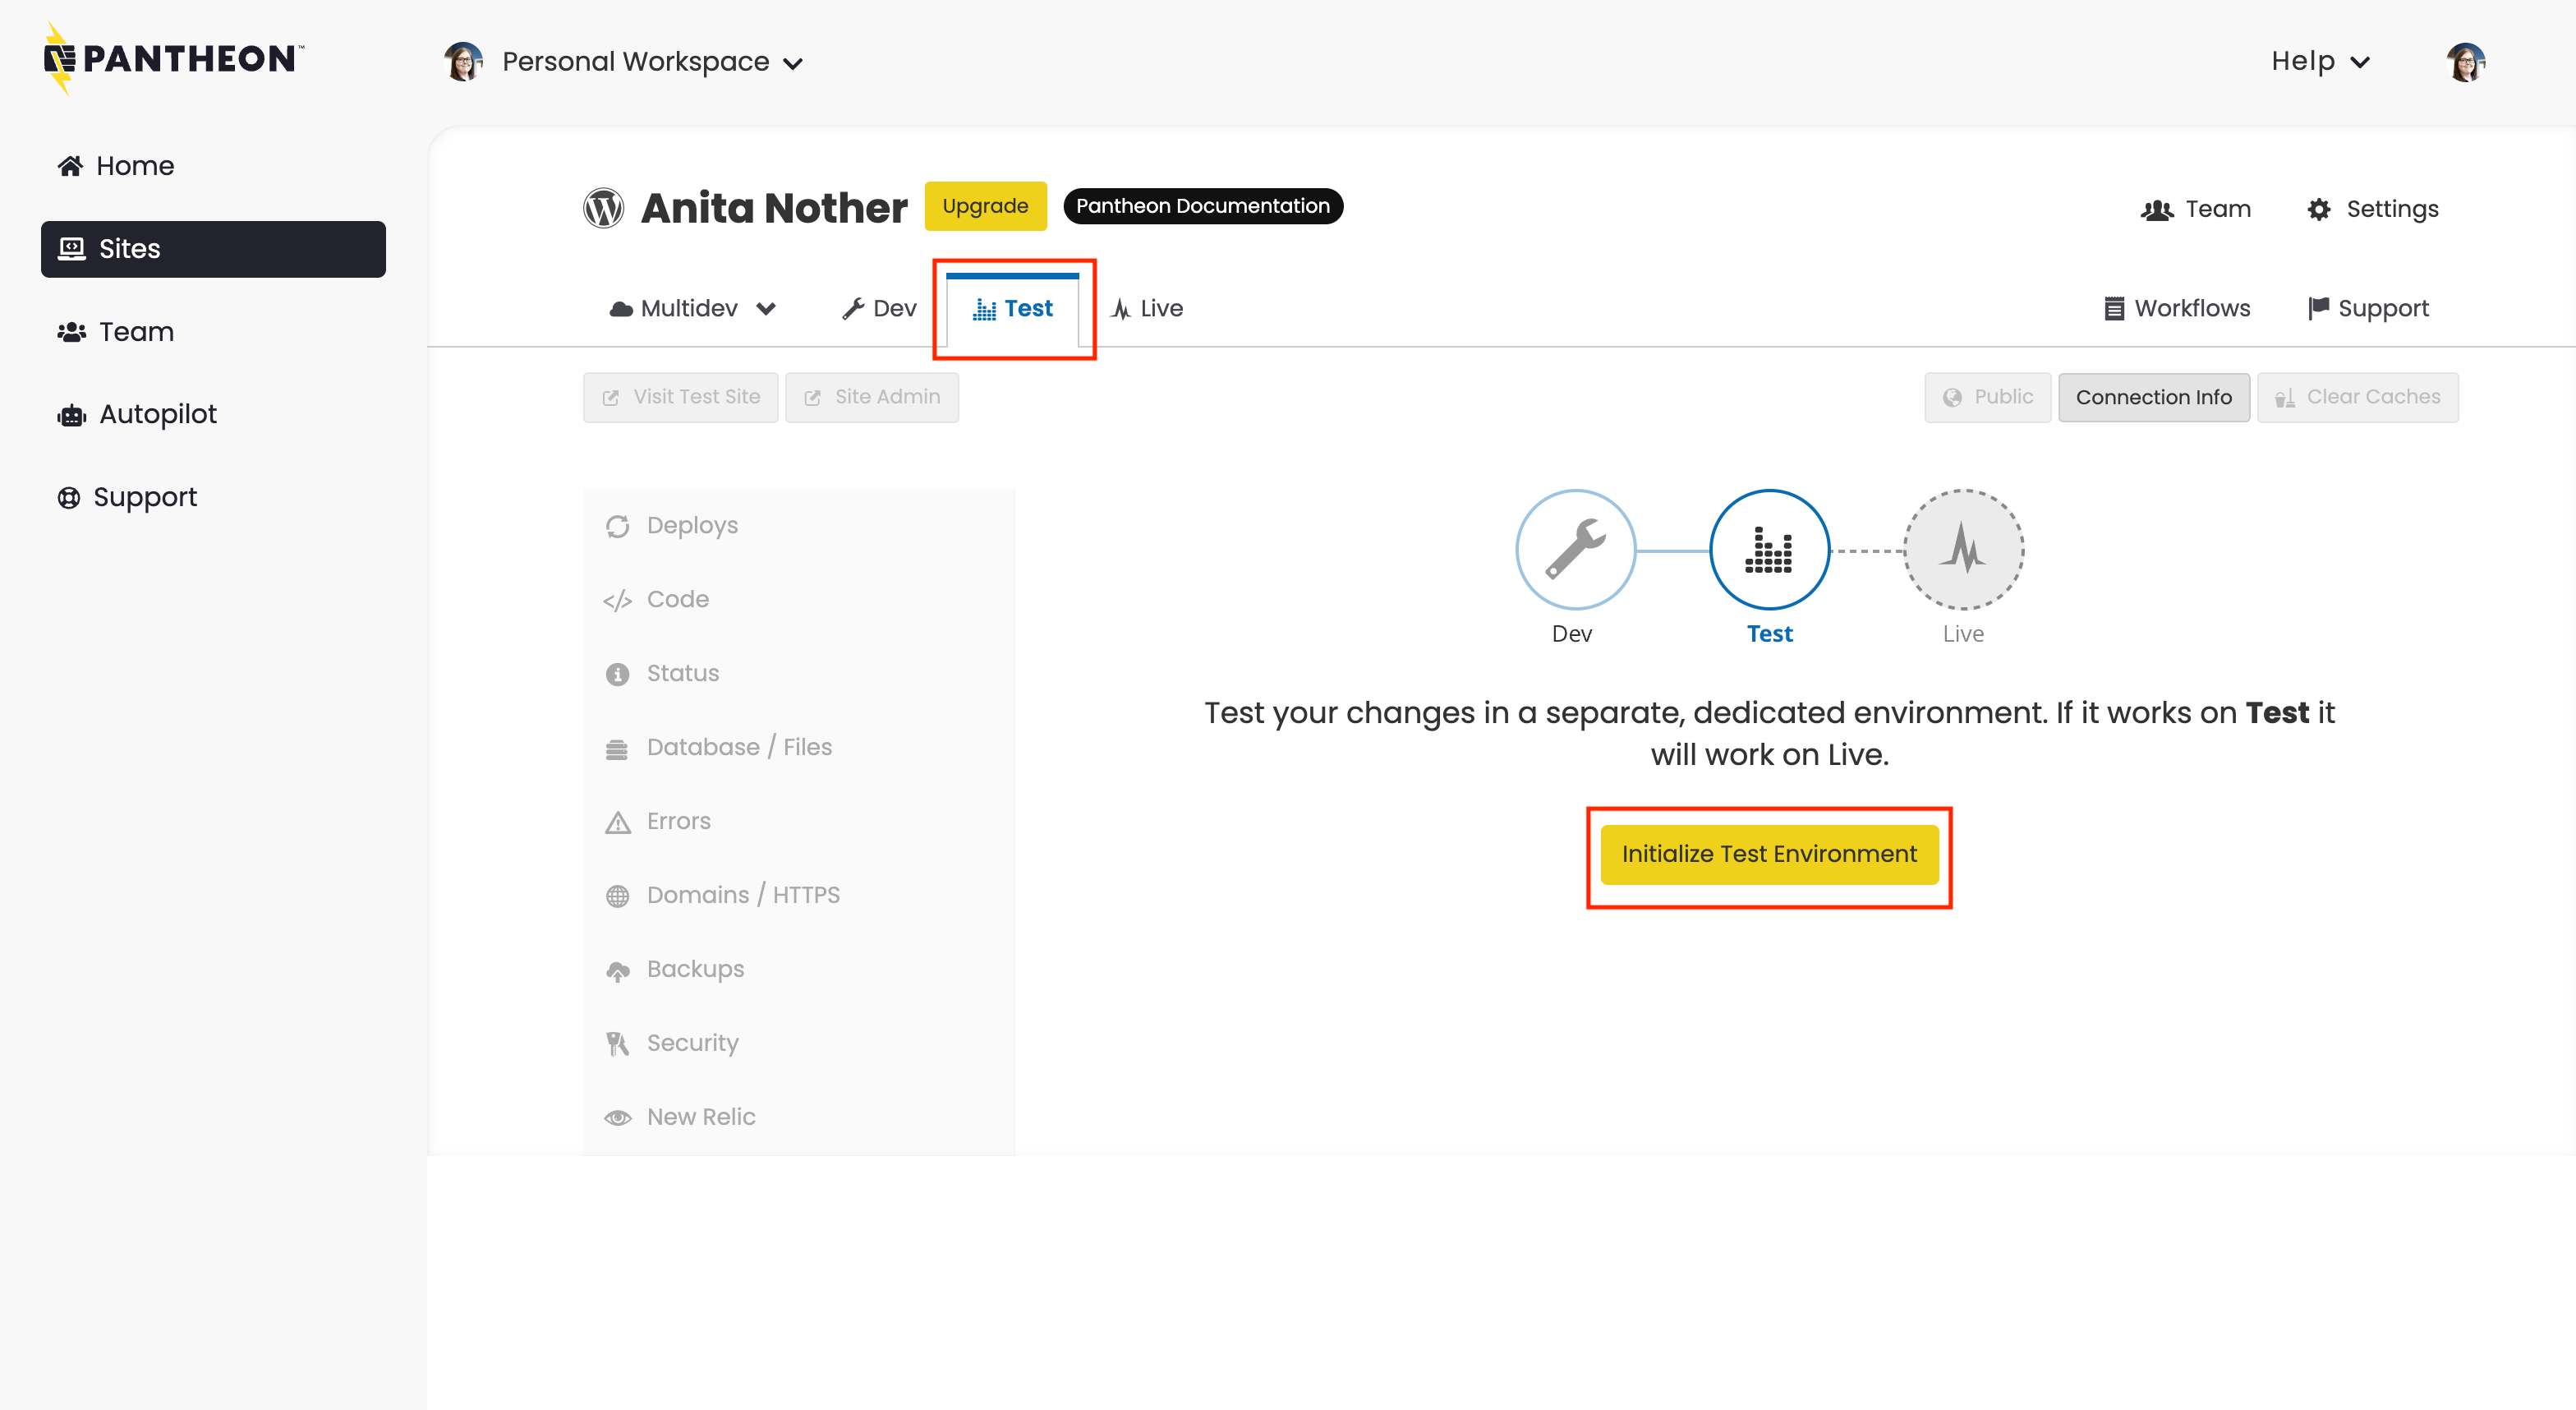
This takes a few moments.
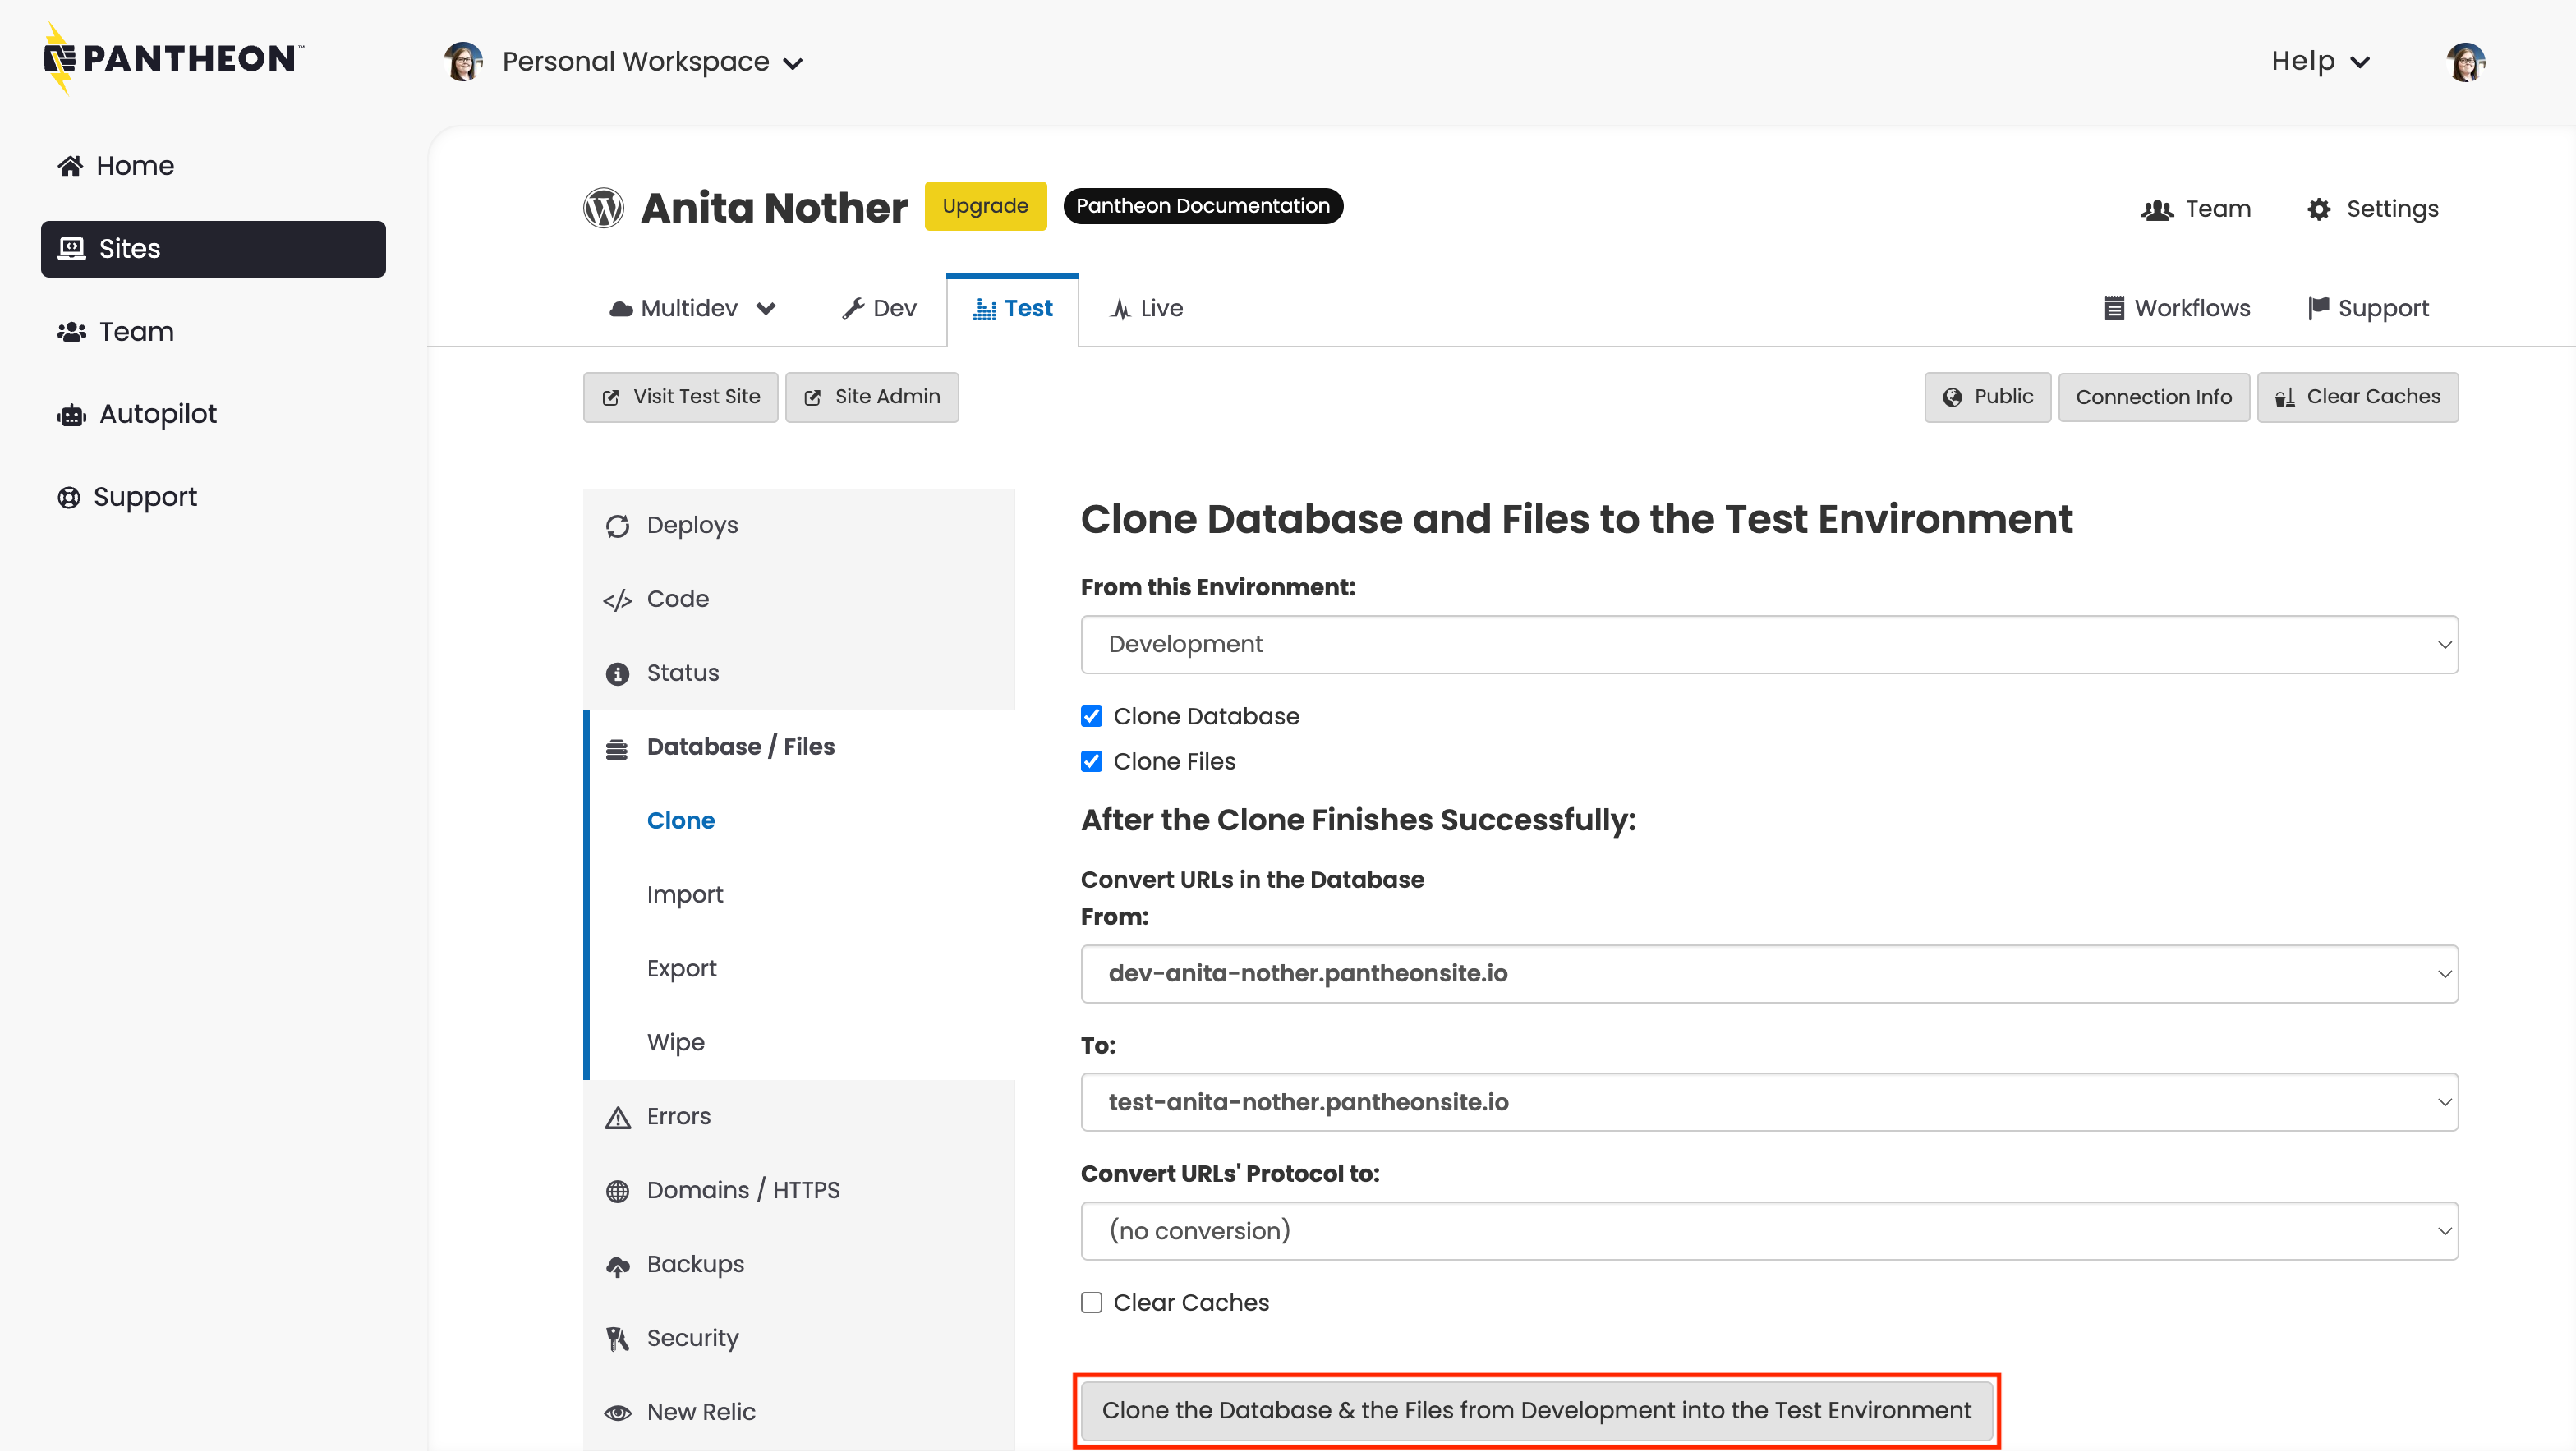
-
Go to the Database / Files tab and select the following:
- From this Environment: Development
- Clone Database: Checked
- Clone Files: Checked
-
Click Clone the Database & the Files from Development into the Test Environment.
You have successfully finished adding a site in its Test environment. Click Visit Test Site to view your site.
Create the Live environment
After you purchase a plan, you can deploy your site live. But first, you have to create the Live environment.
When you complete this step, your site will be live for anyone to see, at the Pantheon URL. For detailed information about launching your site, refer to our Launch Essentials guide.
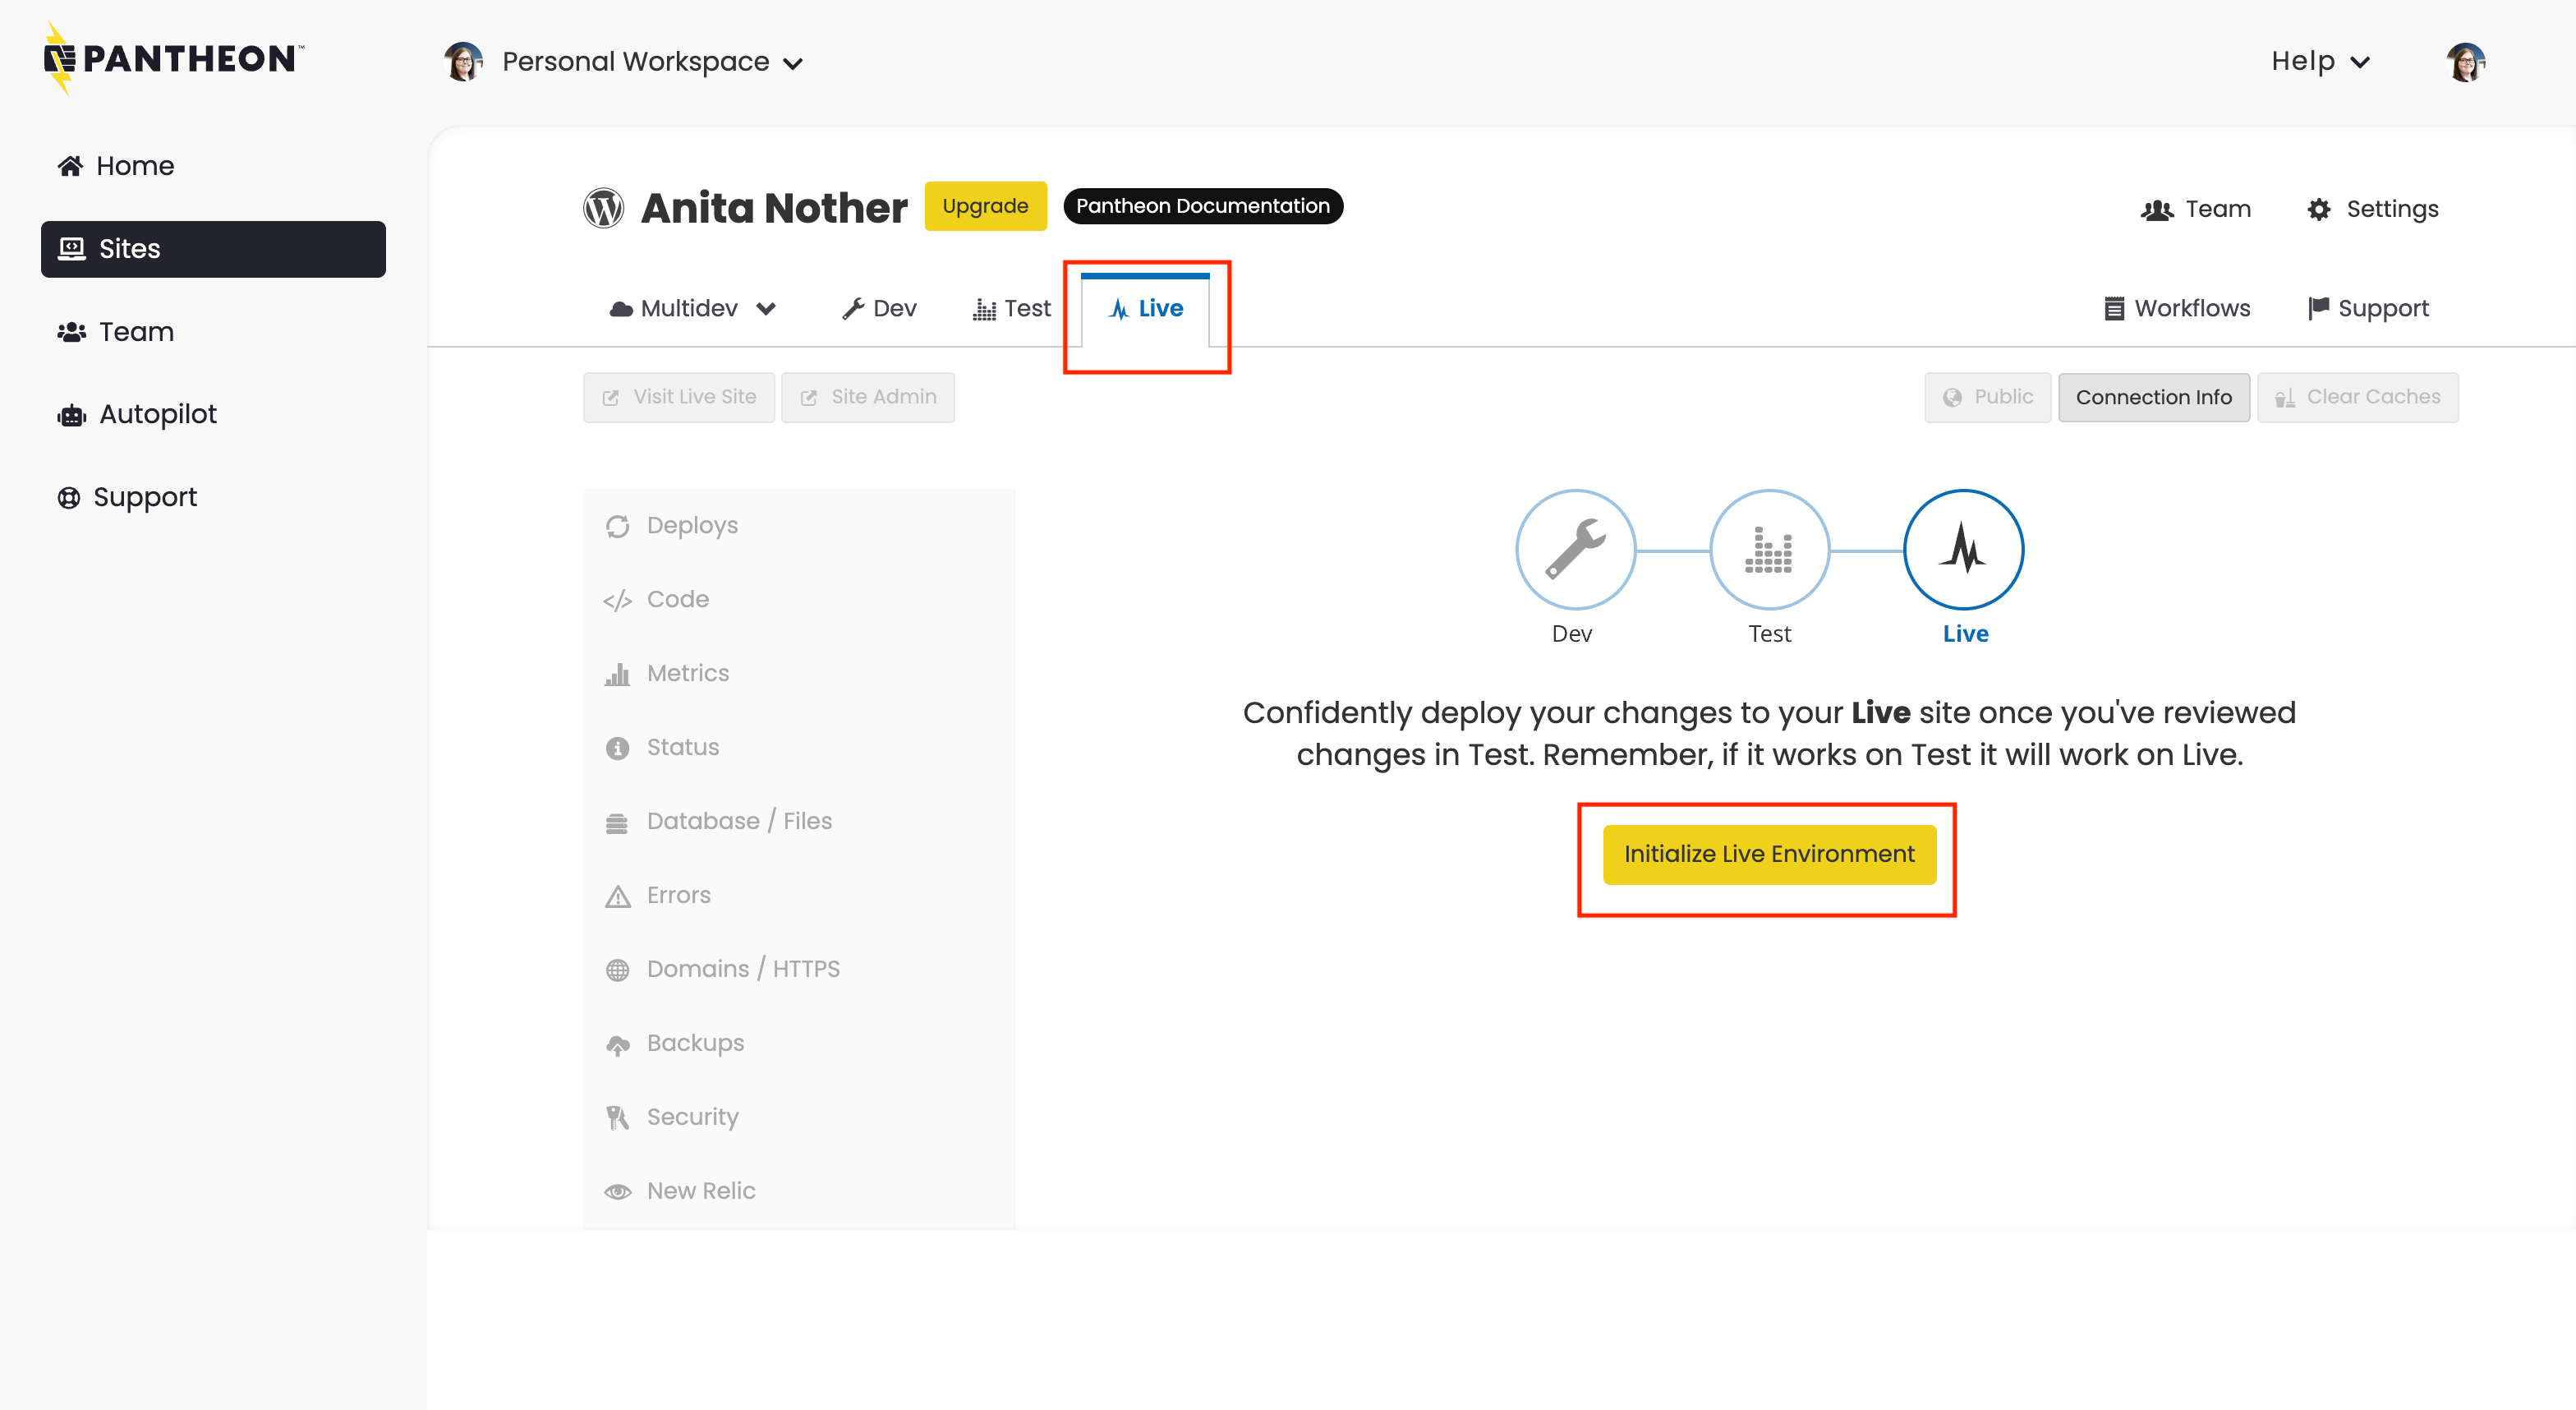
To create your Live environment:
- Go to the Site Dashboard.
- Click the Live tab.
- Click Initialize Live Environment to create your Live environment.
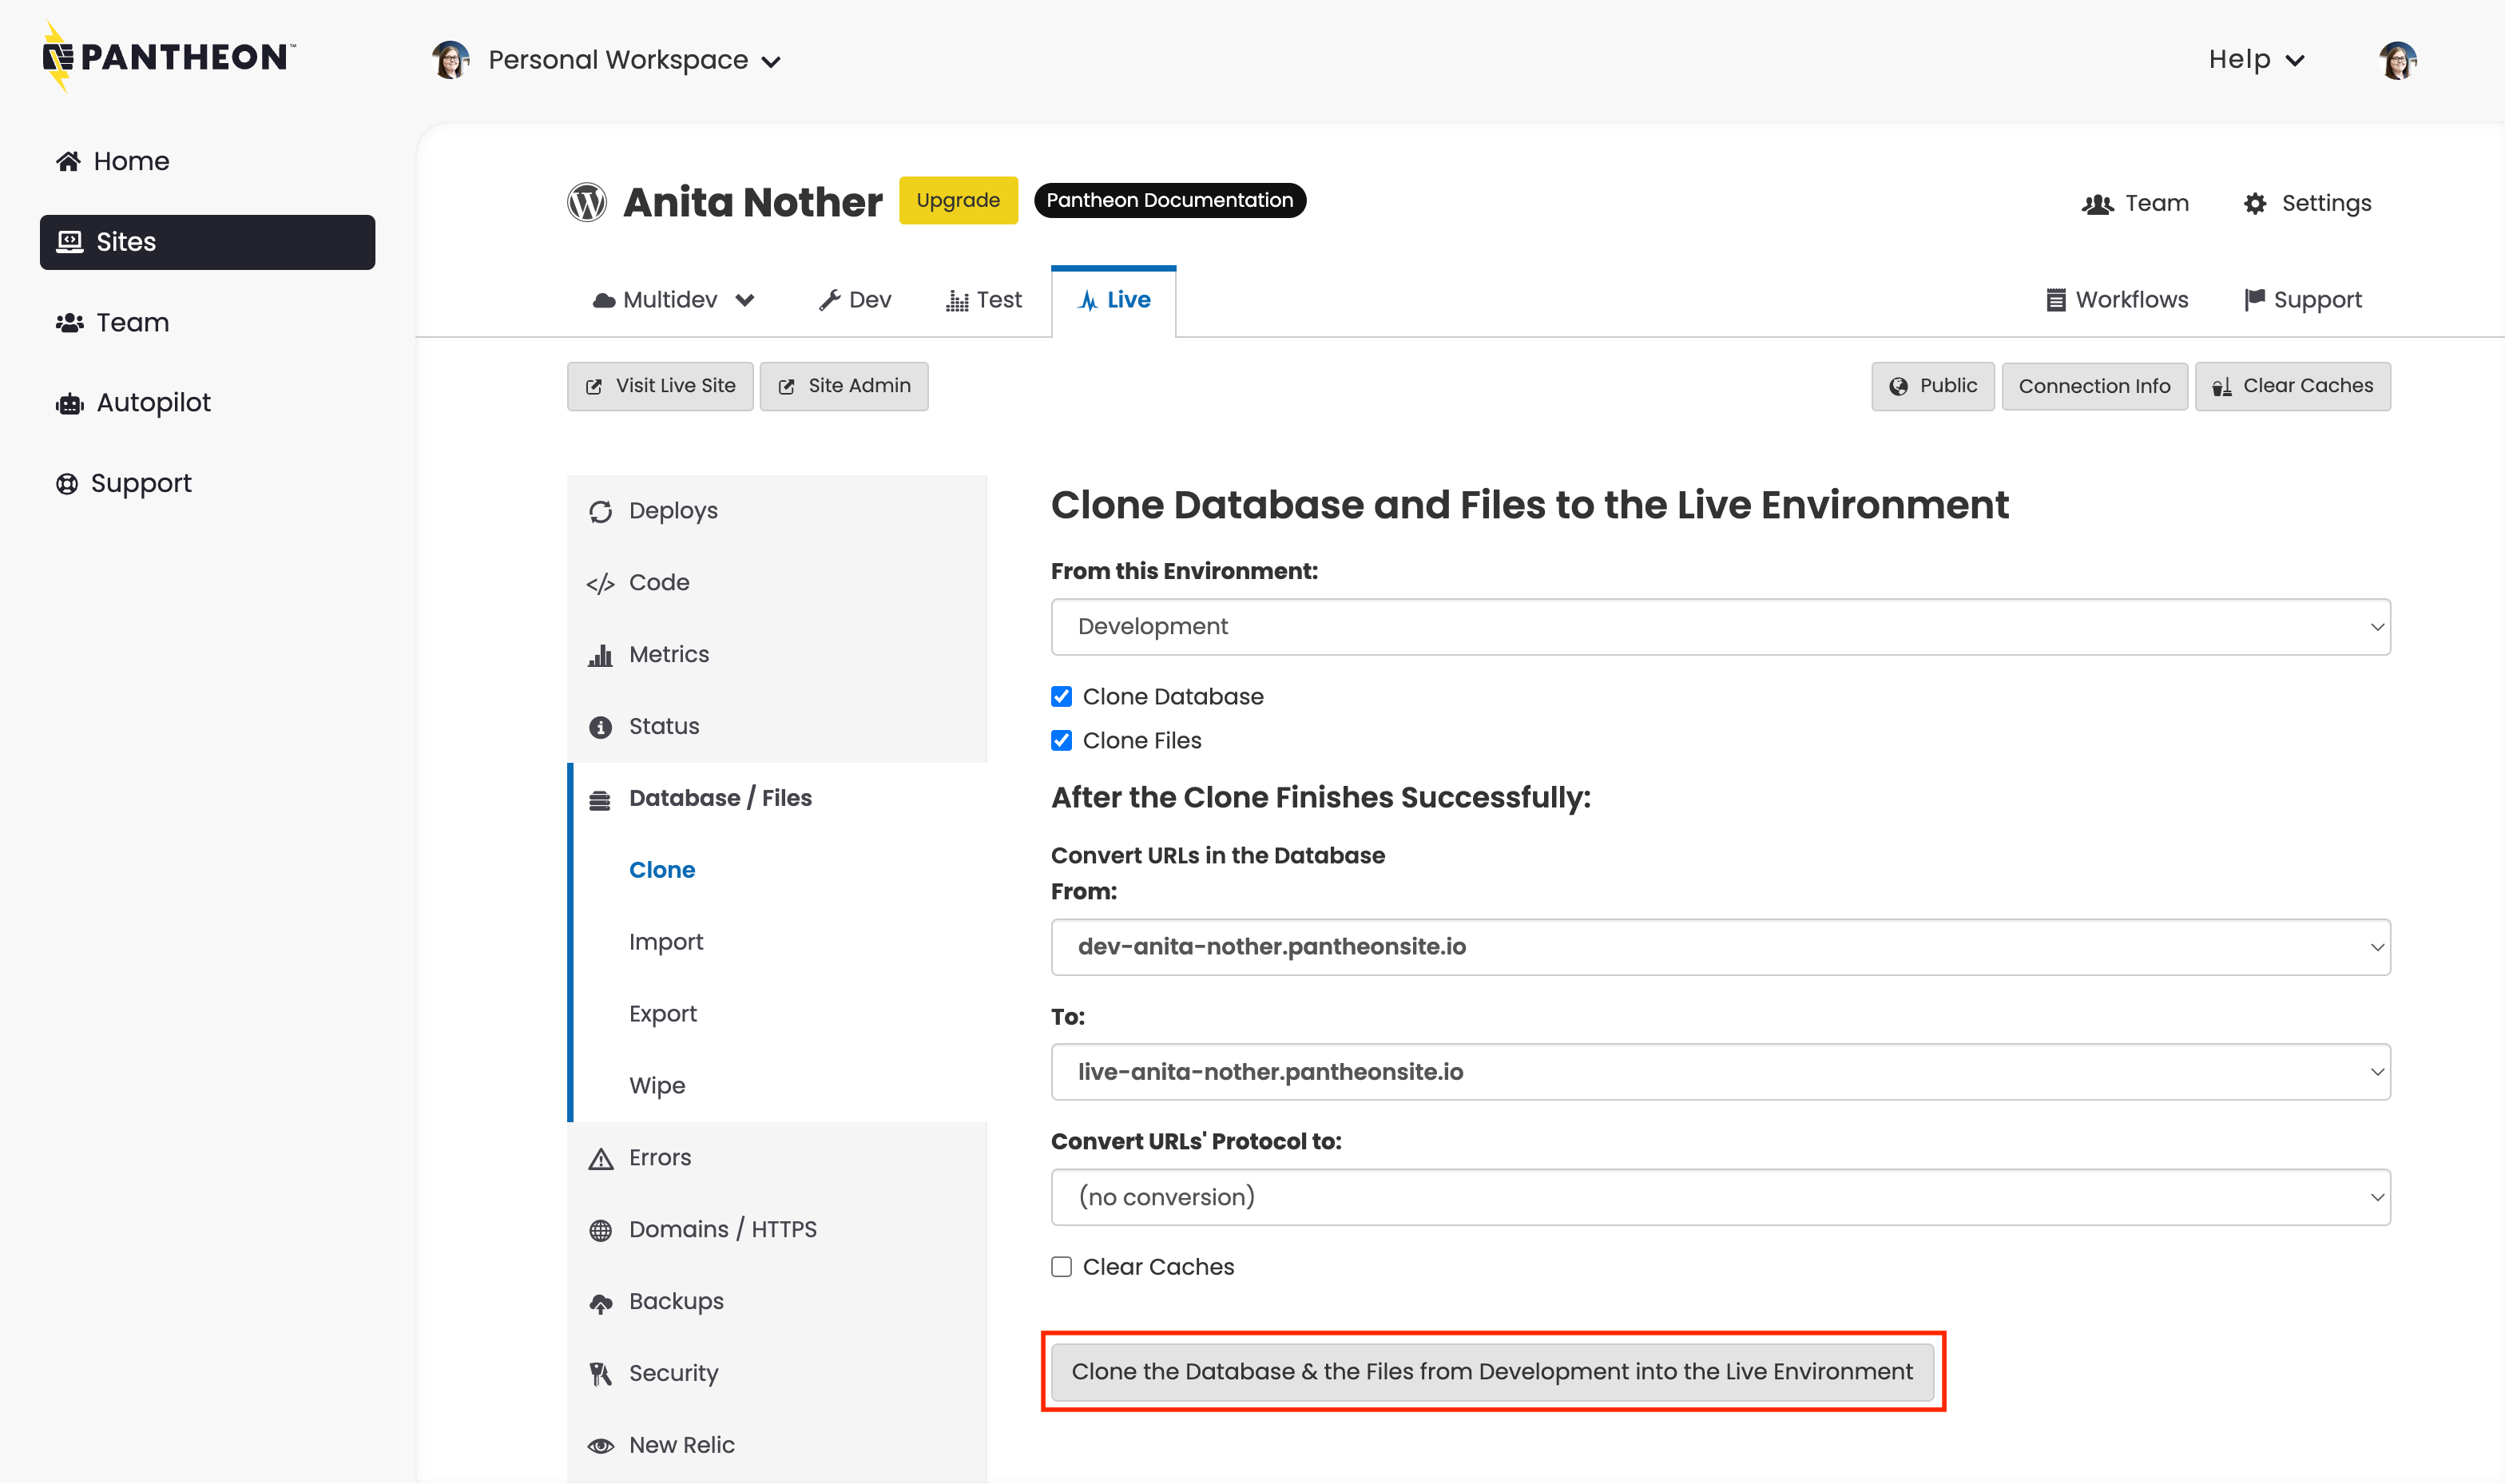
-
Go to the the Database / Files tab and select the following:
- From this Environment: Development
- Clone Database: Checked
- Clone Files: Checked
-
Click Clone the Database & the Files from Test into the Live Environment.
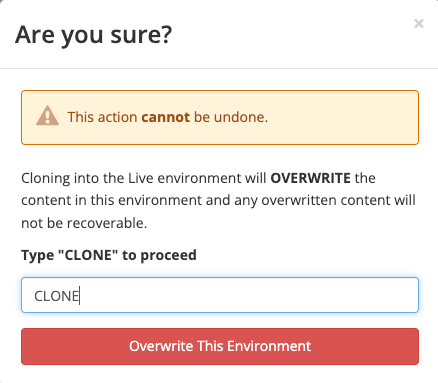
-
Type "CLONE" and then click Overwrite This Environment when prompted to confirm you want to go live.
You have successfully finished adding a site in its Live environment. Click Visit Live Site to view your site.
At this point, you have a live site with a Pantheon URL, like http://my-site.pantheonsite.io/. To change that to a more friendly URL, you'll need to purchase a domain from a DNS provider. Refer to our Domains on Pantheon Guide for more information.
Migrate an Existing Site
If you already have a site hosted elsewhere, you can move it over to Pantheon with minimal effort.
If your migration needs include any of the following, do not use this process, and instead refer to the specified documentation:
-
The site or site archive is greater than 500MB: Manually Migrate Sites to Pantheon
-
You are migrating a site that is only on your local machine: Manually Migrate Sites to Pantheon
-
You are using Drupal version 9 or higher, or are moving a Drupal site and want to upgrade to the latest version of Drupal:
-
Your site is Composer-managed: Migrate a Composer Managed Drupal Site from Another Platform or Import Drush Site Archives with Terminus
-
Your site is not Composer-managed: Migrate a Drupal Site from Another Platform
-
-
You are using WordPress Multisite: Manually Migrate Sites to Pantheon
-
You are using WordPress and don't want to install the plugin required for migration: Manually Migrate Sites to Pantheon
Before you Begin
-
Check your plugins and/or modules against Drupal Modules Known Issues and WordPress Known Issues.
-
Make sure your code is compatible with the latest recommended version of PHP for your CMS. If not, be prepared to adjust PHP versions.
-
Remove unneeded code, database tables, and files.
Perform the Migration
You have successfully migrated a site to its Dev environment!
Now it's time to purchase a site plan in preparation for launching your site.
More Resources
- Migrate a Composer Managed Drupal Site from Another Platform
- Import Drush Site Archives with Terminus
- Migrate a Drupal Site from Another Platform
- Manually Migrate Sites to Pantheon
- Create a Static Site Using an Empty Upstream
- Create a Drupal Site Using a Drupal Distribution
- Create a Drupal Site From the Command Line Using Terminus and Drush
- Create a WordPress Site with Terminus and WP-CLI