Get Started with Pantheon
Launch Your Site
Make your site live for all to see.
And now it's time to finally make your site available to the public! This section provides the minimum requirements to launch your site. Refer to our Launch Guide for more detailed information.
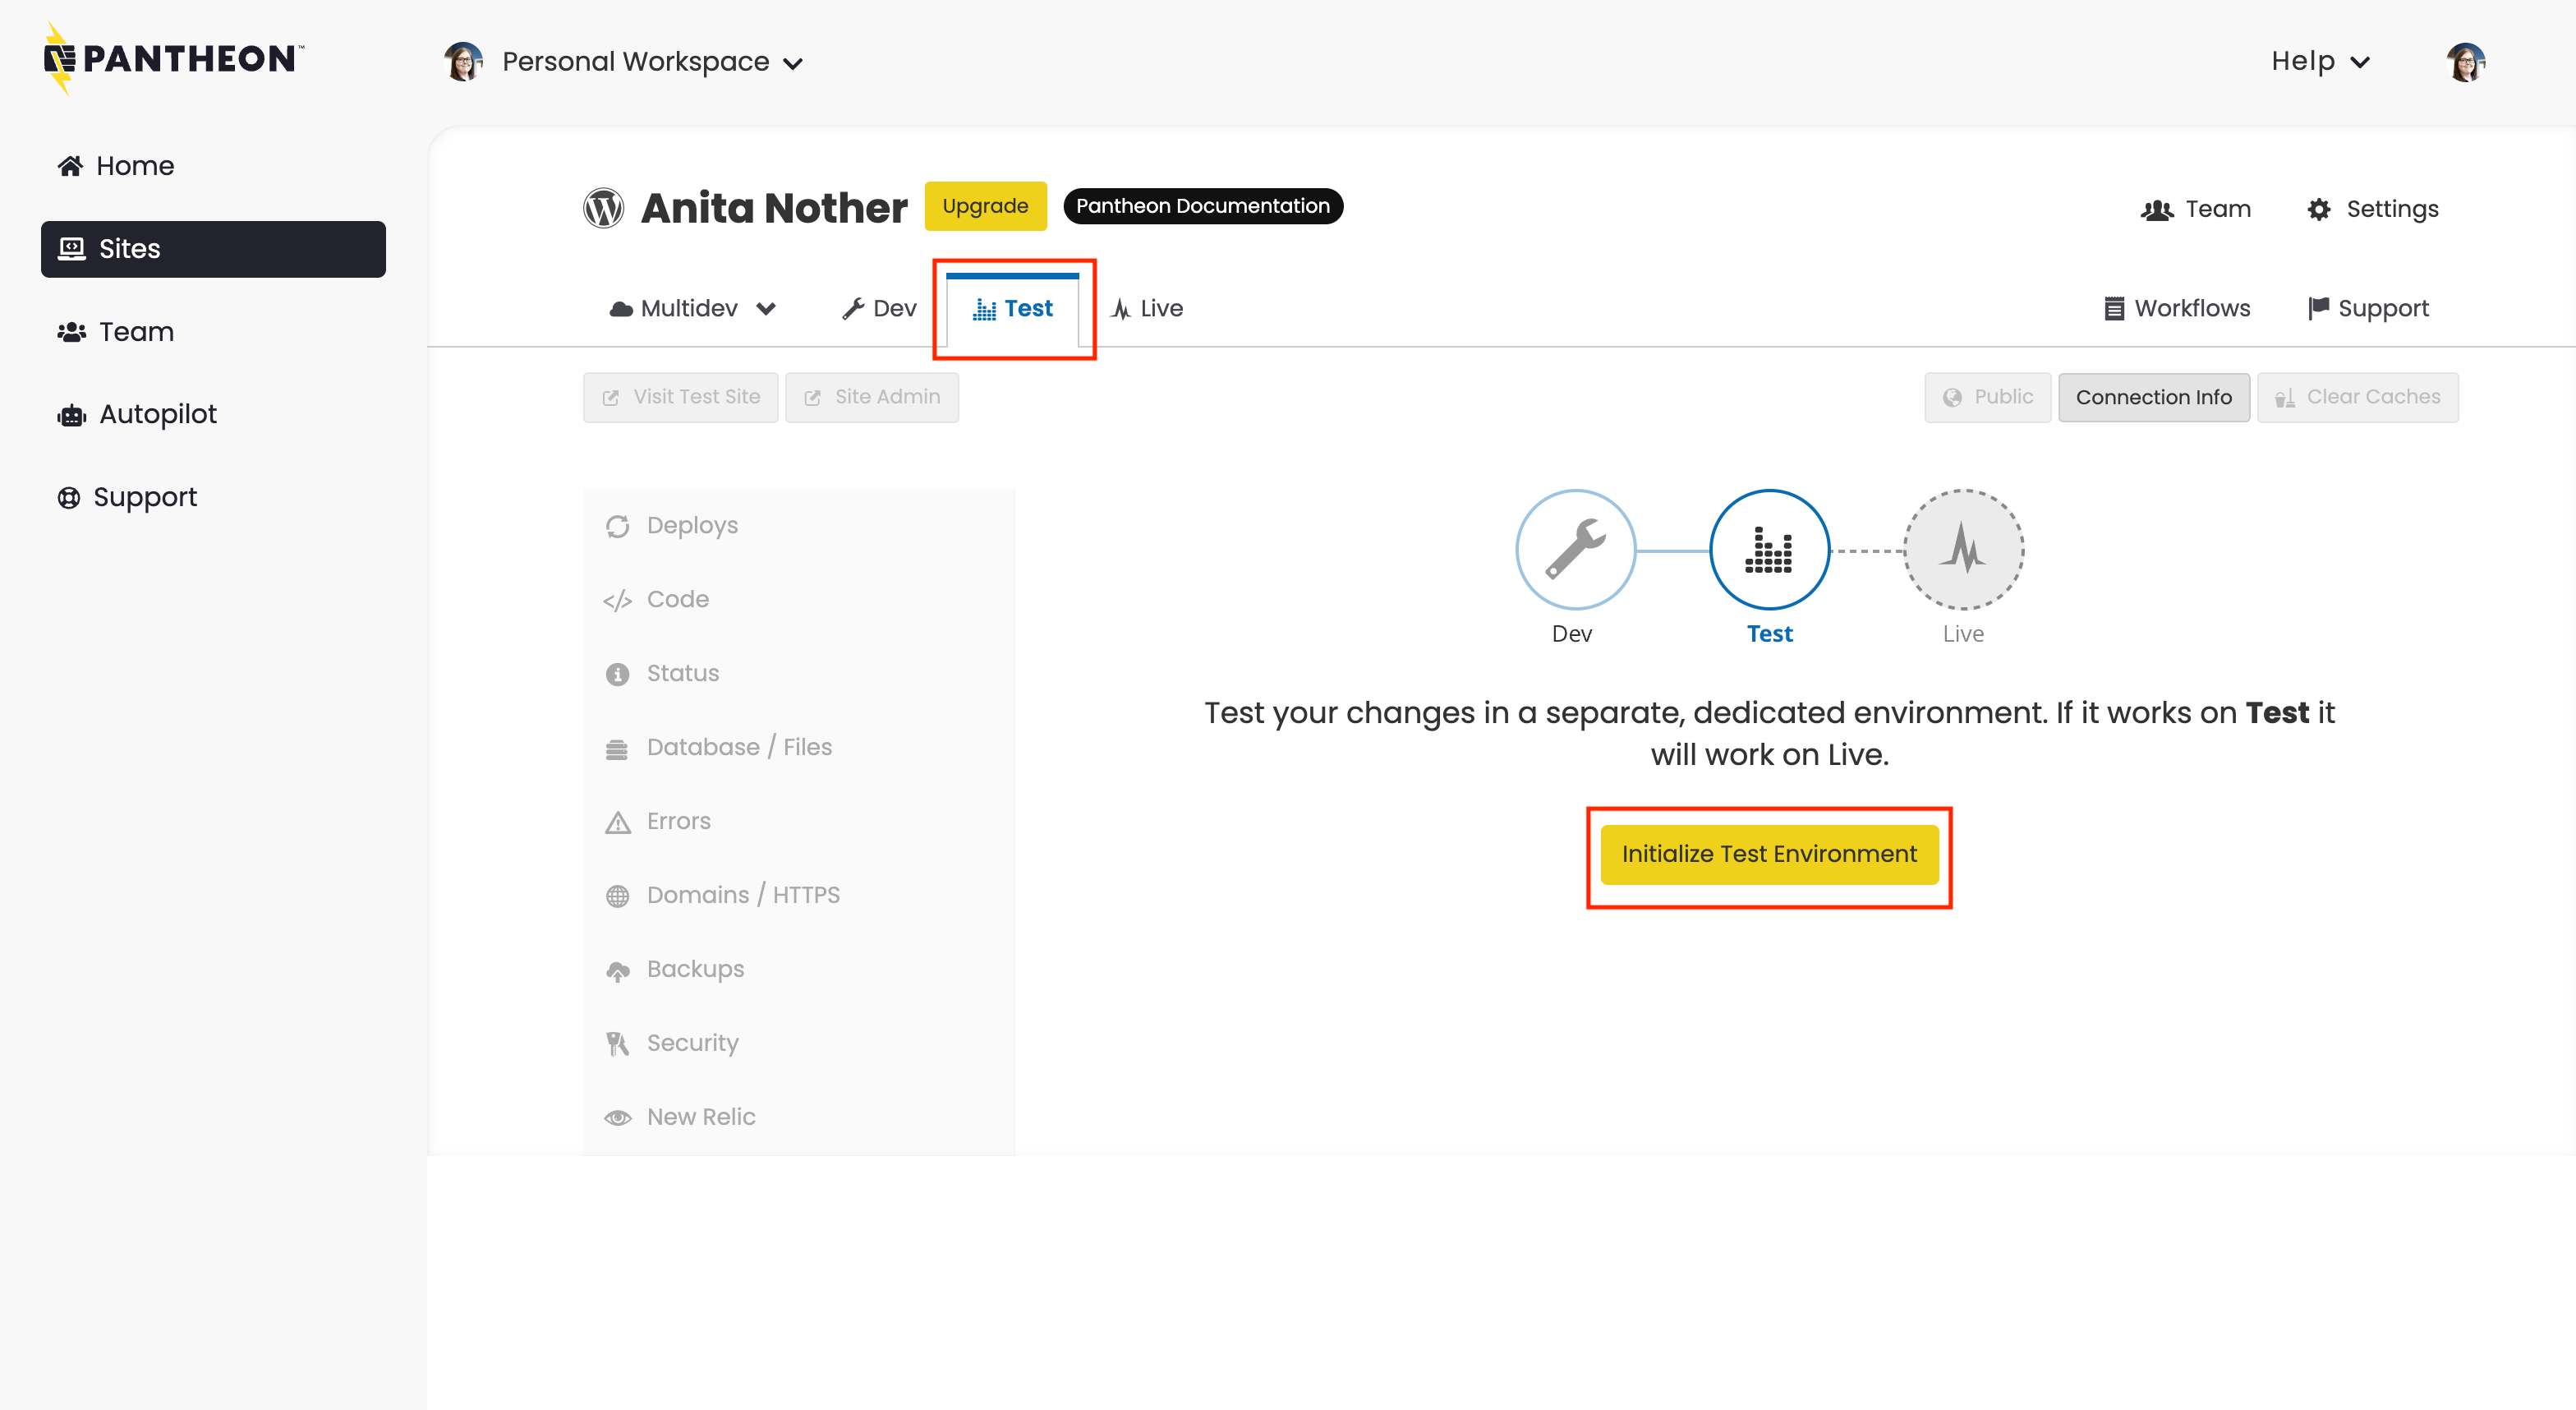
Test Your Site
To create your Test environment:
-
Click the Test tab, then click Initialize Test Environment to create your Test environment.
This takes a few moments.
-
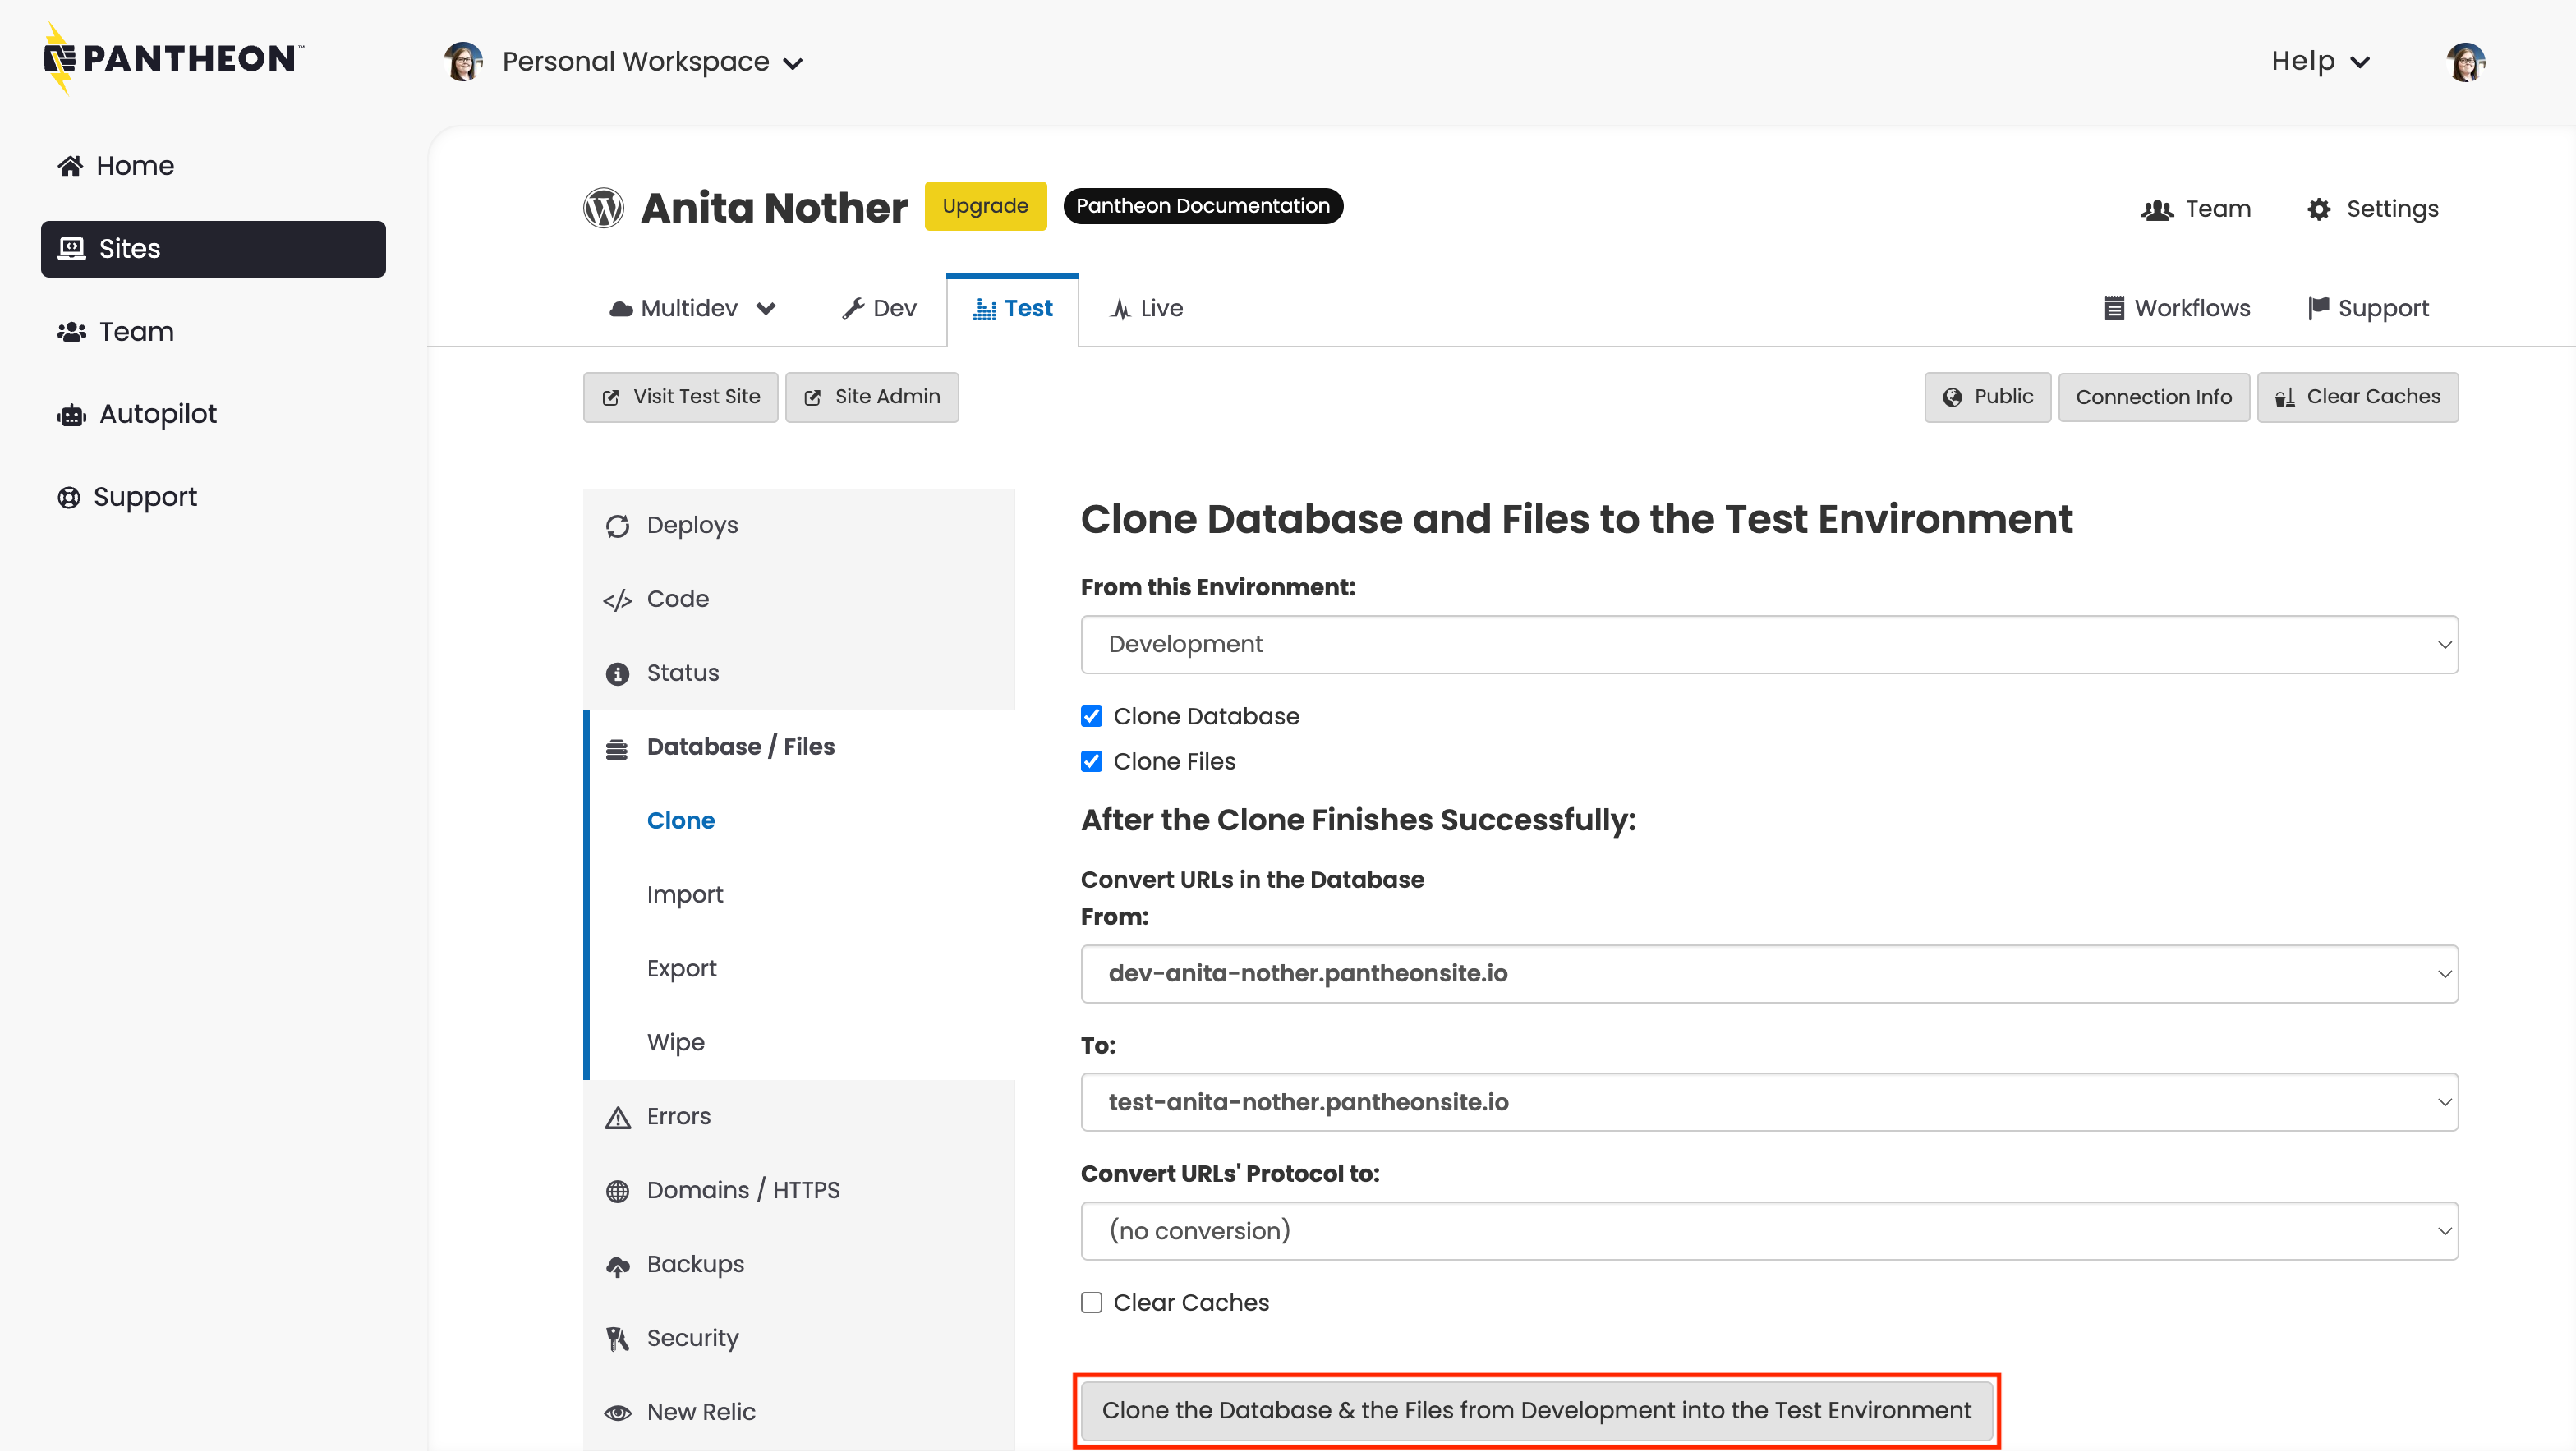
Go to the Database / Files tab and select the following:
- From this Environment: Development
- Clone Database: Checked
- Clone Files: Checked
-
Click Clone the Database & the Files from Development into the Test Environment.
You have successfully finished adding a site in its Test environment. Click Visit Test Site to view your site.
Deploy Your Site to Live
After you purchase a plan, you can deploy your site live. But first, you have to create the Live environment.
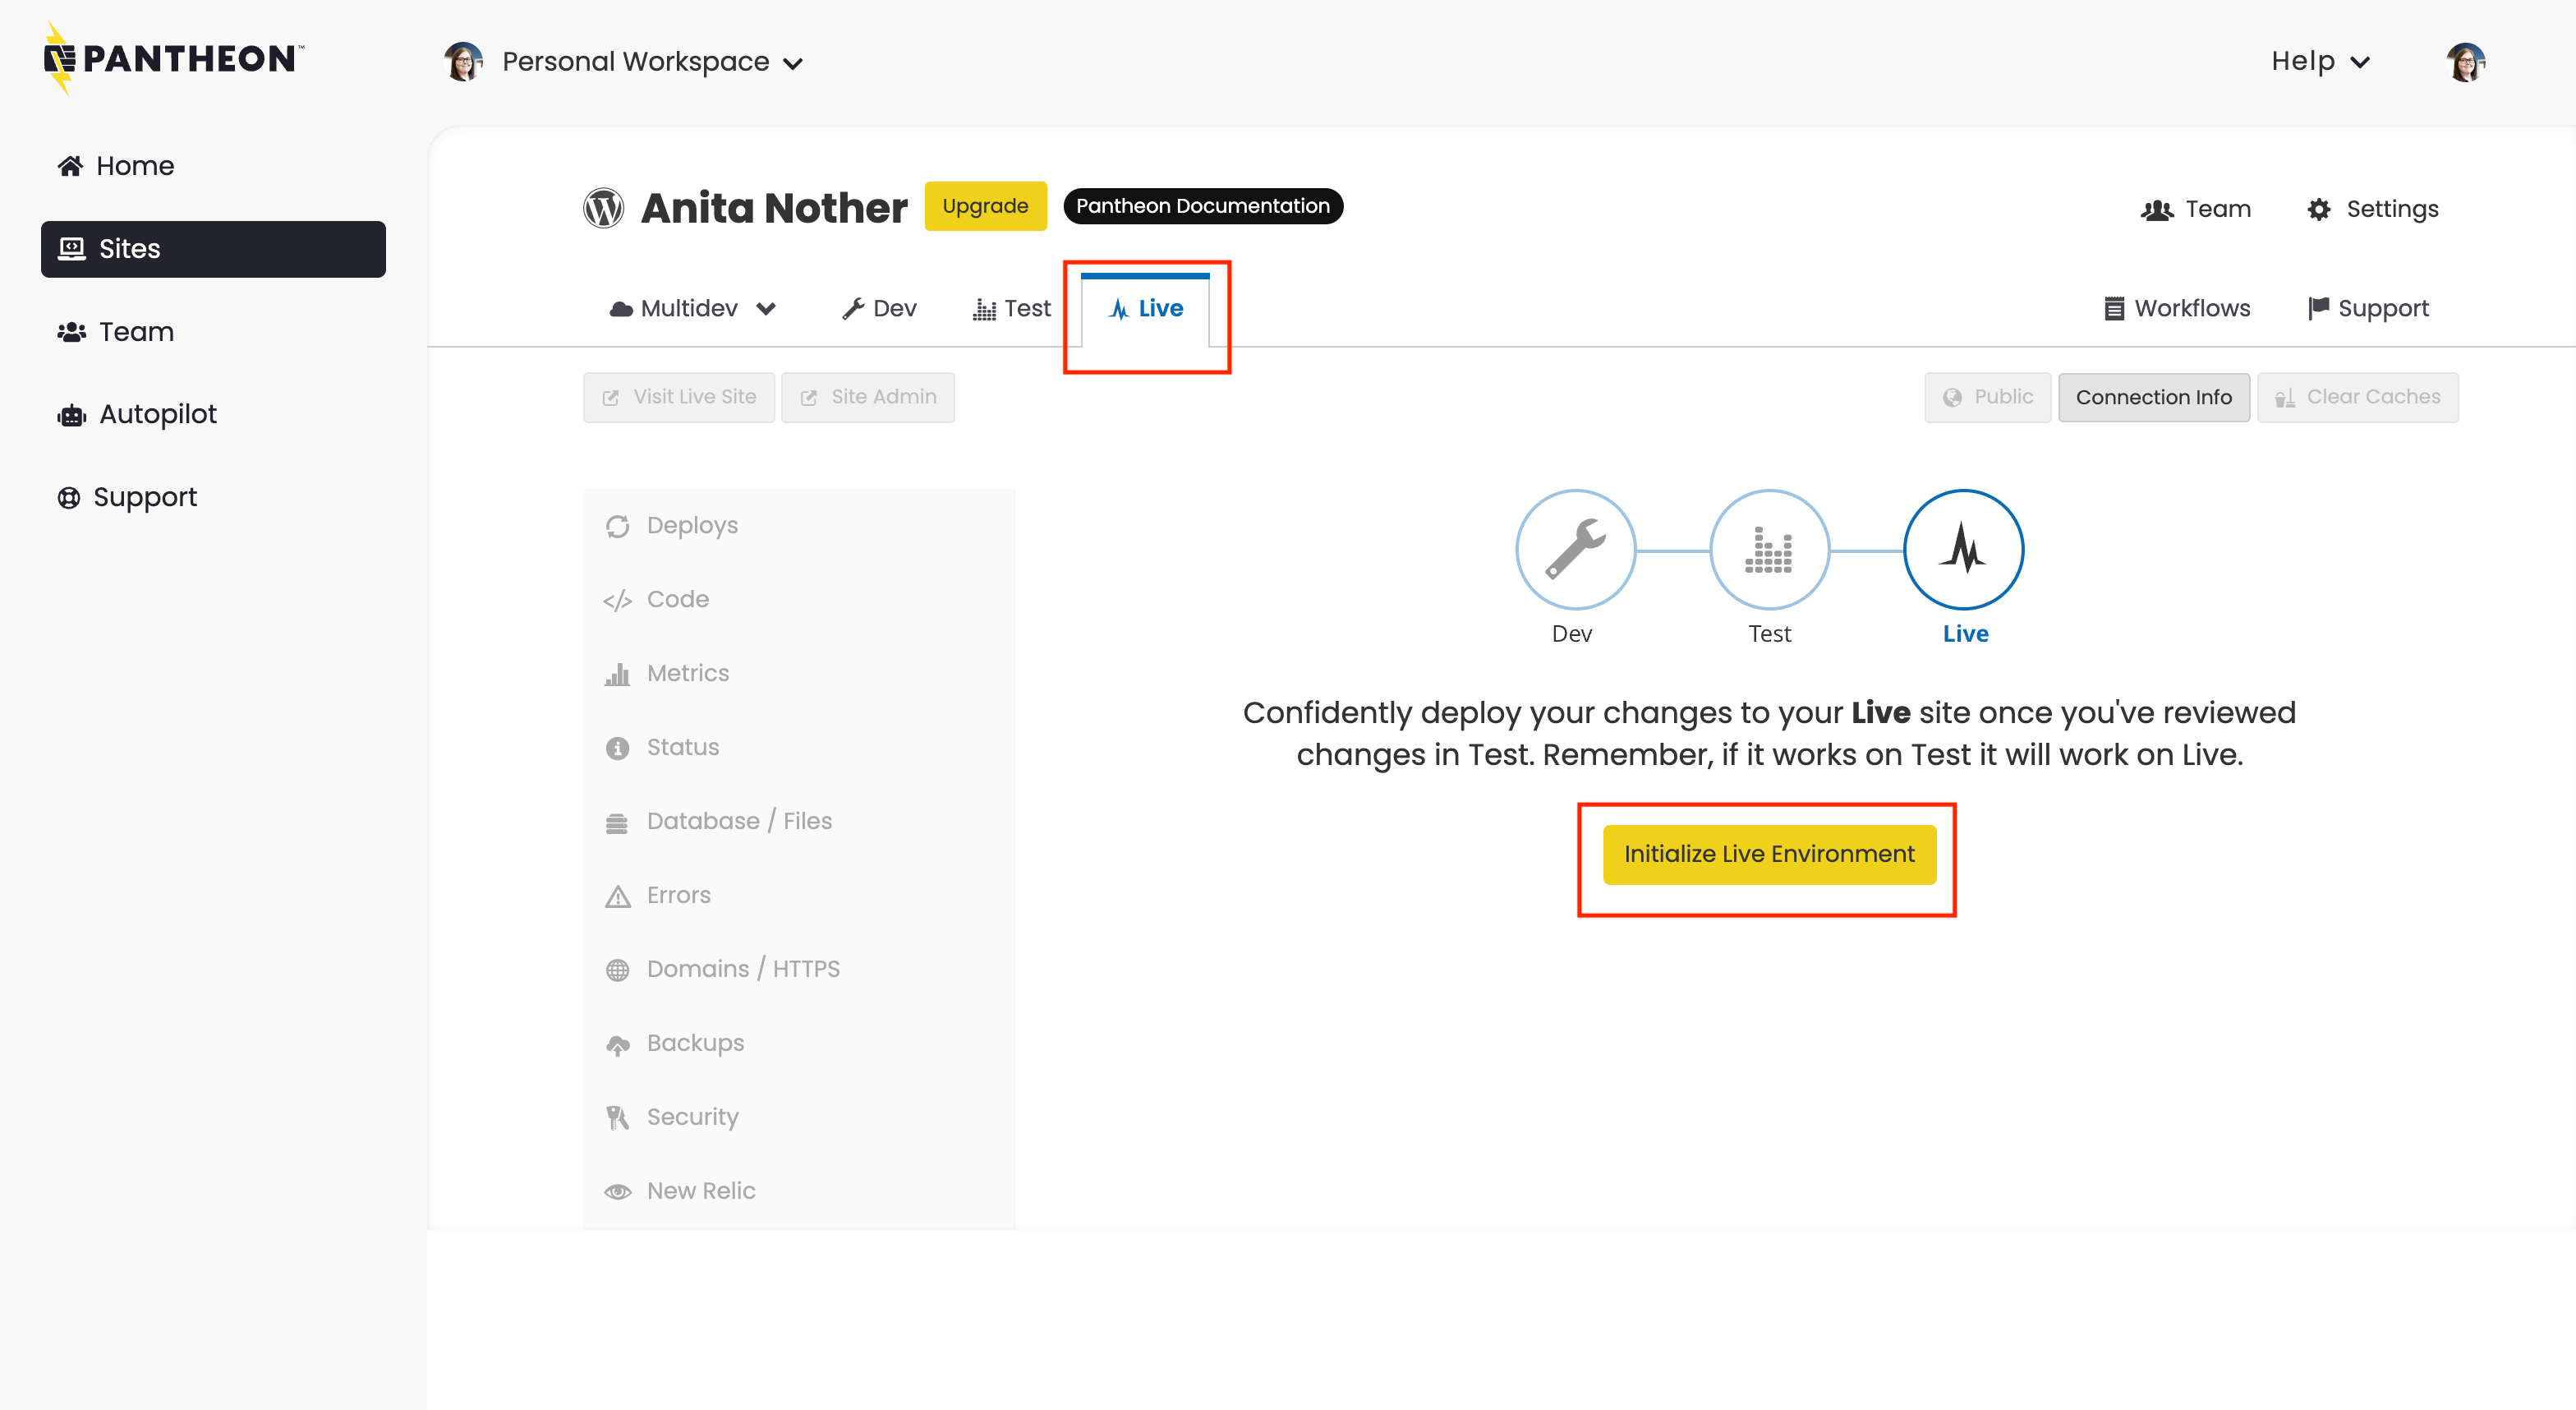
To create your Live environment:
- Go to the Site Dashboard.
- Click the Live tab.
- Click Initialize Live Environment to create your Live environment.
-
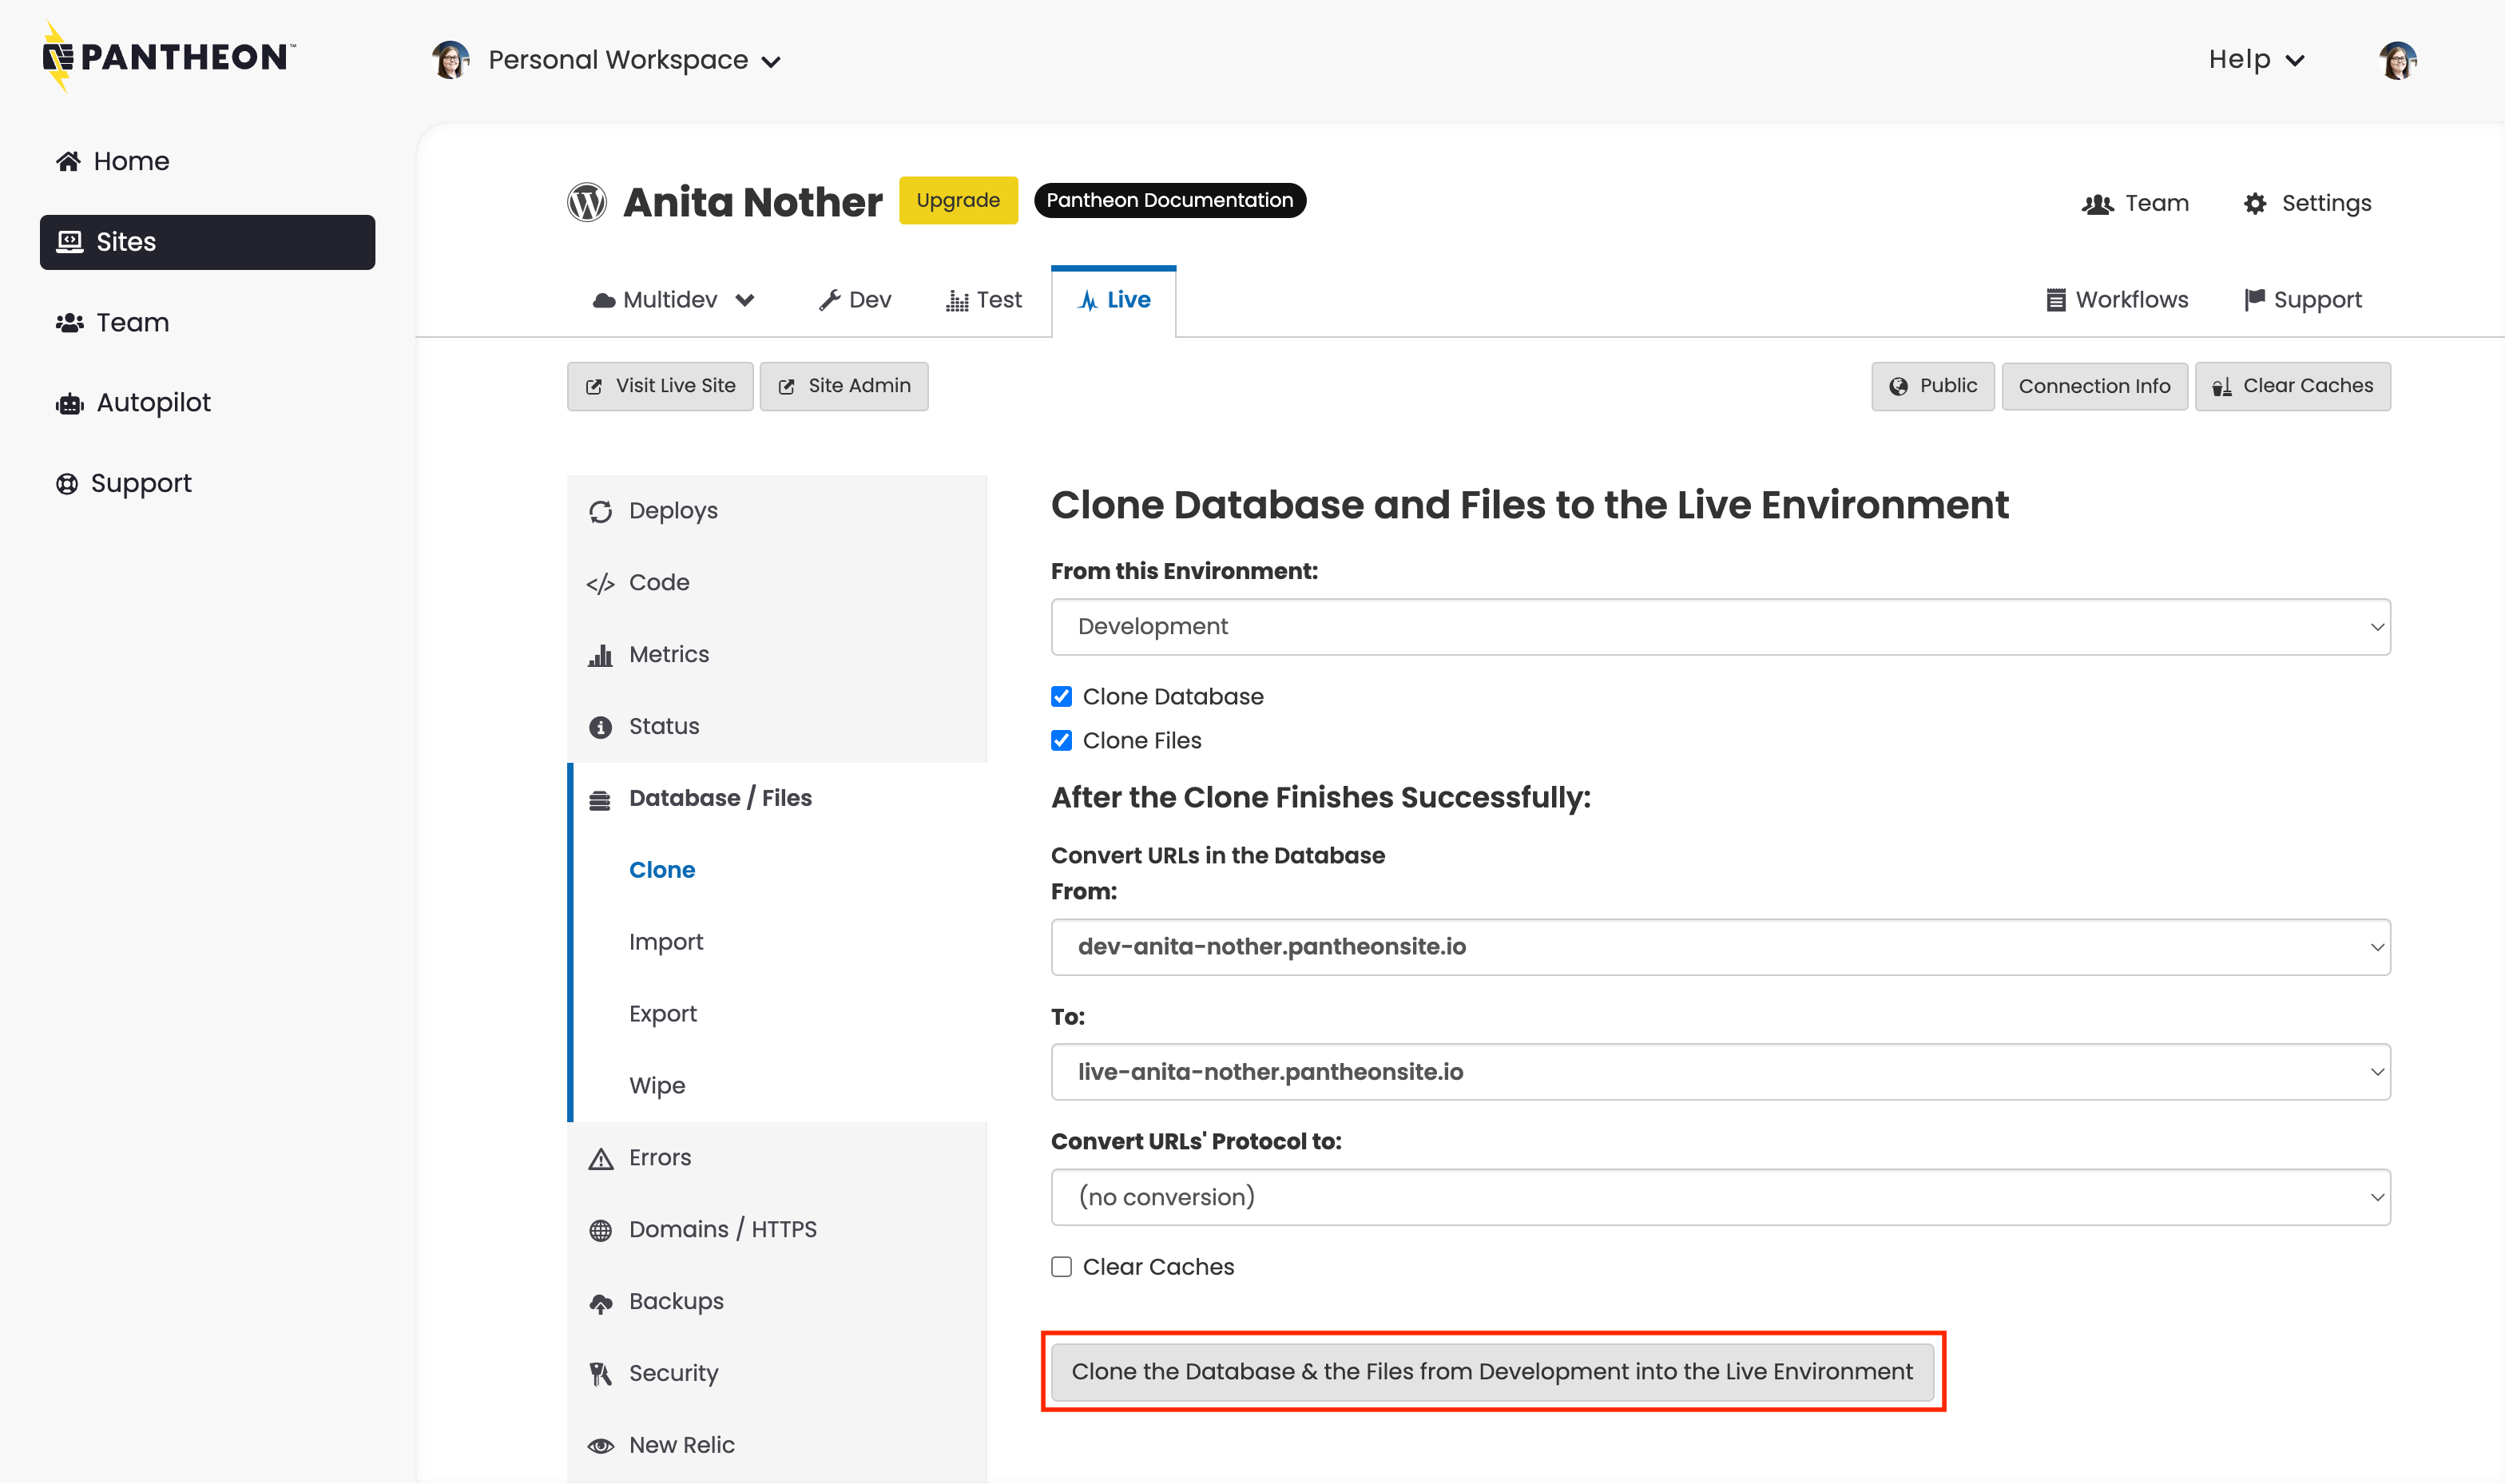
Go to the the Database / Files tab and select the following:
- From this Environment: Development
- Clone Database: Checked
- Clone Files: Checked
-
Click Clone the Database & the Files from Test into the Live Environment.
-
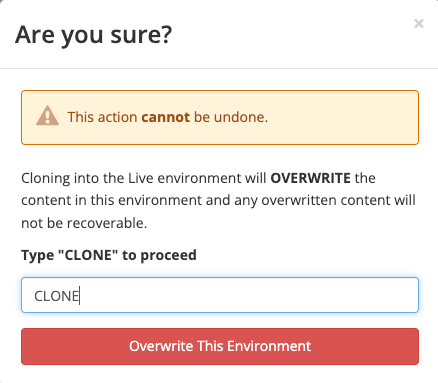
Type "CLONE" and then click Overwrite This Environment when prompted to confirm you want to go live.
You have successfully finished adding a site in its Live environment. Click Visit Live Site to view your site.
Domain Configuration
At this point, you have a live site with a Pantheon URL, like http://my-site.pantheonsite.io/. To change that to a more friendly URL, you'll need to purchase a domain from a DNS provider.
After you've done that, connect your DNS:
-
Go to the Live environment in your Pantheon Site Dashboard.
-
Select the Domains / HTTPS tab.
-
Enter the
wwwdomain (for example,www.example.com), then click Connect Domain. -
Verify ownership by adding a new DNS TXT value or by uploading a file to a specific URL. Select the method you prefer, and follow the instructions. Note that the values are randomized for security.
-
Click Verify Ownership to confirm. It can take 30 minutes or more for DNS records to propagate, depending on your DNS host and your domain's TTL values.
-
Open a new tab or browser window, and copy the Required Values to your DNS provider. If you see a message like "Waiting for HTTPS, DNS records will be provided when HTTPS provisioning completes.", wait one minute, then refresh the page.
-
Click Back to Domains/HTTPS.
-
Select Connect Domain and enter the bare domain (for example,
example.com, and then click Connect Domain.
Then, configure your DNS:
-
Select Details next to the
wwwdomain. -
Log in to the DNS host for the domain in a separate window.
-
Copy the value provided in the Pantheon Site Dashboard for the required A record, then use it to create an A record wherever you manage DNS. Repeat this step for both of the AAAA records.
-
Return to the Domains / HTTPS page in the Pantheon Site Dashboard.
-
Click Details next to the bare domain.
-
Copy the value provided in the Pantheon Site Dashboard for the required A record, then use it to create an A record wherever you manage DNS. Repeat this step for both of the AAAA records.
Click below for detailed instructions for your specific DNS host.
Your site is now live at the domain you have purchased!