Configure PhpStorm for WordPress
Configure your local environment to build a WordPress plugin or theme with JetBrains PhpStorm.
This section provides information on how to configure your local environment to build WordPress plugins or themes with JetBrains PhpStorm.
Overview
JetBrains PhpStorm is a commercial PHP IDE that can be configured to work with WordPress sites. This allows you to build and maintain custom plugins. Follow the steps below to set up a local environment in PhpStorm to create your custom plugins and themes.
Refer to WordPress Development using PhpStorm for more information. The steps in this section focus on integrating and showcasing the PhpStorm workflow and is current as of PhpStorm version 2017.1.4.
Create a WordPress site
Create a new WordPress site on Pantheon if you don't already have one. This site should be empty to develop your new plugin or theme.
Clone the Code Repository
Copy your site code to your local workstation using SFTP or clone your site codebase with Git.
Create a PhpStorm Project
-
Open PhpStorm.
-
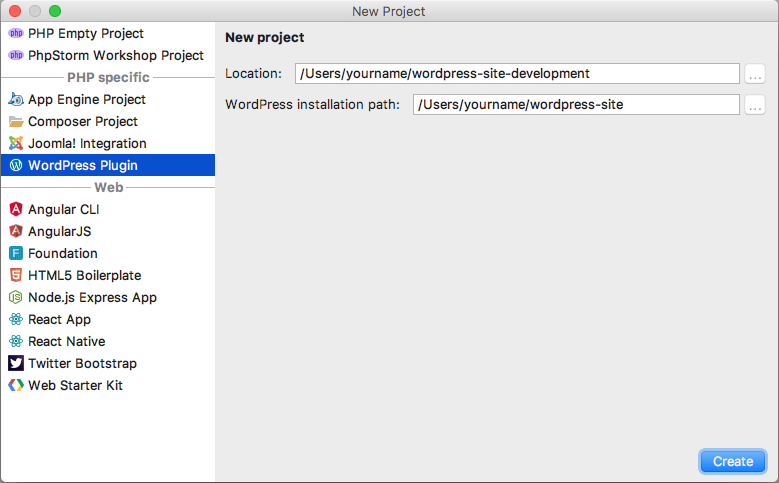
Click Create New Project in the startup window or go to File Menu, and click New Project... if you have an existing project open.
-
Name your project.
-
Select WordPress Plugin as the project type on the left sidebar.
-
Specify or browse to the file path to save your project's files. This is where PhpStorm will store working files, and should be separate from your WordPress directory.
-
Specify or browse to the root directory for your local WordPress site, and click Create.
There will be no open files in your project after you complete these steps. You can find a PHP file in the project's root with the standard plugin header for WordPress.
Configure WP-CLI (Optional)
Many WordPress plugin developers use the command line tool WP-CLI. This is useful if you have a local development environment and want to use WP-CLI to manage it.
You can configure PhpStorm to recognize WP-CLI from within your project after you have installed WP-CLI on your local machine by following these steps:
-
Launch PhpStorm, click Menu, and then click Preferences...
-
Navigate to the Tools Section, click Command Line Tool Support, and then click the + icon to add an entry.
-
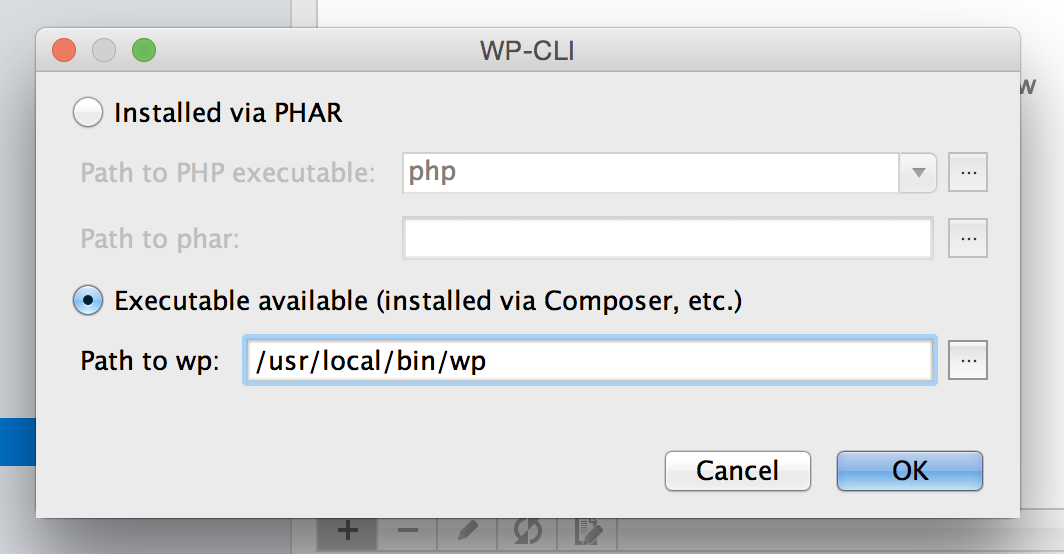
Choose the tool WP-CLI, and click OK.
-
Select Executable Available and enter the file path to your local
wpdirectory. -
Click OK to save the changes.
Configure Your Pantheon Development Environment
-
Set your Dev environment to SFTP mode, and click Connection Info to see the connection settings.
-
Open your PhpStorm project, select the Tools Menu, select Deployment, and then click the Configuration... option.
-
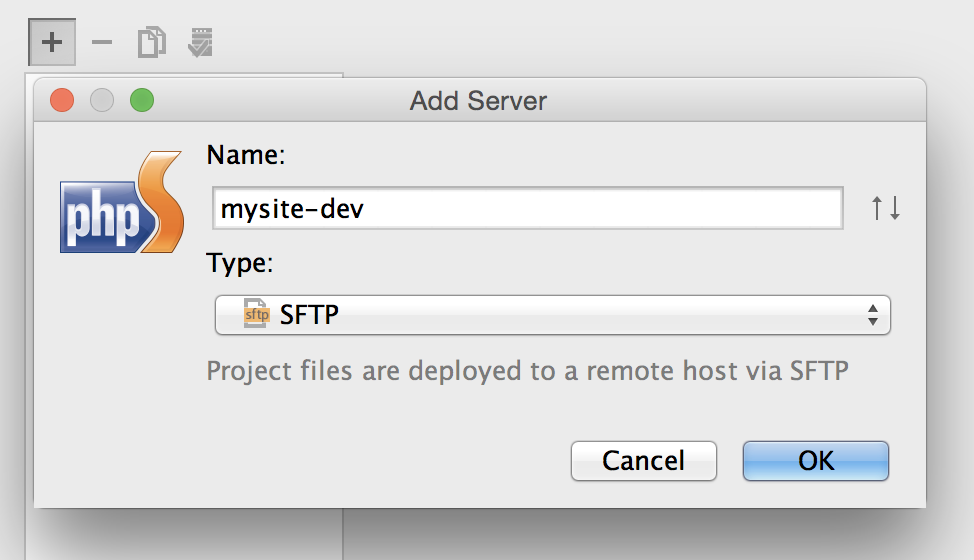
Click + to add a web server.
-
Enter your Pantheon site name, followed by a dash and the environment.
-
Select SFTP for type and click OK.
Connection Tab
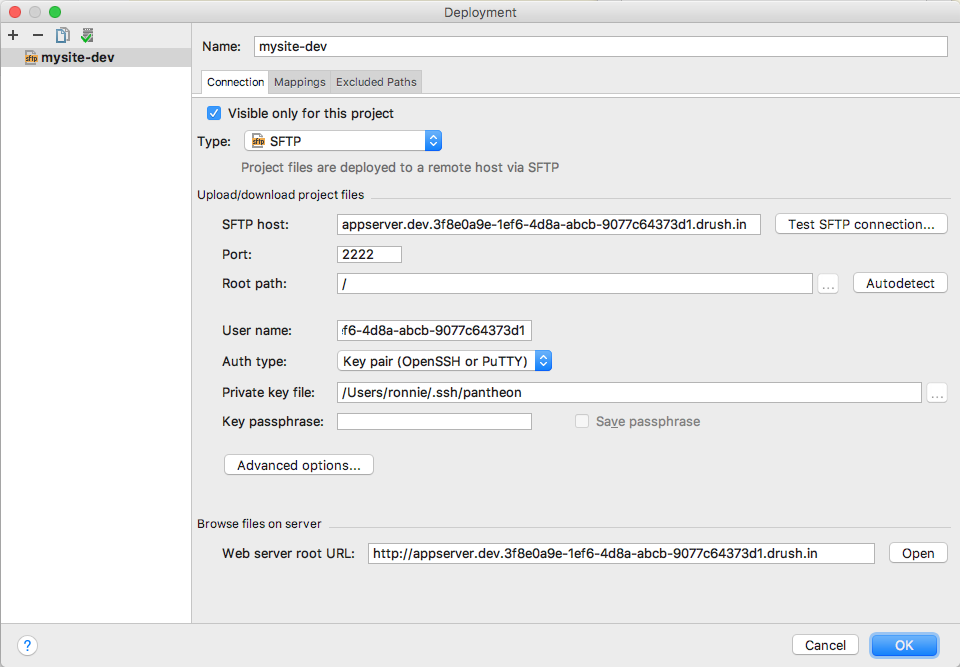
Use your site's SFTP connection information to configure the Connection tab:
-
Type:
SFTP -
SFTP Host:
appserver.dev.<Site_UUID>.drush.in -
Port:
2222 -
User name:
dev.<Site_UUID> -
Auth Type: Select Password and specify password, or key pair and select your private SSH key.
-
Root Path: Click the Autodetect button and the Root Path should be automatically populated:
Warning:WarningPhpStorm does not allow the Root Path to be left blank. Because the Pantheon platform sometimes migrates sites across app servers without warning, you must update the root path any time the binding path changes for your Dev environment.
-
Click the Test SFTP Connection... button and make sure the connection is successful.
-
Click OK.
Mappings Tab
You must populate the file paths within the Mappings tab to allow correspondence between project folders:
-
Local path: This field is automatically populated and requires no edits.
-
Deployment path on server:
/code -
Web path on server:
/ -
Click OK.
Enable Automatic Upload
-
Open your PhpStorm project and select the Tools Menu.
-
Select Deployment, and then select Automatic Upload.
You are now ready to edit your code. Any files you change and save locally will be automatically uploaded to your Pantheon Dev environment.


