Local Development Configuration
Configure your machine for local development with Pantheon.
This section provides information on how to configure your machine for successful local development with your Pantheon site.
Before You Begin
Export Your Variables
This section uses several commands that use the temporary command line alias, $SITE, to make entering command examples easier. Export your variables and clear your site environment cache before you configure your local development setup.
- Set the temporary variable
$SITEin your terminal session to match the name of your site. Replaceanita-drupalwith your site's name in this example:
- Export the environment as a variable:
- Run the command below to clear the target site environment's cache. This can also be done from the Pantheon Dashboard or from the application itself.
Transfer Your Code
Follow the steps below to get a clone of your Pantheon code on your local computer.
-
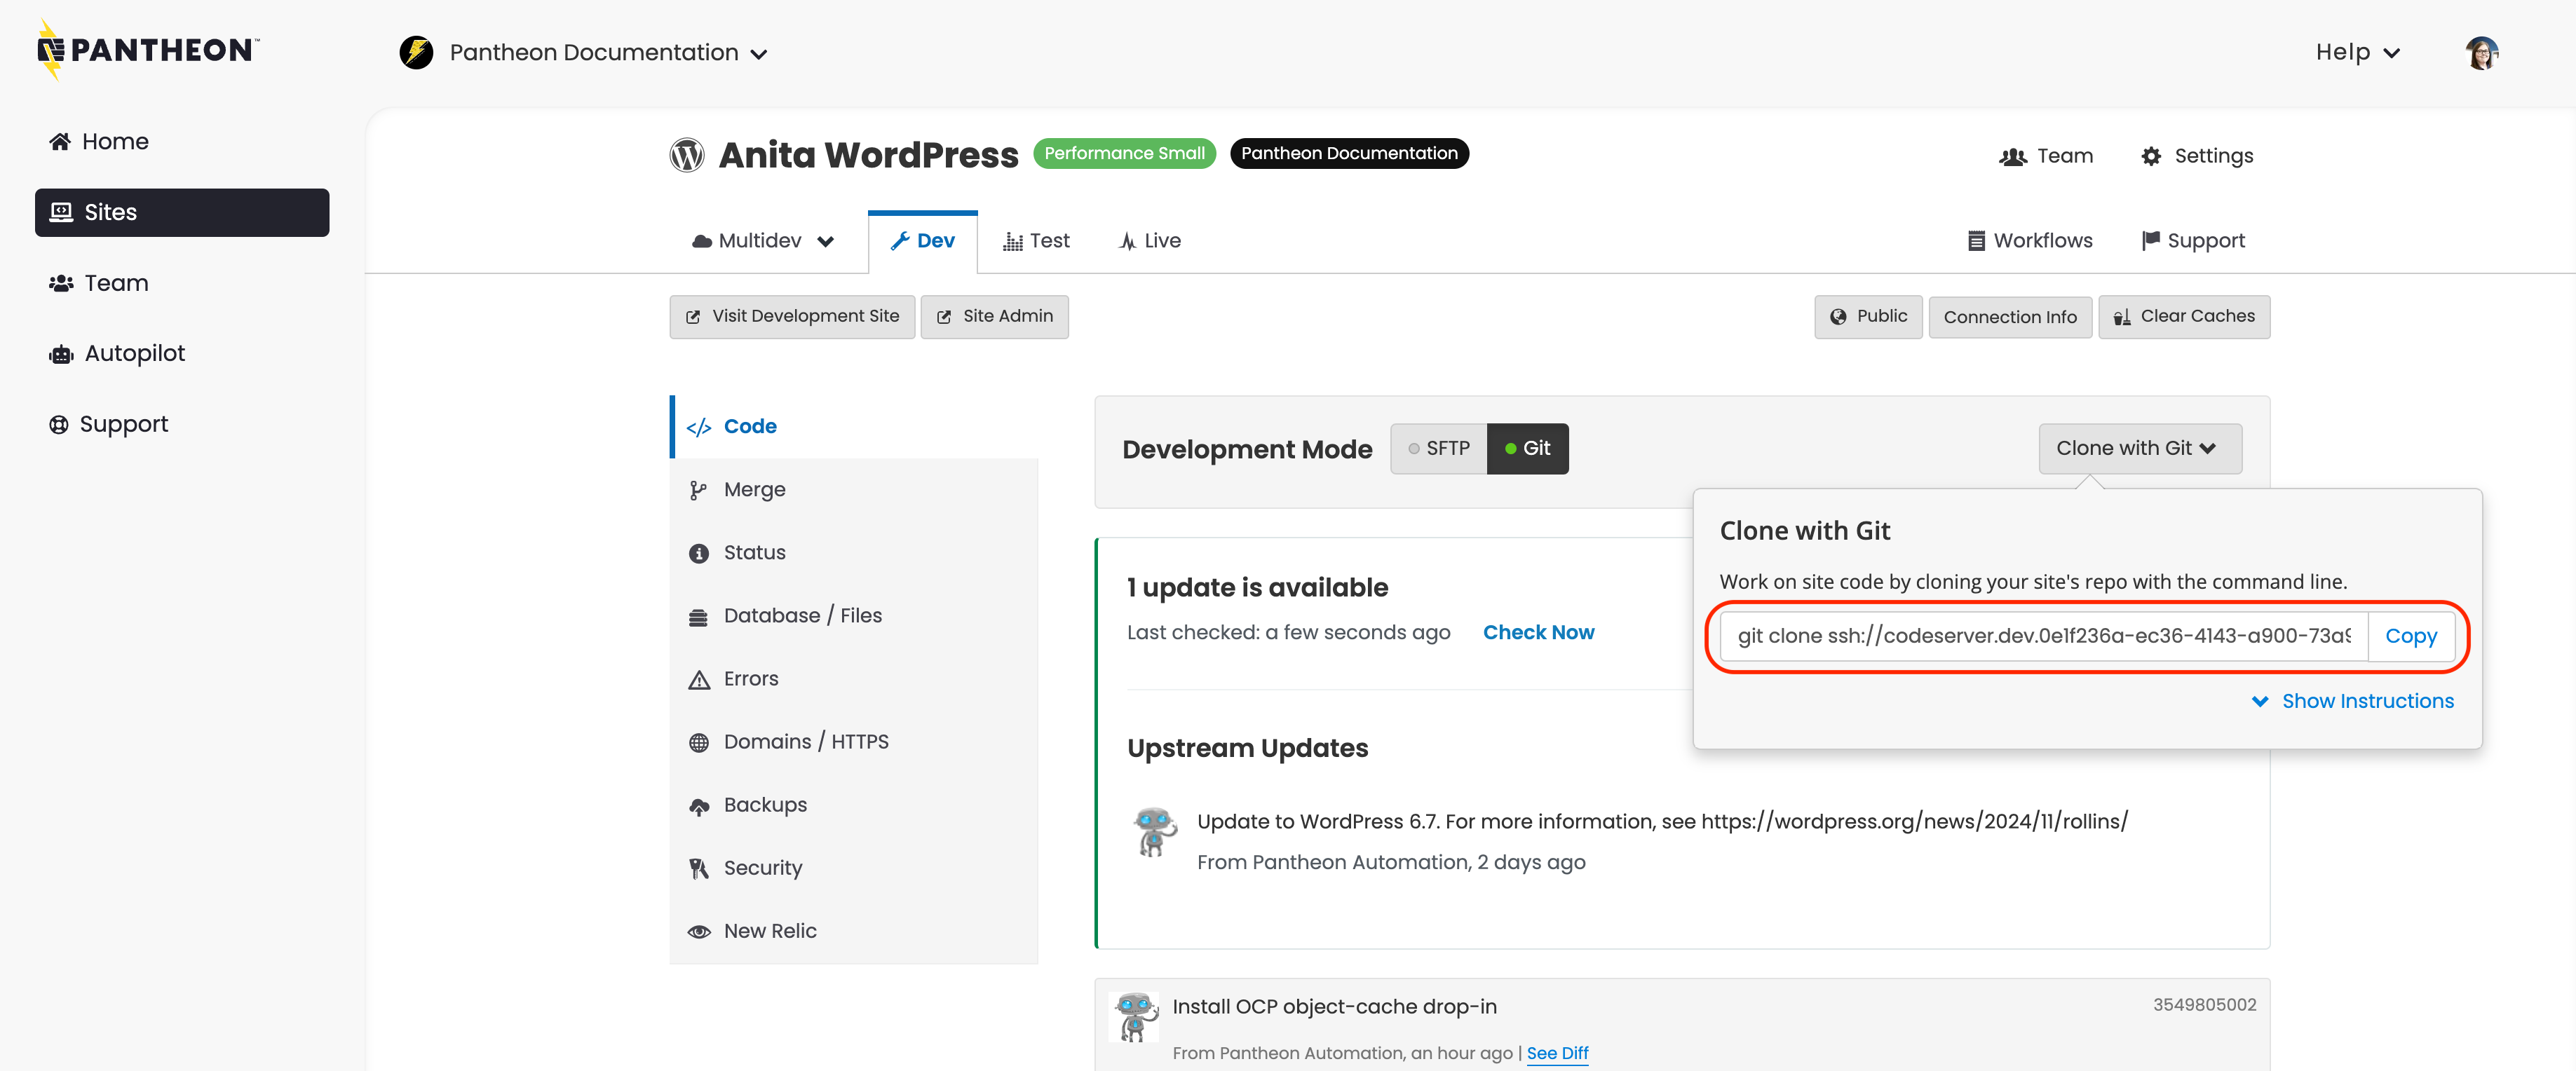
Log in to Pantheon and go to the Site Dashboard.
-
Locate the
git clonecommand at the top of the development panel and copy and paste it into your terminal.
It should look similar to this:
-
Go to where you want the code to reside in your local environment.
Git automatically creates a directory as part of the clone.
-
Run the clone command you copied:
Git fetches the data if everything worked correctly:
- Check your SSH key setup if you run into permission problems.
- Check your network to confirm that you have a current version of Git if the clone starts but can't complete.
Transfer Your Database
Via Dashboard
-
Navigate to the Site Dashboard.
-
Select Database / Files, select Export, and then select Export Database to create an on-demand backup.
-
Select Backups, select Backup Log, and then select Database download link to download the backup.
-
Import the database into your local environment with your MySQL client:
Replace database.sql.gz with the name of the database archive downloaded from Pantheon.
Via Terminus
-
Create and get the database with Terminus commands:
-
Run the command below to import the archive into your local MySQL database:
Transfer Your Files
Refer to SFTP and Rsync on Pantheon for an overview of ways to transfer files.
Via Terminus
- Run the Terminus commands below to create and get a backup of the site's files:
-
Move the resulting backup to the correct directory on your local file system:
- Drupal:
sites/default/files - WordPress:
wp-content/uploads
- Drupal:
Via SFTP CLI
SFTP is a slower method, but easier for some to use:
- Click Connection Info to get your SFTP login credentials.
You will see your connection credentials and a link to connect directly with your preferred client.
-
Use the terminal to navigate to the correct directory on your local file system:
- Drupal:
sites/default - WordPress:
wp-content/uploads
- Drupal:
-
Paste the CLI command copied from your Dashboard.
-
Run
get -r *to transfer the files down to your local environment.
Submit Changes to Pantheon
Send the Code
- Test your changes, then commit locally and push to Pantheon:
- Push the changes:
Send the Database
- Create an archive using the MySQL utility
mysqldump:
- Open your Pantheon Dashboard and select Database / Files, then select Import to upload and import the file.
Send the Files
Upload files to Drupal Via Drush
Drush and Rsync are the easiest ways to send files for Drupal sites:
Upload Files to WordPress or Drupal Via SFTP
Send files using SFTP:
-
Use the terminal to navigate to the correct directory on your local file system:
- Drupal:
sites/default/files - WordPress:
wp-content/uploads
- Drupal:
-
Paste the CLI command copied from your Dashboard.
-
Navigate to the correct remote directory by running
cd files -
Run
put -r ./*to transfer the files.
You can also transfer a single file or a single directory at a time instead of transferring every file, every time.
Local Configuration Files
You must configure database credentials that match your local database to develop locally. Do not manually change these details in your primary configuration file (settings.php or wp-config.php), as this could commit changes to version control and trigger a connection error on Dev when pushing to Pantheon.
Use a local configuration file:
- Drush:
settings.local.php - WordPress:
wp-config-local.php
Your local configuration file must be excluded from version control and included by settings.php or wp-config.php when found. Your local configuration file won't be found on Pantheon because Git ignores the local configuration file, but it will be applied when you run the site locally.
Pantheon's upstreams detect and include wp-config-local.php (WordPress) and settings.local.php (Drupal 8) for local environment configurations.
This file is ignored by the .gitignore file in WordPress and Drupal 8 so that local configurations do not get pushed to Pantheon. Create the file on your local computer, and manage configurations accordingly.
WordPress wp-config-local.php
Pantheon sites that install WordPress 5.5 include a wp-config-local-sample.php file. Older sites can copy the wp-config-local-sample.php file on GitHub to the same directory as the site's wp-config.php, or create one in that location as shown here.
This can be used as a starting point for wp-config-local.php. Replace the database values with the values from your local environment, and the key/salt values with your unique phrase (generated from WordPress.org).
Drupal settings.local.php
-
Create the local settings file and add it to
.gitignore. -
Change to the site's directory and create the file.
-
Change the first command in this example to fit the site's directory structure:
-
Add the local configuration file to
.gitignore:
Drupal 7 users must add a reference to the local file from within settings.php:
