WordPress + Next.js Frontend Starter for Front-End Sites
Configure Content Preview
Learn how to configure content preview.
This documentation is considered deprecated. If you use Front-End Sites today, we encourage you to migrate.
This section provides information on how to configure decoupled content preview for your site. This allows you to preview your content changes in the Next.js app before publishing to your live site.
Before You Begin
Make sure you have:
- Installed and activated the Pantheon Decoupled WordPress Preview Plugin on your instance
- Installed and activated the Pantheon Decoupled Plugin on your instance
Configure Environment Variables
-
Go to the Site Dashboard and click Builds.
-
Scroll down to Site Environment Variables and click the Get Started or Make Changes button. The Get Started button displays if you have not added any Site Environment Variables yet.
 Information:Note
If you have not already created a preview site within your WordPress instance, refer to the Decoupled Kit preview configuration documentation before proceeding.
-
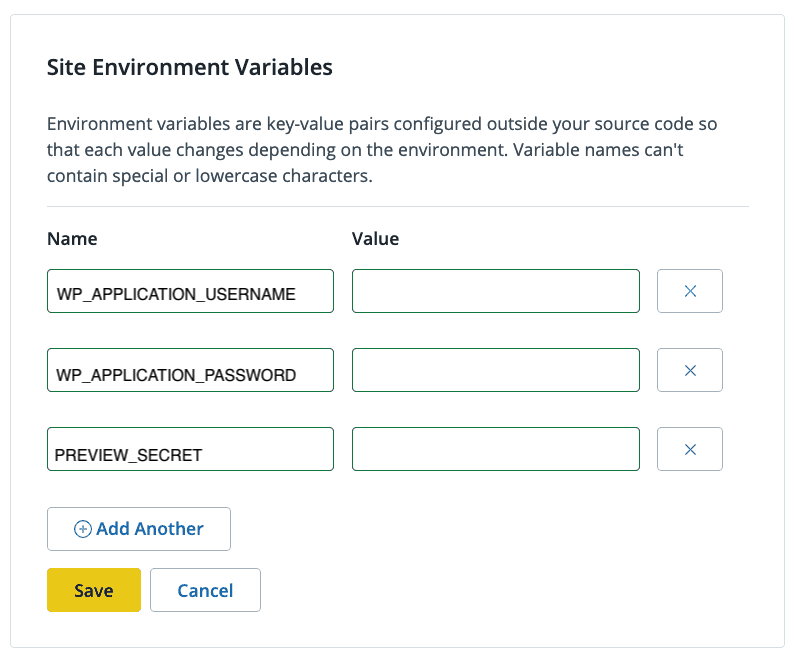
Add the keys below and the corresponding values and then click Save. These are the secure preview key-value pairs associated with your site. Their values can be found under the Environment Variables action in the Settings >> Pantheon Front-End Sites section of your WordPress instance. Refer to Decoupled Kit project creation documentation for more information.
WP_APPLICATION_USERNAMEWP_APPLICATION_PASSWORDPREVIEW_SECRET
-
Go to the Overview page and click the Trigger Build button to start a new build and deployment.
-
Locate your live build in the Multidev section, click Actions, and then select View Latest Build Logs to confirm that your environment variables are set on your live Front-End Site.
-
Log in to your WordPress dashboard.
-
Navigate to Users and either create a new user profile or use an existing user profile. The user name is your
WP_APPLICATION_USERNAME.Information:NoteThis user must have at least an Editor role. This is necessary for the user to access revisions and private posts.
-
Hover over the user name and click Edit to open the user's profile page.
-
Scroll down to the Application Passwords section and add your application password. Your new
WP_APPLICATION_PASSWORDwill display on the screen. Copy and store this value somewhere safe.- You now have a client that can use the preview site, however, you must configure the preview site.
-
Navigate to Settings, select Preview Sites, and then click the ADD PREVIEW SITE button.
Information:NoteYou must have the Pantheon Decoupled WordPress Preview Plugin installed and activated on your instance.
-
Set the URL to point to
http(s)://{YOUR_SITE_URL}/api/previewreplacing{YOUR_SITE_URL}with the URL of your Front-End Site. -
Set a secret for the Preview Site and note this value down as your
PREVIEW_SECRET.
You can now preview content and make other authenticated requests to your WordPress instance.