WordPress Developer's Guide
Enable Solr for WordPress
Learn how to use Apache Solr with WordPress on Pantheon.
This section provides information on how to use Apache Solr with your WordPress Pantheon site.
Apache Solr is a system for indexing and searching site content. All plans except for Basic can use Pantheon Solr.
Currently, Pantheon provides Apache Solr v3.6 for WordPress search for all plans except the Basic plan.
Get WebOps Training
Learn how to configure Solr with help from our experts. Pantheon delivers on-demand training to help development teams master the platform and improve internal WebOps.
Learn moreEnable Solr from the Site Dashboard
You must add the Index Server to your site before you can use Solr on WordPress:
-
Navigate to your Dashboard and select Settings.
-
Select Add Ons, and then click the Add button under Apache Solr Index Server.
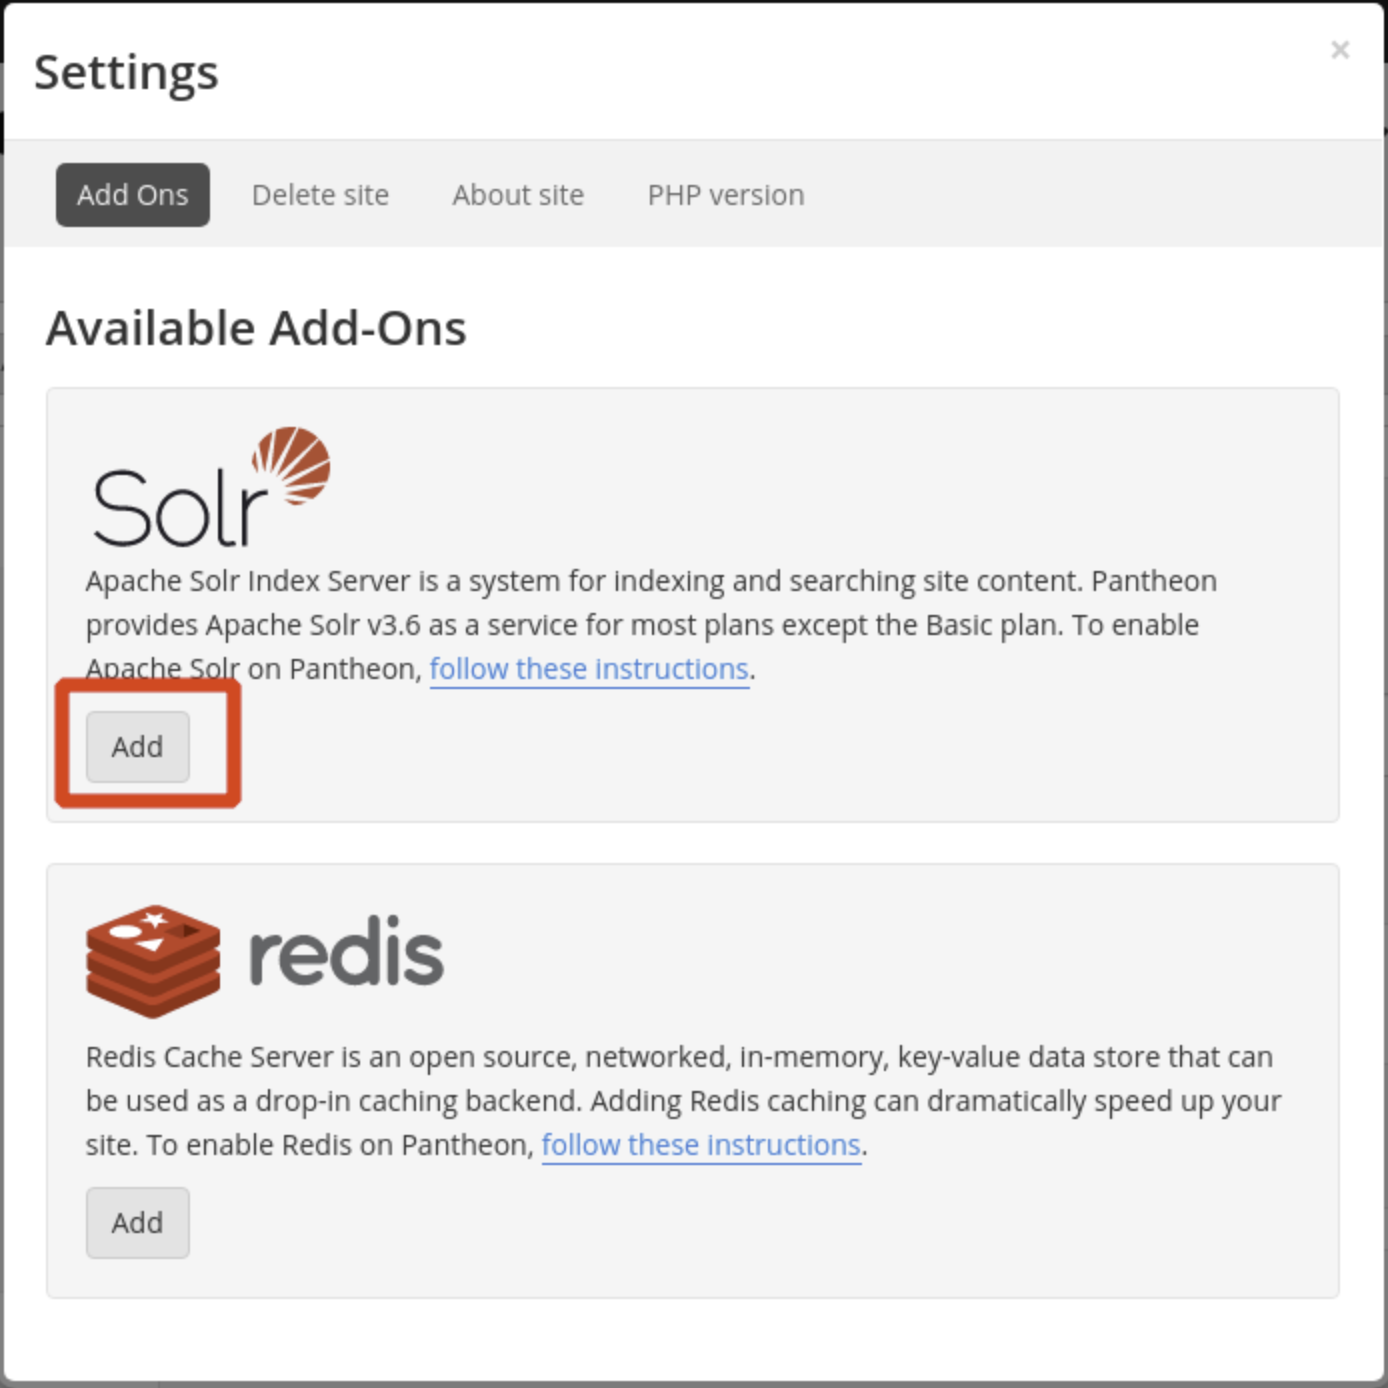
This provisions Apache Solr containers for every environment of your site. You are now ready to integrate with WordPress.
Solr Search for WordPress
Pantheon supports and maintains Solr Search for WordPress (Solr Power). This plugin replaces the default search mechanism within WordPress while preserving the familiar integration methods within themes and widgets.
This plugin requires PHP version 7.1 or higher. Refer to Upgrade PHP versions for more information on switching PHP versions.
Install and Configure the Solr Search for WordPress Plugin
-
Navigate to your Dev or Multidev environment and set the connection mode to SFTP via the Pantheon Dashboard, or with Terminus:
-
Install and activate the Solr Search for WordPress (Solr Power) plugin on the Dev or Multidev environment using the WordPress Dashboard, or with Terminus:
Or for WordPress Multisites:
-
Open your WordPress Dashboard, navigate to Solr Power (previously under Settings), and then select the Info tab to see your site's Solr Server details.
-
Select Indexing Options from the navigation bar and configure desired indexing options for Solr.
-
Click Save Changes after making modifications.
Information:NoteYou can exclude pages or posts from being indexed by providing the numeric ID of the item (comma separated) in the Excludes Posts or Pages field.
-
Navigate to the Actions tab and click Start Index (next to Index Searchable Post Types) to index all publicly queryable post types, or via Terminus:
For WordPress Multisites, you must index all your subsites individually:
-
Deploy the plugin to the site's Test and Live environments after validation and testing.
Set up Front-end AJAX Search Bar
-
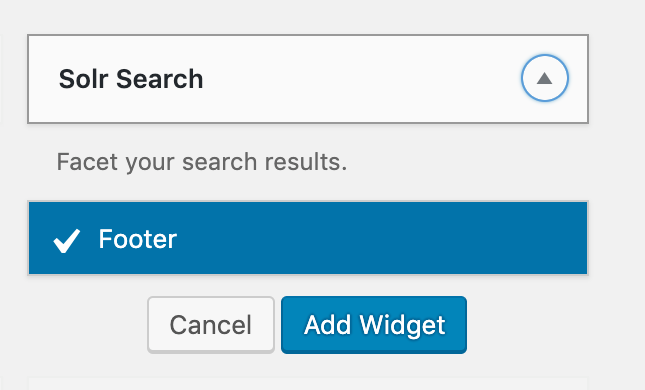
Open Appearance, select Widgets, and then add the Solr Search Widget in your desired widget position.
-
Open Solr Power, select the Facet Options tab, check AJAX Facet Search Support, and enter the Div ID in AJAX Div ID (displays search results), such as
primary.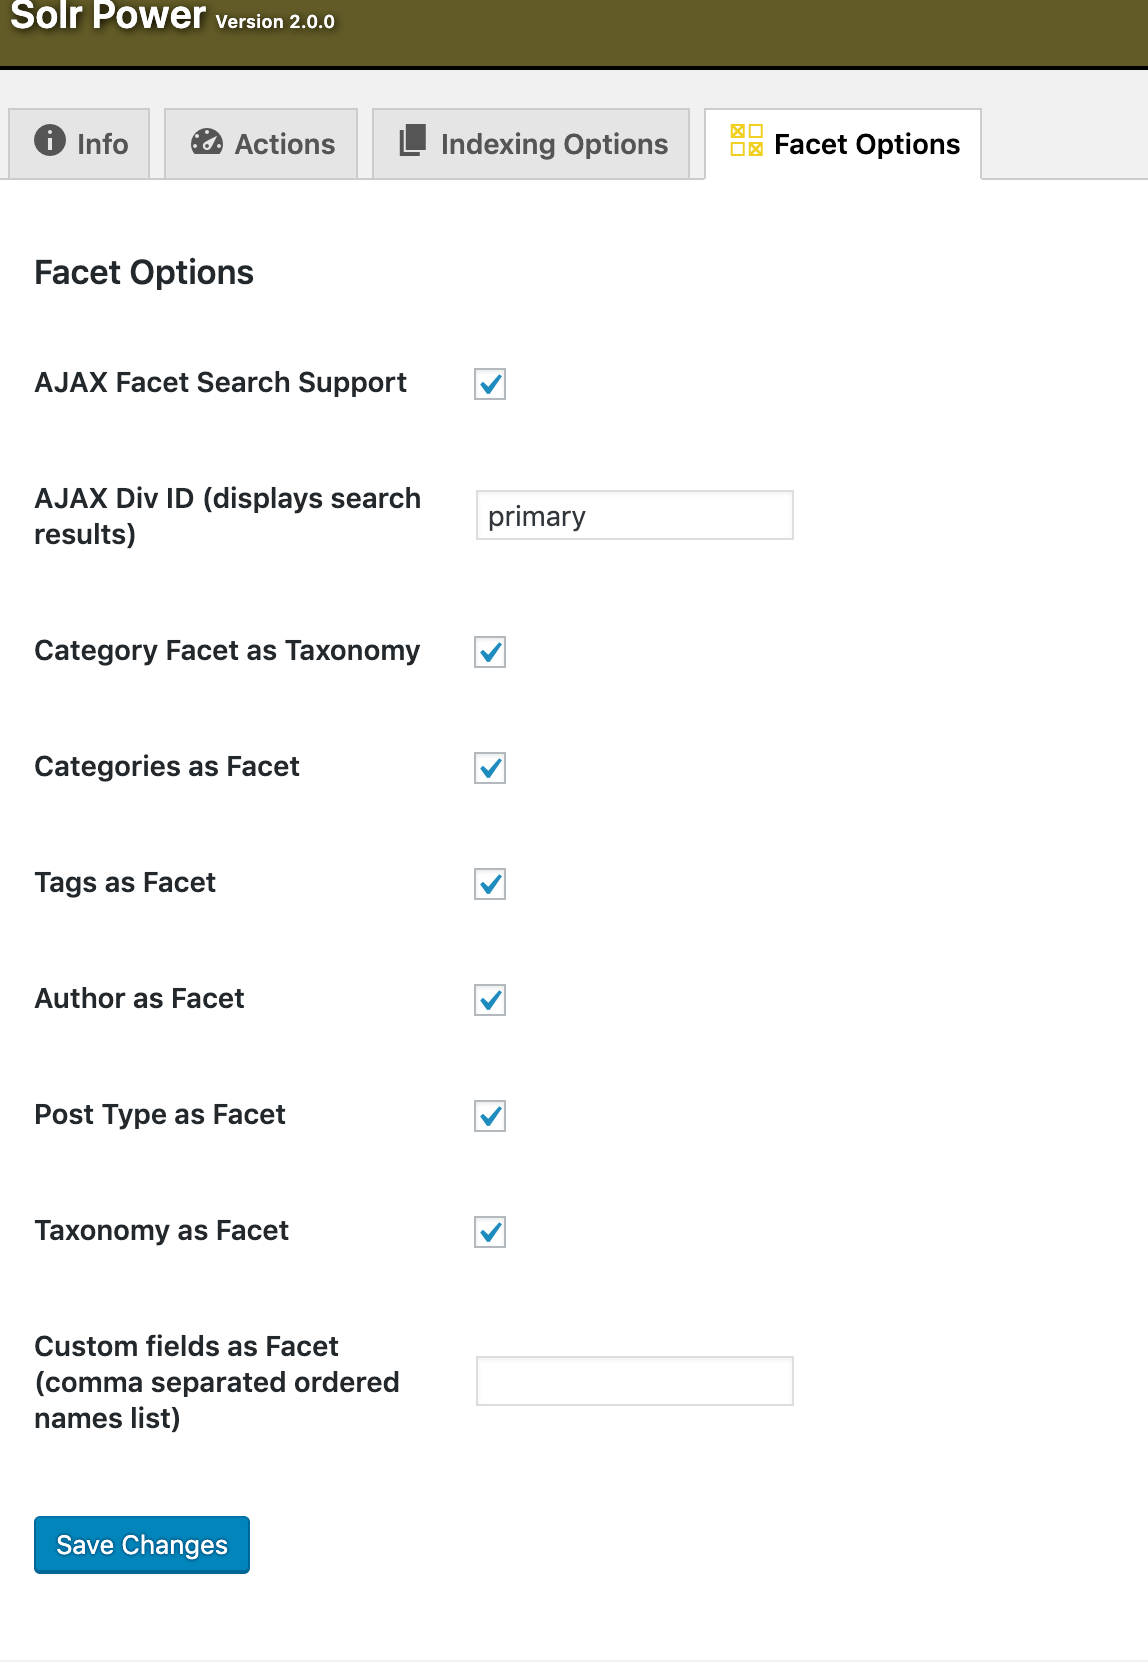
Search results appear under Div ID. You can use an existing Div ID in the page template, or you can create your own blank element using a unique ID name.
-
Check your desired Facets and save your settings.
-
Test the search functionality before committing the changes.
Optimize Index
Refer to the Optimize command document for more information about how you can optimize your index.
Schema.xml
Custom schema.xml files exist outside of version control, and must be uploaded to each environment separately.
A default schema.xml document is automatically sent to the Solr server when you activate the plugin on the Dev or Multidev environment. The schema.xml file is submitted automatically when you deploy the plugin to another environment on Pantheon.
You can set a custom schema.xml:
-
Upload your custom
schema.xmlto the/wp-content/uploads/solr-for-wordpress-on-pantheon/directory using SFTP. -
Navigate to the plugin's Actions tab, select Repost schema.xml, and click Execute.
Known Issues/Limitations
This plugin is under active development on GitHub. Use the issue queue for status updates and support. Pull requests are also welcome!
Re-Indexing
New, deleted, and modified posts and pages are automatically added to the Solr index. However, you must re-index the site if you modify the indexing options within Solr Power.
Navigate to the Actions tab and manually re-index the site.
Enable Solr for AJAX and WordPress Dashboard
Use the solr_allow_ajax and the solr_allow_admin filters to allow Solr to work with AJAX and within the WordPress Dashboard.
Safely Remove Solr
The following code changes are required before Solr can be safely uninstalled and disabled:
-
Uninstall the Solr Search for WordPress plugin.
-
Ensure the default search mechanism is functioning.
-
Commit and deploy these changes to the Live environment.
-
Go to Settings, click Add Ons, and then click Remove for Solr.