Configure

Learn how to configure your WordPress Multisite.

Discuss in our Forum Discuss in Slack

This section is intended for customers who have had a WordPress Multisite upstream created for them by a Pantheon employee. If you do not have a WordPress Multisite upstream, refer to the introduction page of this guide. After you create a new site on the Multisite upstream and visit the Dev environment's site URL, you should be redirected to the WordPress web-based installer.

 Note

Adjust placeholders in code snippets as needed throughout this guide. This includes placeholders such as <site> and <env> in Terminus commands, in addition to placeholders in brackets <> in larger code blocks.

Install the WordPress Multisite

We recommend using Terminus to install a WordPress Multisite.

  1. Install the most recent release of Terminus:

    curl -O https://raw.githubusercontent.com/pantheon-systems/terminus-installer/master/builds/installer.phar && php installer.phar install
  2. Generate a Machine Token, then authenticate Terminus:

    terminus auth:login --machine-token=<machine-token>
  3. Make sure the site's connection mode is set to SFTP:

    terminus connection:set <site>.dev sftp
  4. Use Terminus to execute the wp core multisite-install command. You can refer to the documentation for more information.

     Note

    The default behavior for this command is to create a WordPress Multisite with the subdirectory configuration. To create your network with the subdomain configuration, add the --subdomains flag.

    terminus wp <site>.<env> -- core multisite-install --url=<url> --title=<site-title> --admin_user=<username> --admin_email=<email>

    After you successfully install a new WordPress Multisite, a message is displayed that is similar to the following:

    terminus wp sitenetworks.dev -- core multisite-install --url=dev-sitenetworks.pantheonsite.io --title="WordPress Multisite" --admin_user=aghost --admin_email=aghost@pantheon.io
    Admin password: abcdefgnotarealpassword
    Created single site database tables.
    Set up multisite database tables.
    Added multisite constants to 'wp-config.php'.
    Success: Network installed. Dont forget to set up rewrite rules.

The message confirms your WordPress Multisite is installed.

Configure the WordPress Multisite

The wp core multisite-install command that we ran in the previous section modifies the wp-config.php file. The modification sets the DOMAIN_CURRENT_SITE constant, which assigns a specific URL to your WordPress Multisite.

To ensure it works on the Pantheon platform, you need to adjust the configuration so that the DOMAIN_CURRENT_SITE constant is defined conditionally based on the given environment:

  1. Navigate to Code in the Dev tab of your Site Dashboard.

  2. Click Connect with SFTP to access the credentials for connecting to your preferred SFTP client.

  3. Click Open SFTP client, and enter your User Dashboard password when prompted.

    If you run into issues, please refer to Pantheon's SFTP documentation.

  4. Open the code folder in your SFTP client, and download your site's wp-config.php file.

  5. Locate the configuration added by WP-CLI, and comment out the line that sets DOMAIN_CURRENT_SITE. You will replace this variable in the following step. For example:

    wp-config.php
    define( 'WP_ALLOW_MULTISITE', true );
    define( 'MULTISITE', true );
    define( 'SUBDOMAIN_INSTALL', false );
    $base = '/';
    # define( 'DOMAIN_CURRENT_SITE', 'example.com' );
    define( 'PATH_CURRENT_SITE', '/' );
    define( 'SITE_ID_CURRENT_SITE', 1 );
    define( 'BLOG_ID_CURRENT_SITE', 1 );
  6. Add the following code block to your wp-config.php file, under the lines mentioned in the previous step:

    wp-config.php
    /**
     * Define DOMAIN_CURRENT_SITE conditionally.
     */
    if ( ! empty( $_ENV['PANTHEON_ENVIRONMENT'] ) ) {
      switch( $_ENV['PANTHEON_ENVIRONMENT'] ) {
        case 'live':
          // Value should be the primary domain for the WordPress Multisite.
          define( 'DOMAIN_CURRENT_SITE', $_SERVER['HTTP_HOST'] );
          // Once you map a domain to Live, you can change DOMAIN_CURRENT_SITE
          // define( 'DOMAIN_CURRENT_SITE', 'example-network.com' );
          break;
        case 'test':
          define( 'DOMAIN_CURRENT_SITE', 'test-<site>.pantheonsite.io' );
          break;
        case 'dev':
          define( 'DOMAIN_CURRENT_SITE', 'dev-<site>.pantheonsite.io' );
          break;
        default:
          # Catch-all to accommodate default naming for multi-dev environments.
          define( 'DOMAIN_CURRENT_SITE', $_ENV['PANTHEON_ENVIRONMENT'] . '-' . $_ENV['PANTHEON_SITE_NAME'] . '.pantheonsite.io' );
          break;
        }
    }

    If your site uses a custom domain instead of a platform domain, edit the wp-config.php to reflect the custom domain.

    You may notice that the test and dev cases are redundant. Remove the test and dev cases if you don't intend to add custom domains to those environments. Generally, you should conditionally define the DOMAIN_CURRENT_SITE constant based on the current Pantheon environment (Dev, Test, Live or Multidev).

  7. Save your changes and upload the wp-config.php file to Pantheon's Dev environment after you edit.

 Note

A warning may appear in the WordPress dashboard that you need to update your .htaccess file. Since Pantheon used Nginx and your site is already pre-configured for multisite use by your Account Manager, you can ignore this warning.

Develop the Multisite

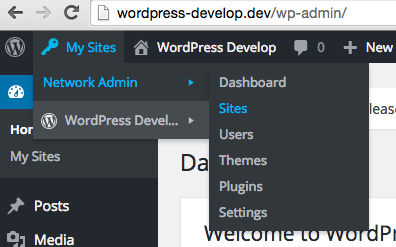
Congratulations on setting up your first WordPress Multisite. When you log in to the WordPress Dashboard, you'll see a My Sites menu item in the toolbar:

Enabling the network

You will have one site and you can create another if needed. If you chose to use WordPress Multisite with subdirectories, you'll be able to access the site right away. If you chose to use subdomains, you'll need to map a custom hostname to the environment before you can access the new environment.

Explore the WordPress Network Dashboard to become familiar with the variety of additional settings. You can review the options that are available for each site you create, manage users across WordPress Multisite, and learn about the network settings. After you explore the WordPress Network Dashboard, learn how to use the WordPress Multisite with the Pantheon Workflow.

More Resources