WordPress Developer's Guide
AWS S3 Setup for WordPress
Add AWS S3 storage integration to a WordPress site on Pantheon.
This section provides information on how to integrate Amazon Web Services (AWS) S3 storage with your WordPress Pantheon site.
AWS offers Simple Storage Service (S3) for scalable storage and content distribution that you can integrate with sites running on Pantheon. Pantheon already offers content distribution through our Global CDN, but S3 is a good option for addressing issues with highly populated directories or serving large files.
Before You Begin
Be sure that you have:
- An existing WordPress site on Pantheon, or create a site.
- A local clone of your code repository.
- An account with Amazon Web Services (AWS). Amazon offers free access to most of their services for the first year.
- Terminus installed on your local computer.
This process uses Terminus commands. Set the variable $site in your terminal session to match your site name before you begin:
Configure S3 within the AWS Console
You must configure the service within your AWS Management Console before integrating S3 with your Pantheon site.
Create a New AWS S3 Bucket
-
Open your AWS Console and click S3.
-
Click Create Bucket.
-
Enter a bucket name and then select an AWS Region. The bucket name you choose must be unique across all existing bucket names in Amazon S3. You cannot change the name after you create a bucket. Note that the bucket name you choose is visible in the URL that points to the objects stored in the bucket.
-
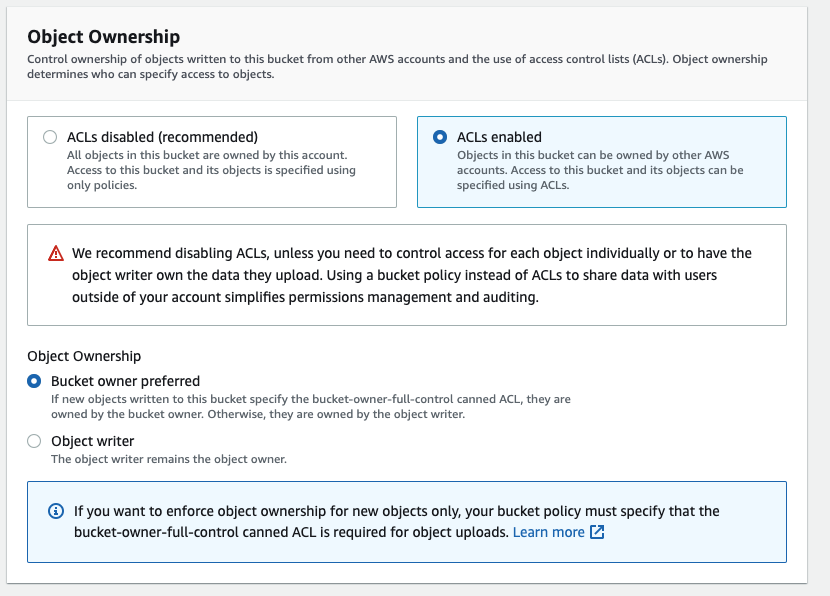
Select ACLs enabled and set Object Ownership to Bucket owner preferred in the Object Ownership section.
-
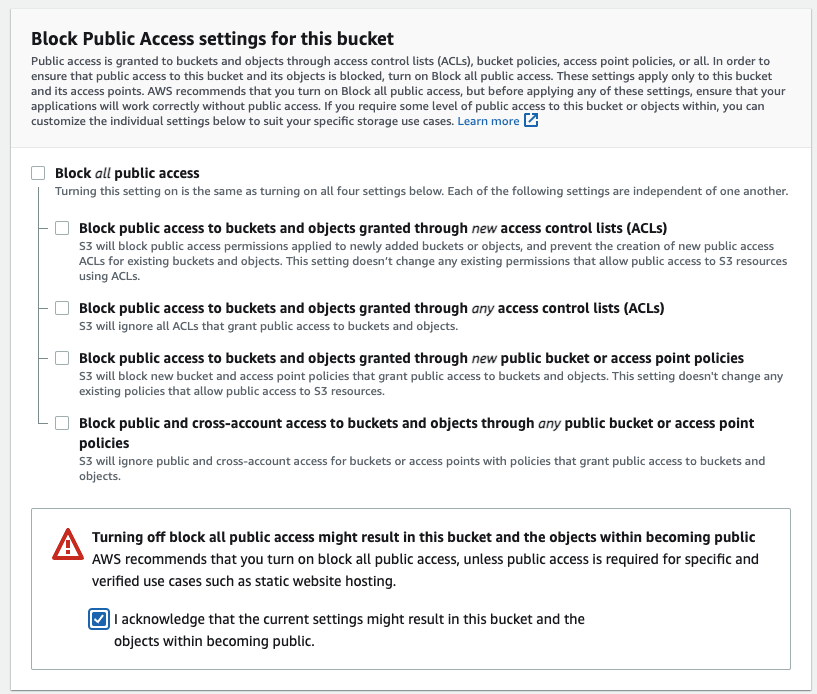
Uncheck the Block all public access in the Block Public Access settings for this bucket section and then select the checkbox to acknowledge turning off this setting when prompted.
-
Leave all other settings to default and then click Create bucket.
Configure your AWS Access
-
Open your Identity and Access Management (IAM) dashboard, select Access Management, select Policies, and then click the Create policy button.

-
Select
JSONand paste the code below under thePolicy editor, then change thebucketnameto the name you specified in the Create a New AWS S3 Bucket section, and then click Next.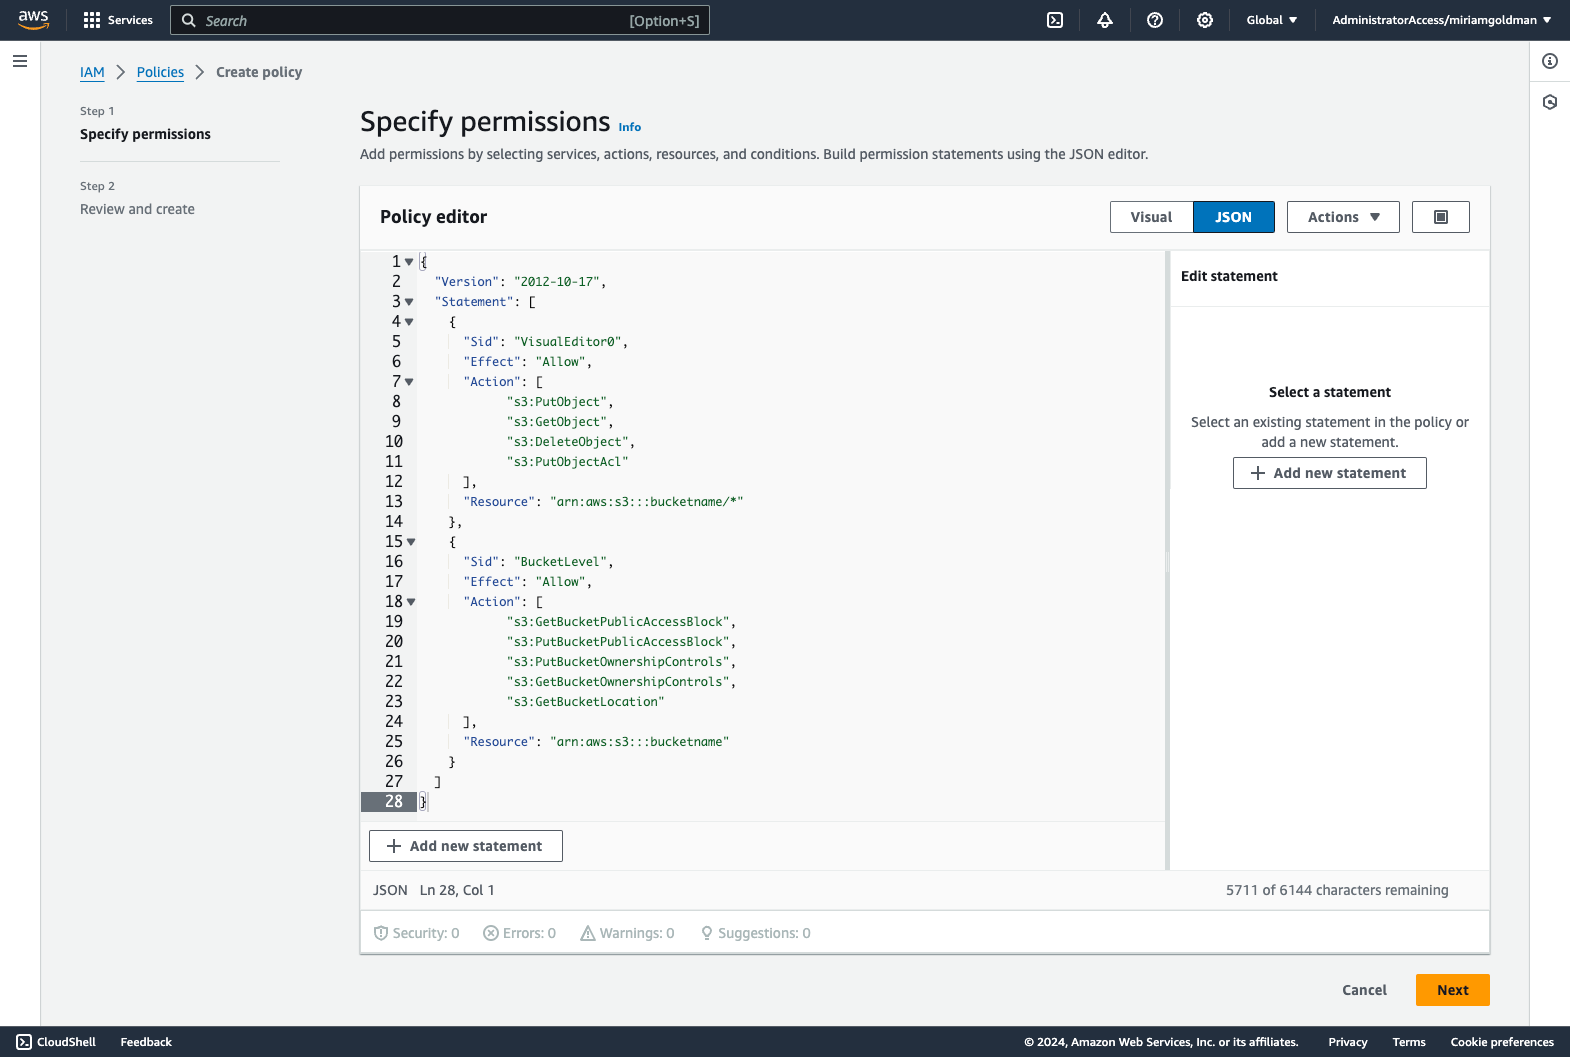
-
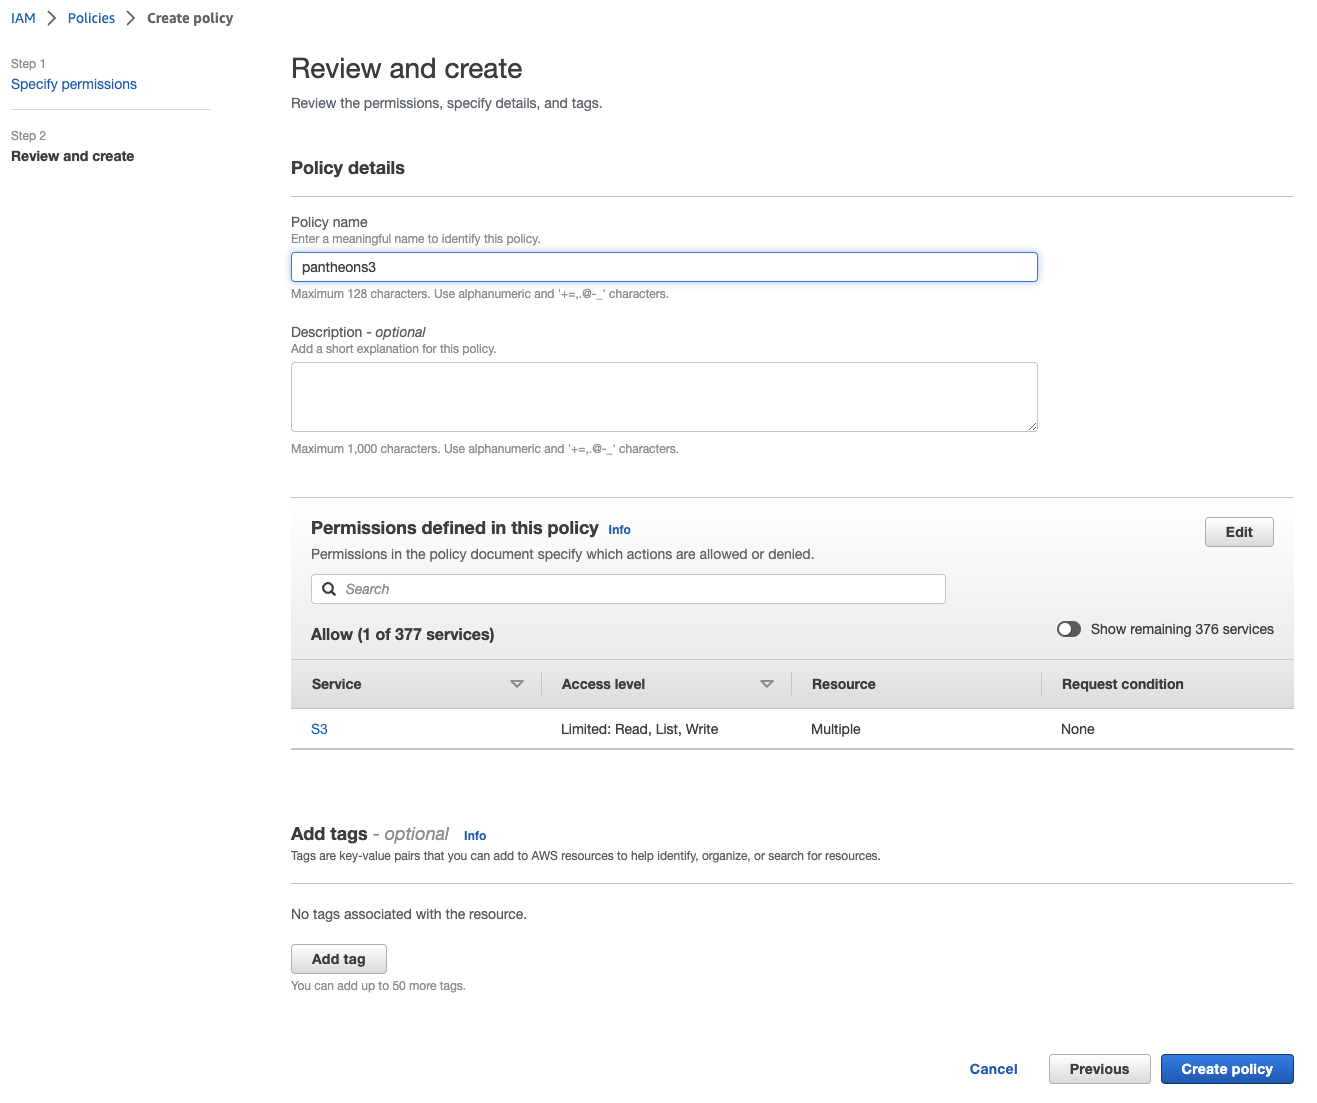
Enter your policy name in the Policy name field (for example, Pantheons3Access) and then click Create Policy.
-
Go back to Access Management in the IAM dashboard, select Users, and then click Add users to create a user based on the policy you created.
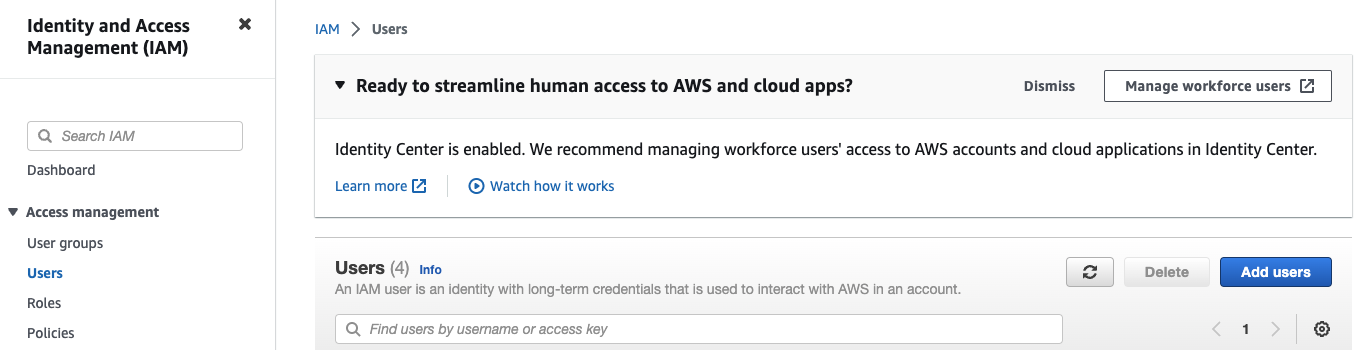
-
Enter a name for your user in the User name field (for example, S3-user), and then click Next.
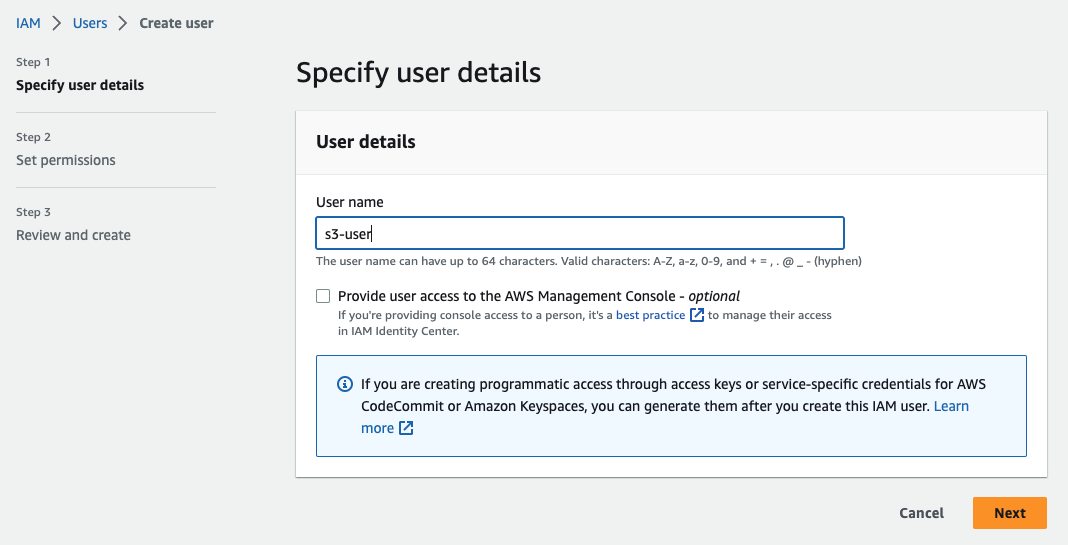
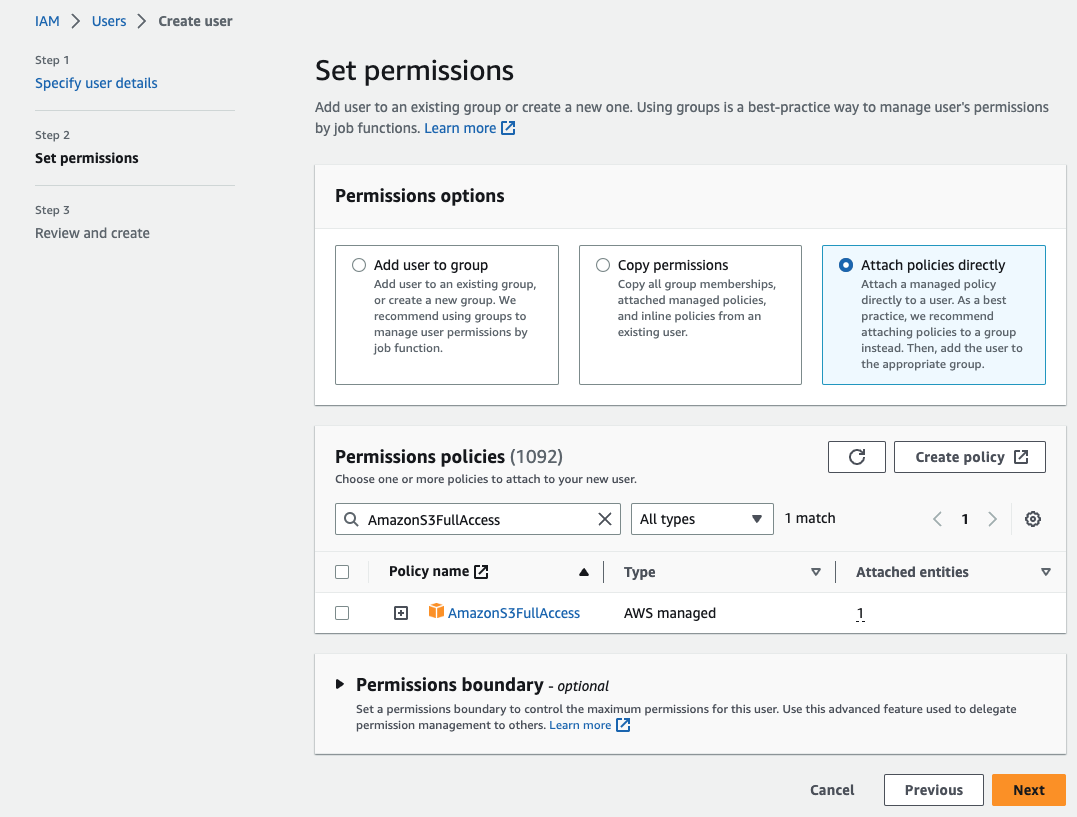
-
Select Attach policies directly in the Permissions options section, locate the policy that you created in the above steps, and then click Next.
Information:NoteSteps 1-3 create a custom AWS User policy with read and write permissions to the specific bucket assigned to your site. You can select the AmazonS3FullAccess policy to replace the custom policy that you created if you require higher permissions (example: listing buckets in the WP Offload Media plugin).
-
Review the configuration and click Create user. This creates a user profile without programmatic access.
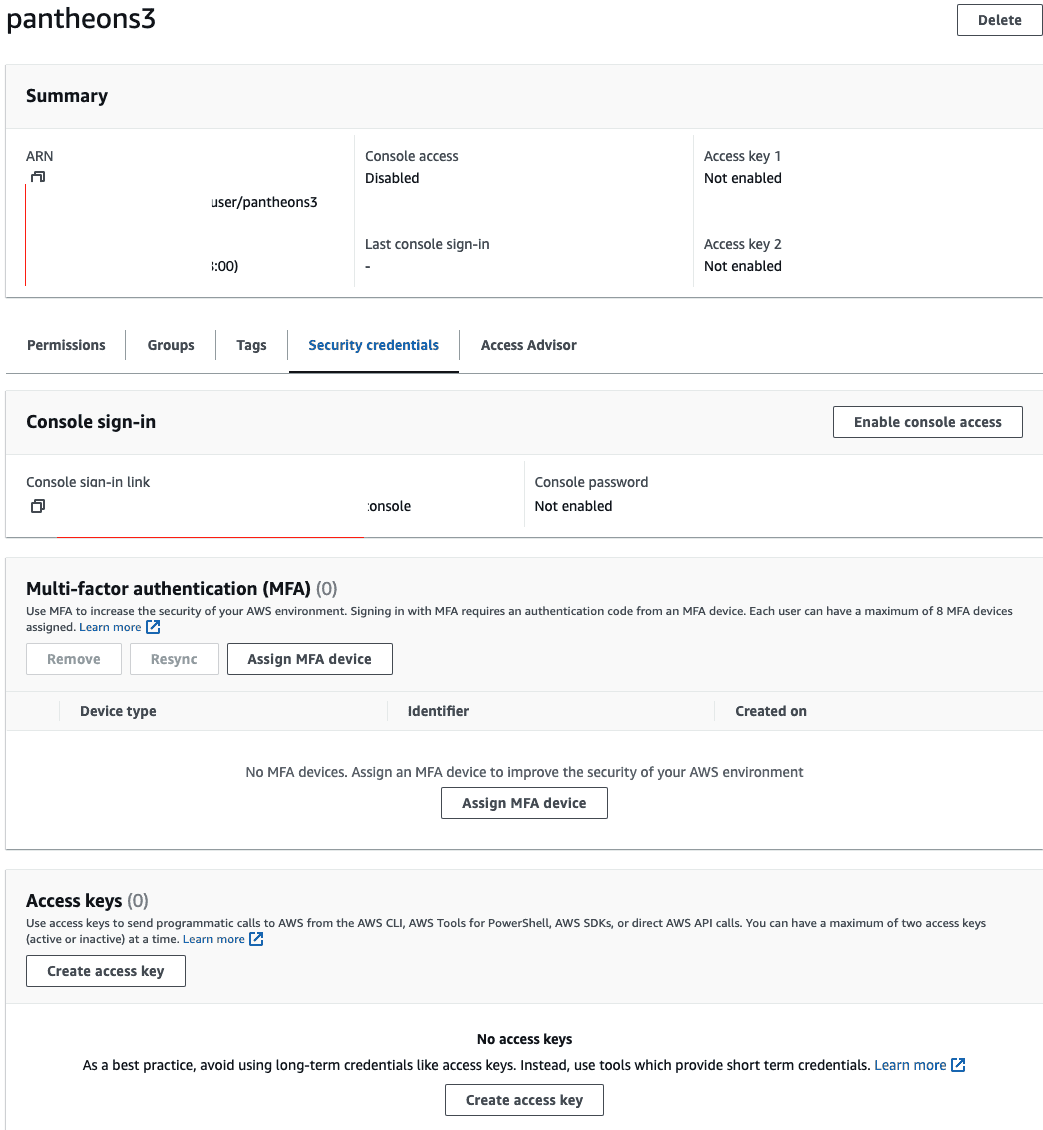
-
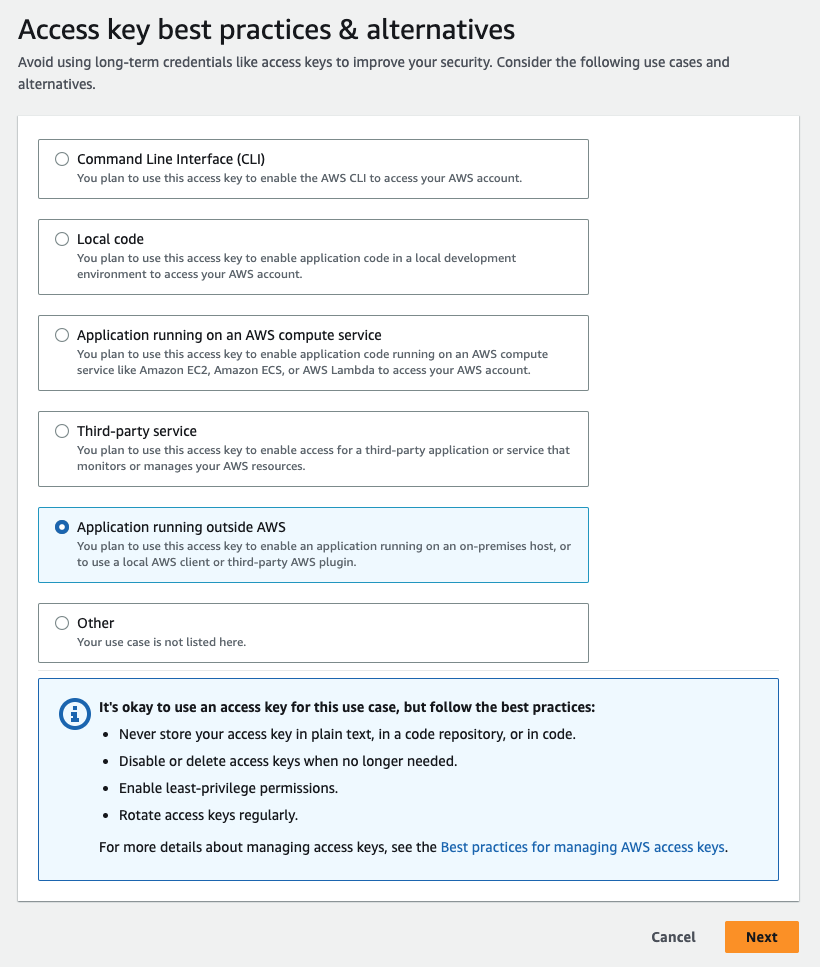
Open your user profile, select the Security credentials tab, and click the Create access key in the Access Keys section.
-
Select the Application running outside AWS option and click Next.
-
Set the optional tags if desired and then click Create Access key to finalize the access. Be sure to note the Access Key and Secret Access Key and store them securely.
Integrate S3 with WordPress
You must install a plugin such as S3 Uploads or WP Offload Media to integrate S3 with WordPress.
WP Offload Media* is configurable in the WordPress admin UI and offers a number of options and features, including multisite support but requires a paid license to use custom domains (as opposed to a direct URL to the S3 bucket).
S3 Uploads is open-source but does not include an admin UI and requires WP-CLI through Terminus and Composer for setup and migration.
Install and Deploy S3 Uploads Plugin
Follow the S3 Uploads documentation to install and setup this plugin. Note that any WP-CLI commands in the documentation must be run through Terminus for a Pantheon site (e.g. terminus wp -- <site>.<env> s3-uploads verify).
This plugin has known multisite issues. Consider WP Offload Media if you need an alternative plugin with premium support and a multisite version.
Install and Deploy WP Offload Media
Follow documentation from DeliciousBrains to install and deploy WP Offload Media. No specialized configuration is required for this plugin to run on Pantheon.